Coleman Instant Tent 4 Review (Bought & Tested!)
This page contains affiliate links, and that means that I may earn a commission if you buy something, at no extra cost to you. You can find my full disclosure policy here.
Rating and Summary
I found the Coleman Instant Tent 4 to be a wonderful hot day and summer camping tent. Not only does it set up quickly, there’s also a good amount of livable space and hot day ventilation.
However, it wouldn’t be my tent of choice in heavy rain. The rainfly is very small and doesn’t provide much rain protection, and there’s also minimal ventilation when it’s raining.
I go into much more depth in the rest of this post, so do read on to find out more!

If you enjoyed this video, please consider subscribing to my channel here:
Check out the Coleman Instant Tent:
RELATED: The 7 Best Instant Tents, The 14 Best Coleman Tents
Product Details
In this section, I’ll be showing you these few things:
- Unboxing
- In the Box
- Specifications
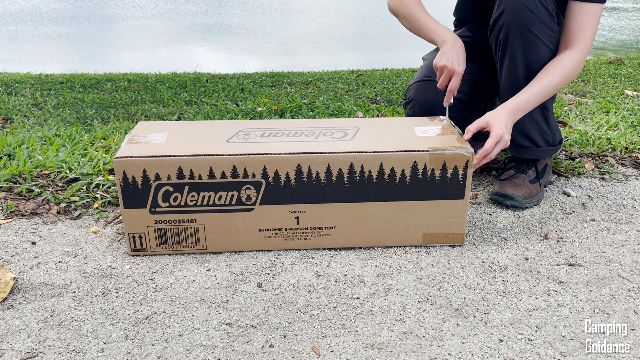
Unboxing
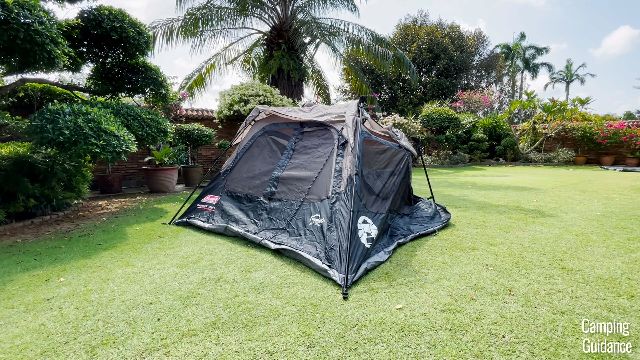
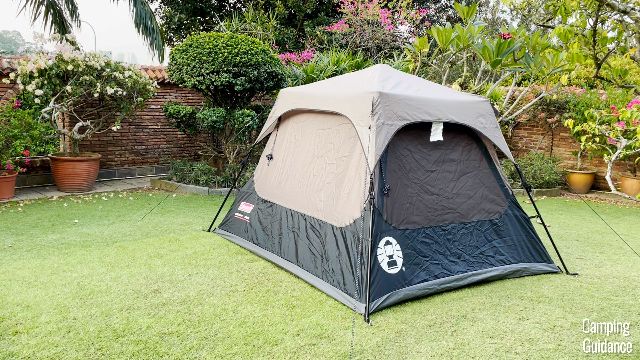
I bought this Coleman 4-Person Instant Tent from Amazon, and here’s what it looks like out of the box:
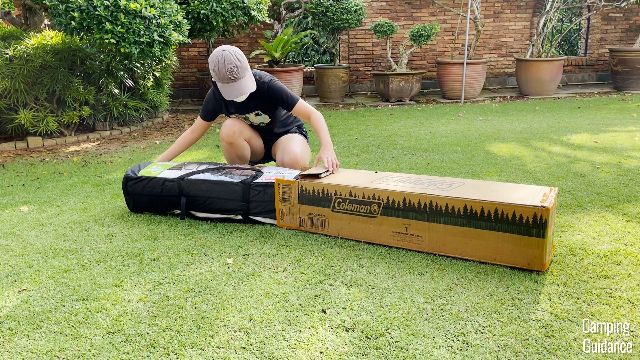
In the Box
Inside the package, I got just the Instant Tent 4 tent body with pre-attached poles and guylines, and 8 stakes in a carry case.
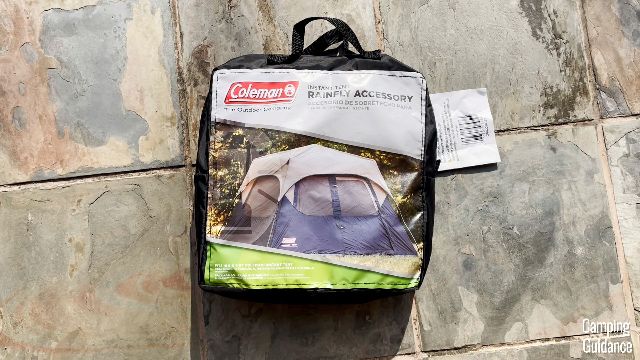
I had to buy the rainfly separately, which comes with another 4 stakes.
Specifications
Here are all my personal measurements on the Coleman Instant 4-Person Tent:
- Peak height: 61 inches
- Lowest height: 50 inches
- Length: 7 feet 11 inches
- Width: 7 feet
- Base Area: 55.4 square feet
- Floor material: Polyethylene
- Bathtub flooring: Yes, ~4 inches
- Tent body material: 150D Polyester Taffeta
- Rainfly material: 150D Polyester Taffeta
- Poles material: Alloy Steel
- Number of poles: All pre-attached
- Mesh: Regular
- Packed size: 40 by 11 by 8 inches
- Weight of tent: 18.0 lbs
- Weight of rainfly: 2.0 lbs
- Total weight: 20.0 lbs
- Number of guylines: 4
- Number of stakes: 8 (separate rainfly comes with an additional 4 stakes)
- Number of doors: 1
- Hinged door: No
- Number of windows: 4
- Number of vents: 1
- Number of pockets: 2
- Number of lantern loops: 1
- Number of gear lofts: 0
- E-port: No
- Black-out: No
- Set up timing (1 person): 4.5 minutes
- Take down timing (1 person): 5 minutes
- Number of single sleeping pads: 4
- Number of queen-sized mattresses: 1
Testing and Performance
I put my Coleman Instant 4-Person Tent through these 7 different tests:
- Ease of use: Set up, take down, pack up
- Spaciousness: Height, side walls, base area, mattress sizing
- Comfort and features: Door, windows, storage options
- Ventilation: Hot day ventilation, rainy day ventilation
- Weather protection: Light rain test, heavy rain test
- Quality: Material, mesh, seams, stitching, zippers, poles, guylines, pre-attachments
- Portability: Weight and packed size
Ease of Set Up
Set Up Instructions
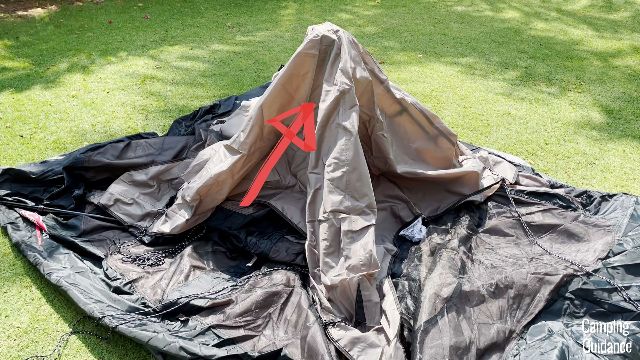
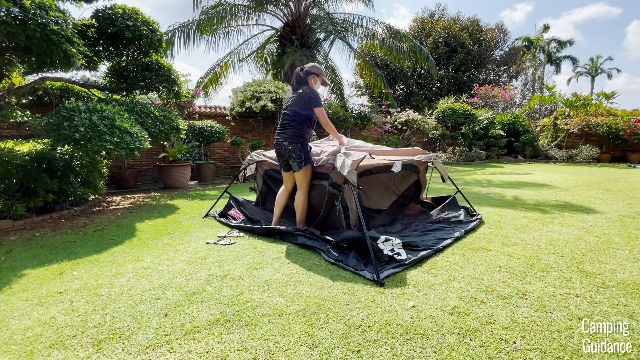
To set up this Coleman 4-Person Instant Tent, first unfold the tent until it lays flat on the ground. The tent should be mostly flat, except for this central hub here.
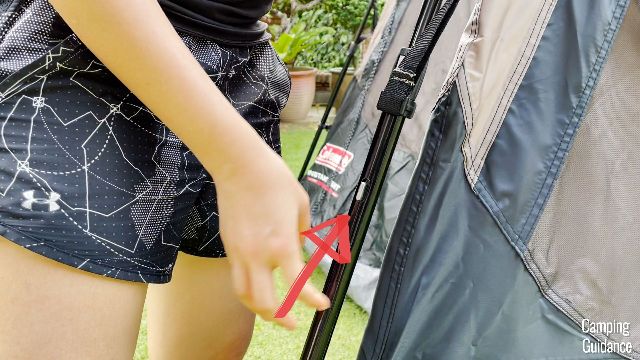
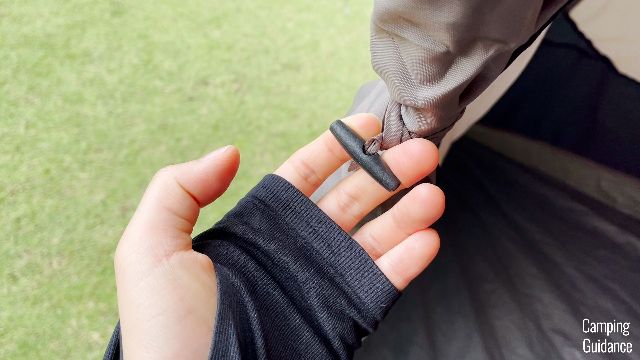
Then, pull the 4 elbow joints outwards. These joints have a black neoprene covering, and look like this:

After you’re done pulling the 4 elbow joints outwards, they should be propped up like this, so your tent should be semi-set up:
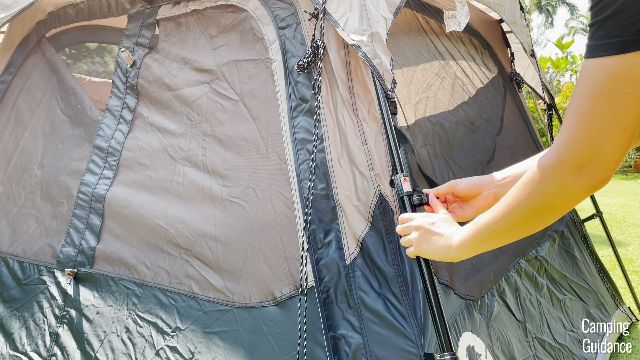
Next, extend all 4 poles upwards to make up the walls of your Coleman Instant Tent.
Pull each pole upwards until you hear this silver lock button pop out and click into place, and that’s when you know the pole is fully extended.
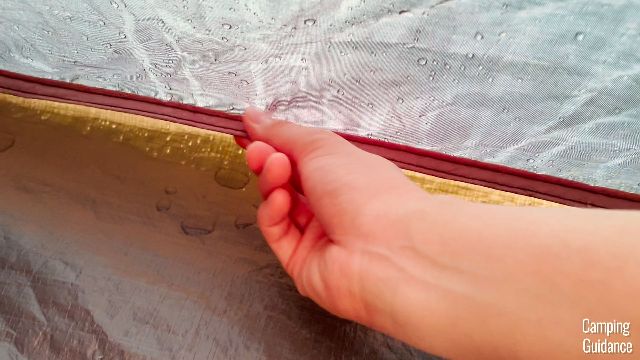
Then, drape the rainfly over the tent, and clip the 4 extended tips of the rainfly just below the instant tent sticker.
To tighten and secure the rainfly, just pull on the strap in front.

Finally, stake down the tent body with 4 stakes, and guy out the tent with the 4 pre-attached guylines on the rainfly.
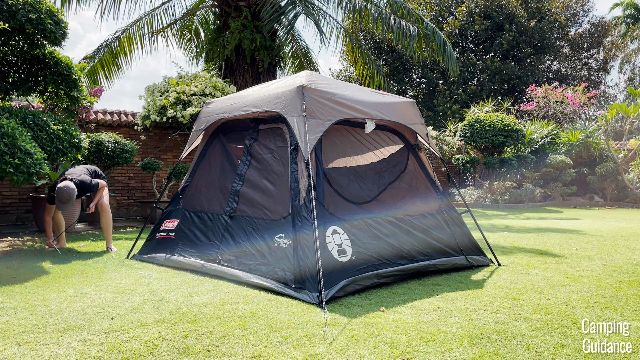
If you didn’t buy the separate rainfly, you can still guy out the tent. The Coleman Instant Tent 4 comes with pre-attached guylines on the tent body itself, which look like this:

Set Up Timings
To set up the Coleman 4-Person Instant Tent, including staking and guying out the entire tent, but without the rainfly, took me about 3 minutes to do so on my own.
If you want to put the rainfly on, that took me another 1.5 minutes, so 4.5 minutes altogether.
Tip: If you want an even quicker tent to set up, the Coleman Pop Up Tent is the only tent that sets up faster. Check out the difference between this instant tent and the pop up tent in this blog post here: Coleman Instant Tent V.S. Coleman Pop Up Tent (I Tested Both!)
Ease of Pack Up
Pack Up Instructions
To take down this Coleman Instant Tent 4, first remove all the guylines, stakes, as well as the rainfly.
Next, press on the silver lock button on the 4 telescoping wall poles, and push down on all the poles to retract them until they cannot be retracted further.

After that, push the 4 elbow joints with the black neoprene covering inwards, like so:

With all the joints pressed inwards, now fold all the poles back towards the center hub, and your tent should look something like this.
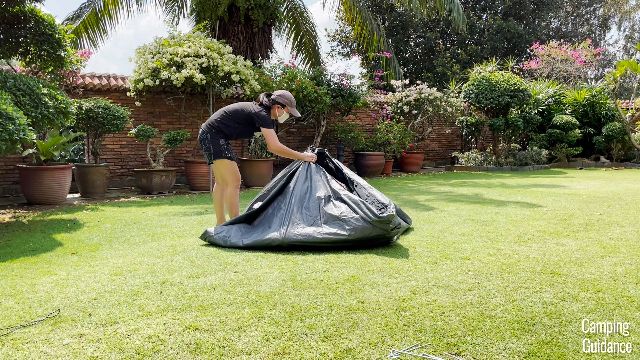
Then, lift the tent up by the center hub, place the center hub horizontally on the ground, and roll the rest of the tent fabric together.
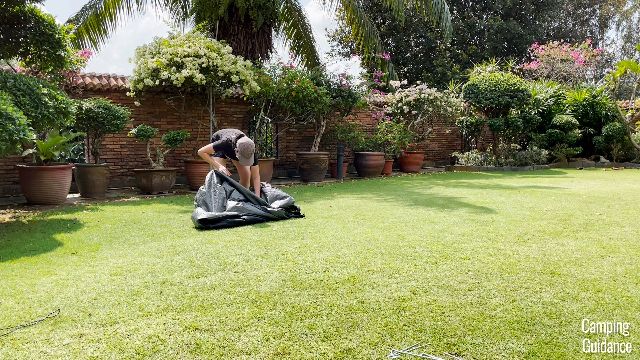
Finally, put the rolled up tent back into the carry bag, and zip it up.

Pack Up Timings
Packing up this Coleman 4-Person Instant Tent on my own took me just 3.5 minutes, if I don’t remove the rainfly.
If you want to remove the rainfly, that’ll take another 1.5 minutes, so 5 minutes altogether.
I didn’t have to remove this strip at the bottom to expand the bag, but if you do so, the pack up will be 1 minute quicker or so.

For more details on the set up, take down and pack up, you can check out my YouTube video right here:
Height
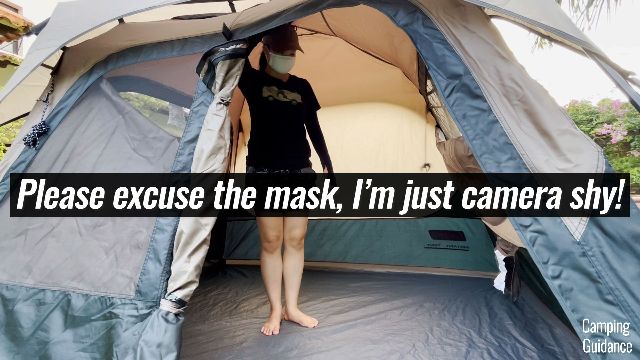
The peak height inside this Coleman 4-Person Instant Tent is about 61 inches, which is slightly shorter than my height, so my head presses against the roof when I try to stand upright. I’m about 5’3″/160cm tall.
The lowest height in the tent, at the four corners, is about 50 inches, and here’s what it looks like when I try to stand in the corners.

Livable Space
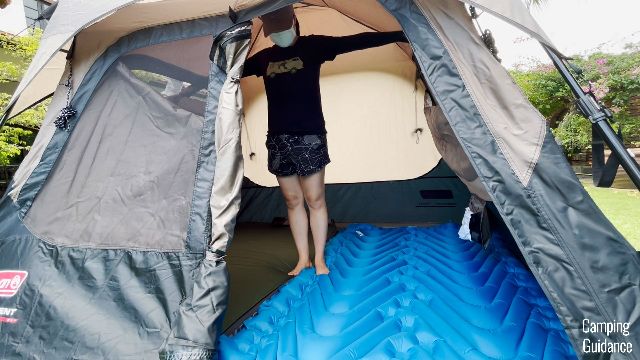
The side walls of this Coleman Instant Tent 4 are somewhat almost vertical, which gives it a nice cabin shape:

This gave me quite a bit of livable space inside the tent, so I could freely stretch my arms out.
Base Area
The length of this Coleman 4-Person Instant Tent is about 7 feet and 11 inches, while the width measures about 7 feet, so only 1 inch smaller than the marketed dimensions in length.
Single Pad Sizing
This Coleman 4-Person Instant Tent fits 4 regular sleeping pads, and here’s what 2 double sleeping pads look like inside the tent. Both double pads fit just nicely, with no leftover space at all, and you do have to sleep shoulder to shoulder.

I found it quite annoying to sleep at the corners though. I couldn’t put anything in this pocket (pictured below) while sleeping, because otherwise it keeps brushing against my body.

Also, my head would touch the wall of the tent when I sit up, right here:

Queen Bed Sizing
Instead of 4 sleeping pads, you can fit just 1 queen-sized camping mattress, and here’s what a queen looks like inside the tent. There’s plenty of room for 2 people to sleep inside this tent on the queen bed, plus lots of leftover space for camping gear as well.

Also, even though my queen mattress is quite thick at about 9 inches, I could still almost stand up while on the mattress, and I had lots of livable space leftover as well.

Windows
There are a total of 4 windows in this Coleman 4-Person Instant Tent, 1 big window on the left wall, 2 small windows together on the front wall, another 1 big window on the right wall, and no windows at all on the back wall.
This picture below shows the left wall as well as the front wall of the Coleman Instant Tent 4:

Each big window on the side walls measures about 52 by 28 inches, while each small window on the front wall measures about 24 by 22 inches.
All these windows have 2 metal zippers each.

There’s no latch for each window, but you can tuck the fabric neatly against the bug net of the window. This also makes it easy to zip up each window without any fumbling.

When the windows are open, there’s a bug net to prevent larger bugs like mosquitoes from getting in.
Door
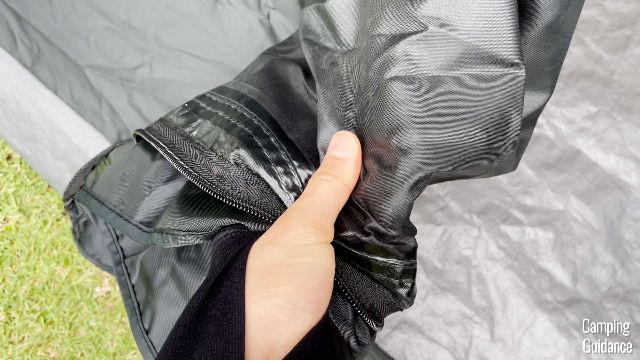
There’s only 1 door, which is on the front length of this Coleman 4-Person Instant Tent, and similar to the windows, it also comes with 2 metal zippers. The zippers are protected by some extra fabric to prevent leaking into the tent through the zippers in case of rain:

I had no issues zipping this door open and close, whether from the outside, or the inside. To hold the door open, there are 2 latches by the side here.
This single door measures about 37 inches in width, and 45 inches in length, so not very big in size. It’s about 48 inches from the ground to the top of the door, so I had to duck quite a bit when getting in and out of the tent through this door.

Storage
Pockets
For storage, there are 2 pockets inside this Coleman 4-Person Instant Tent, each measuring about 9 by 7 inches.

Lantern Loop
There’s also 1 loop at the top of the center of the tent, where you can hang a lantern for lighting at night.

Others
Besides this, there are no other loops for gear lofts or other storage. And, there are no e-ports as well.
Light Rain Test
I put this Coleman 4-Person Instant Tent through really light rain, and it stayed dry when the rain stopped 15 minutes later.
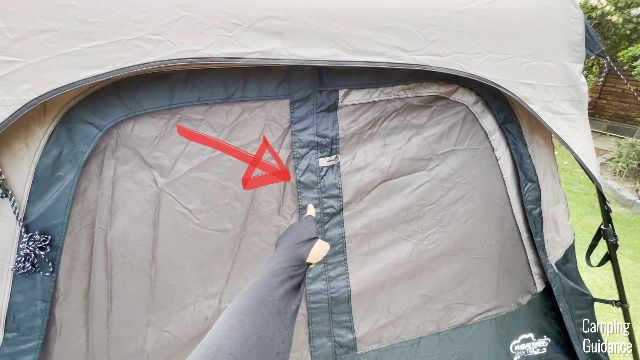
However, even in light rain, I found that water will get into your tent through the windows if you leave them open.
For example, here are the windows at the front of the tent (pictured below), and here’s where the rain is dripping (red arrow). Anything below will get wet even in light rain.
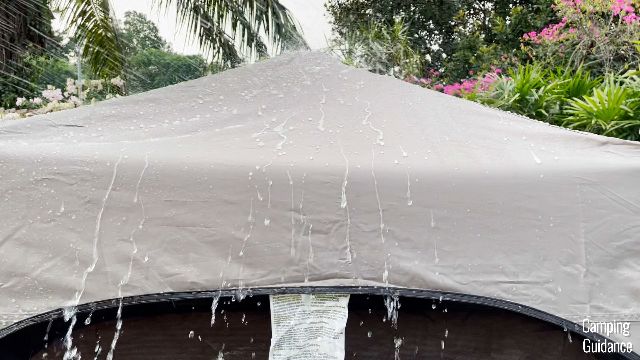
Heavy Rain Test
For my heavy rain test, I used this water hose against the Coleman Instant Tent 4.
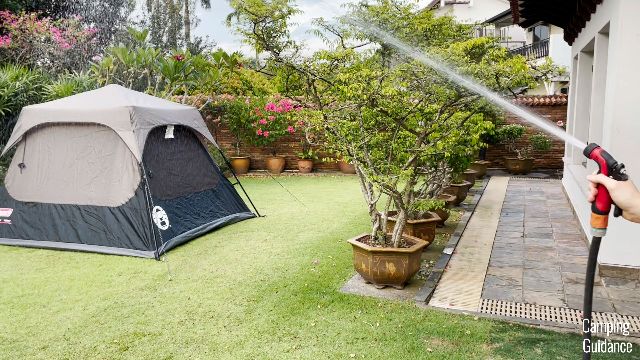
I concentrated the rainfall on the back wall, as well as one of the side walls:

I found that the windows got completely soaked within the first couple of minutes, and this is because the rainfly is so tiny.
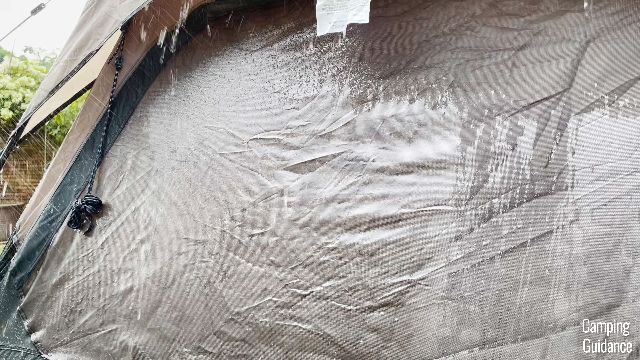
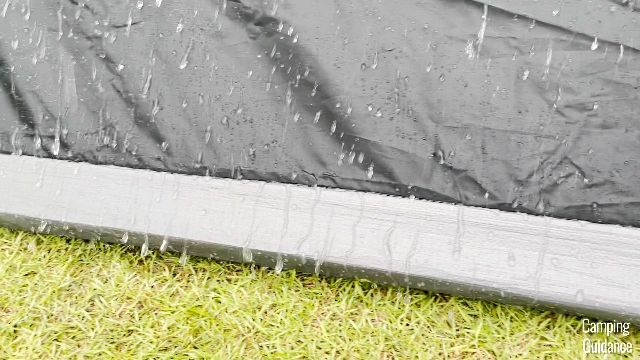
After 15 minutes of this heavy rain, I found quite a bit of leaking from the seam connecting the bathtub flooring to the black tent fabric, which was not seam taped and instead inverted.
Also, because the pocket was so low-hanging, it also leaked quite a bit:

I also found that the black fabric (bottom half of the tent) was damp from the inside of the tent, after just 15 minutes of heavy rain. The rainfly is so small that it couldn’t protect the black fabric at all, which got into contact with lots of water.
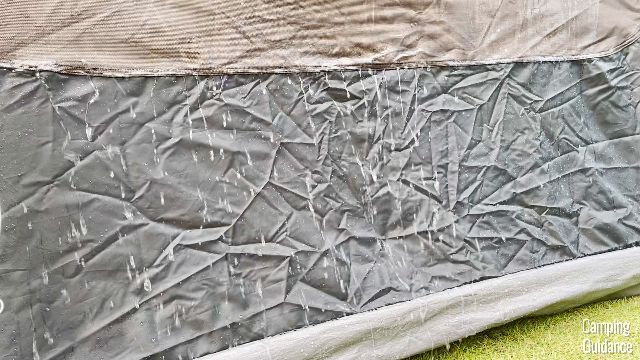
Even the rainfly was slightly damp too. The brown fabric nearer the top (above the black fabric) was still dry though.
For a little more detail on this rain test, you can check out my YouTube video here:
Hot Day Ventilation
On a hot day without the rainfly, this Coleman 4-Person Instant Tent has quite a bit of ventilation. The windows are quite big (pictured earlier in the ‘Windows’ section), although I’m not sure why there’s no mesh at all on this back wall.

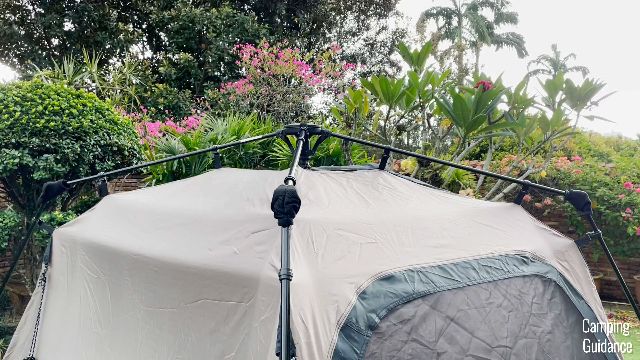
There’s also a small vent at the top of the tent. There’s no ceiling mesh though, as you can see from this picture:

Rainy Day Ventilation
On a rainy day though, you’d need to use the rainfly, which will cover the vent at the top.

And you’d need to close all the windows as well, especially in heavy rain, or tons of water will get into your tent. So, on a rainy day, ventilation is limited.
Quality
Tent Body Quality
The main tent body of this Coleman 4-Person Instant Tent is made of 150D polyester taffeta, which is what Coleman calls ‘double-thick’ fabric. I found it to be pretty good quality too.
Flooring Quality
The flooring of this Instant Tent 4, as are all Coleman tents, is made of polyethylene. It has a bathtub feature, which extends up to about 4 inches, and is useful when there’s light flooding.
Seam Taping
I checked all the seams in the Coleman Instant Tent 4, and found that most of them were factory taped, like the middle seam between the black and brown fabric, the vertical seams, and the window and door seams.
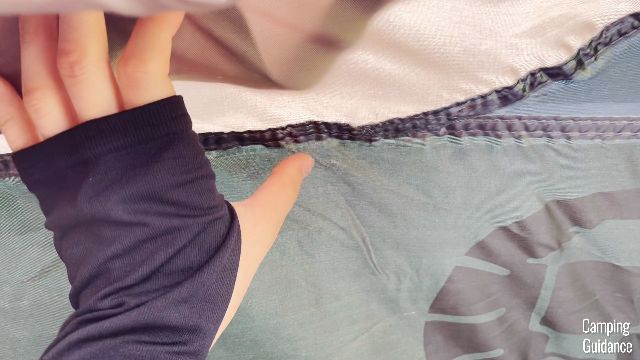
The only seam that was not taped was the black fabric to bathtub flooring seam, which is inverted instead, and this is why it leaked a lot during my rain test. It’s also usually the most vulnerable seam in any rain test, so I’m not sure why Coleman chose to make it inverted instead.

Stitching
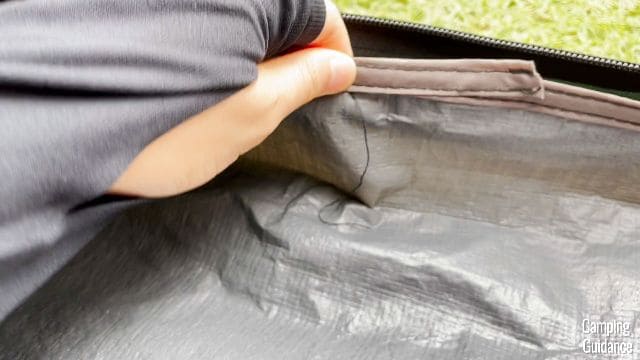
The double stitching around the entire tent was consistent and pretty good quality, with only the occasional loose thread.
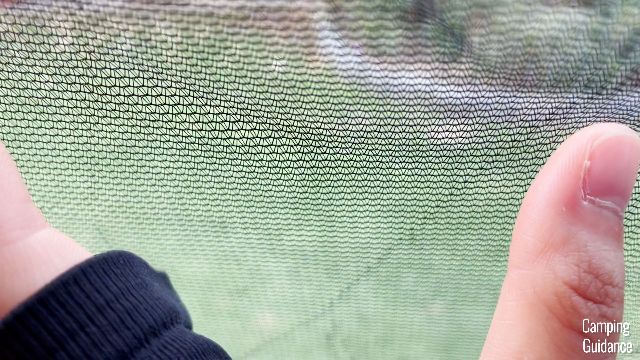
Mesh Quality
The holes of the mesh are too big to be no-see-um mesh, so it’s just regular mesh, and the quality of the mesh was consistent throughout the entire tent.
Zipper Quality
The zippers are decent quality, and all of them are catch-free, both the windows and doors.
But here’s a tip though. Try to avoid getting the rain cover on the outside stuck in the track of the zipper. So, when zipping the door up from the inside, push the door out at the same time. When zipping the door up from the outside, lift the rain cover when zipping.

Poles Quality
All the poles of this Coleman 4-Person Instant Tent are made of alloy steel, and look like this:
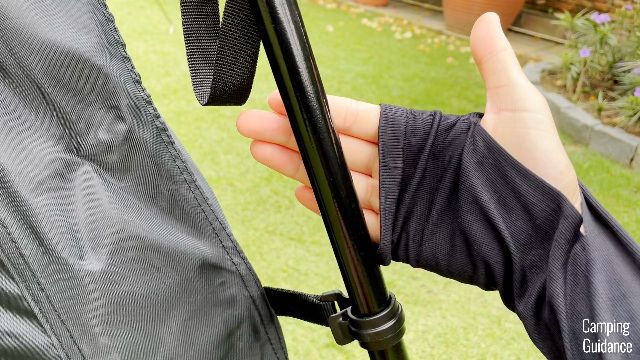
All the poles of the tent are pre-attached, making for an easy set up and a somewhat sturdy tent if you guy it out. All the poles are connected together and can’t be removed, even if you want to remove them.
Guylines
The guylines are decent quality too, but don’t seem to be reflective at night.
Portability
Packed Size
This Coleman 4-Person Instant Tent has a packed size of 40 by 11 by 8 inches. For a size comparison, here’s what it looks like beside a Coleman 2-Person Sundome Tent, the separate rainfly, as well as a 32-ounce Nalgene bottle.
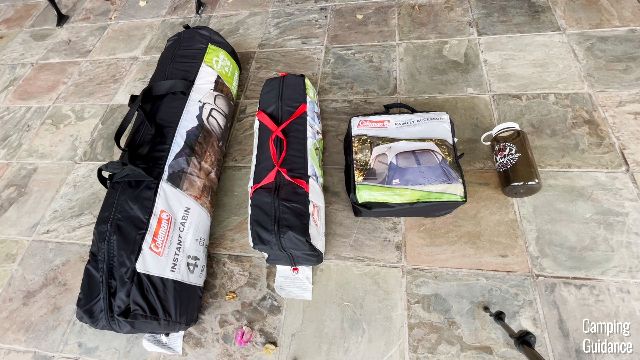
Like all other instant tents, this Coleman Instant Tent 4 is pretty long, so there are 2 additional buckles on the carry bag.

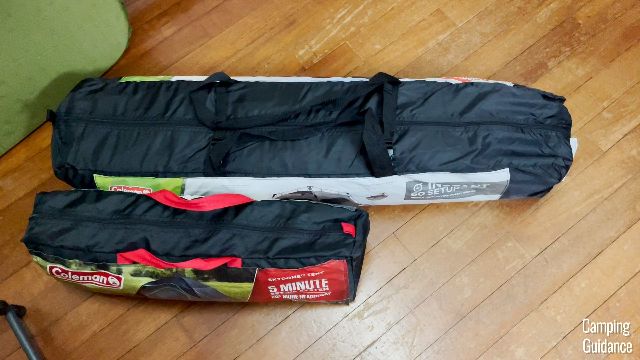
This is what the Coleman Instant Tent 4 looks like beside a Coleman Skydome Tent 4, which doesn’t come with the same pre-attached pole mechanism. The Instant Tent is so much longer!
Weight
The Coleman Instant Tent 4 weighs 18.0 lbs, including the 8 stakes.
As for the rainfly, it weighs another 2.0 lbs with the 4 included stakes.

Pros and Cons
Pros
For pros, I found this Coleman 4-Person Instant Tent super easy to set up, taking me just 4.5 minutes, and this includes staking and guying out the entire tent.
The take down was very easy as well, taking me just 5 minutes, and I was even able to get the entire tent back into the carry bag without even having to expand the bag.
I also liked that the almost vertical side walls and cabin shape of this tent gave me lots of livable space to not only stand up, stretch my arms out, but lounge around as well.

There’s also quite a bit of ventilation on hot days, with 4 windows in total, and 1 small vent.
Also, like most Coleman products, the quality is decently good, from the stitching, mesh, zippers, and poles, and this particular Coleman tent is even complete with double-thick fabric of 150D polyester taffeta.
Cons
As for cons, I think the biggest one is that the rainfly doesn’t offer much rain protection. In fact, it’s pretty small, and covers literally only the very top of the tent.
Also, the bathtub flooring seam is not taped. On top of that, there’s minimal ventilation when it’s raining, because you can’t open any of the windows.
Another big con is that you have to buy the rainfly separately, and that’s an additional cost of about $30. (That’s about how much I paid for mine.) I just found it super strange that it doesn’t come with the rainfly.
A smaller con is that the door isn’t very big at all.

Recommendations
And finally, here are my recommendations.
Recommendation #1
If you’re sold on this tent, check out the price difference between this Coleman Instant Tent 4 and the 6-person version. If you don’t have to pay much more, I’d highly recommend the 6-person instant tent instead.
This is because the 6-Person version has a 6-foot peak height, and you can likely stand up in it if you’re not taller than 6 feet. And also, the 6-Person version has windows on all 4 walls for more ventilation, while the 4-Person version has windows on only 3 walls.

Recommendation #2
Next, if you expect heavy rains, I don’t think this tent will be that great a pick. It’s more of a summer tent with lots of ventilation.
But if you still want it, I’d highly recommend that you use a sealant, especially for the bathtub flooring seam, and lots of waterproofing spray for not only the black tent fabric, but for the rainfly as well.

On the other hand, most Coleman tents have better rain protection than this Coleman Instant Tent. Check out how this instant tent stacks up:
- Coleman Sundome Tent V.S. Instant Tent (I Tested Both!)
- Coleman Instant Tent V.S. Skydome Tent (I’ve Got Them Both!)
Recommendation #3
Also, I think this tent is great for 2 people, just a queen sized bed with lots of leftover room. 4 people will definitely not be comfortable.
Bonus: Must Read!
Finally, how does this Coleman 4-Person Instant Tent compare to other Coleman tents, or instant tents though? Well, don’t worry, because I’ve already done the comparison for you, in these blog posts:
- I Tested the 14 Best Coleman Tents!
- The 7 Best Instant Tents (I Bought and Tested Them All!)
- Fast Pitch Tent V.S. Instant Tent (With REAL Pictures!)


Or, check out the Coleman Instant Tent: