Kelty Wireless 4 Review (Bought & Tested!)
The Wireless is Kelty’s best-selling camping tent. So, I tested the Kelty Wireless 4 to see what the deal was all about.
This page contains affiliate links, and that means that I may earn a commission if you buy something, at no extra cost to you. You can find my full disclosure policy here.
Quick Summary
If you’re on the lookout for tents that are less than $200, this best-selling Kelty Wireless 4 is one of the better picks out there. It is a spacious tent that’s feature-rich, and also has great waterproofing.

RELATED: Tents Under $200
I’ll link to my YouTube review here when it’s done (TBA):
If you enjoyed this video, please consider subscribing to my YouTube channel here:
Check out the Kelty Wireless 4:
1. In the Box
Out of the box, this is what I got:
- Carry bags
- Instructions
- Rainfly (with 4 pre-attached guylines)
- Tent body
- Poles x 3
- Stakes x 10

2. Set Up & Pack Away
The entire setup is pretty straight-forward, here’s how:
- Secure the 2 longer gray poles into the Quick Corner sleeves.
- Secure the 13 pole clips.
- Secure the short ridge pole at the top with grommets and 2 more pole clips.
- Secure color-coded rainfly with pole wraps and 6 easy-clip buckles.
- Stake entire tent down (4 corners, 2 vestibules, 4 guylines).
For more details, I have a separate video with loads of instructions and tips to help you set up your tent more easily (TBA):
Altogether, the entire setup takes only about 9.5 minutes. The pack away takes a little less time – 8.5 minutes.
3. Peak Height
The peak height inside the Kelty Wireless 4 is 58 inches, so I couldn’t stand up even under the peak height, and my head touches the top:
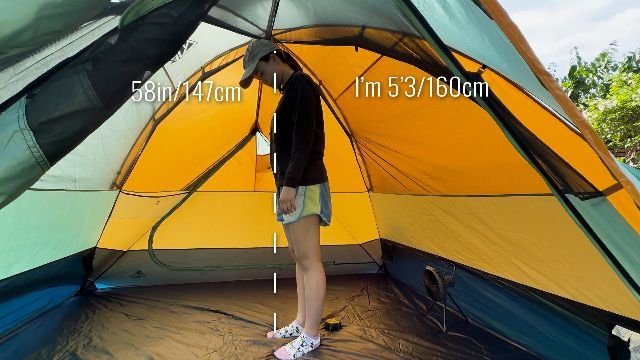

What I liked though, was the 3-pole structure, which helps extend the peak height throughout the width of the tent, giving you an extreme right width of 50.5 inches and extreme left width of 49 inches.

4. Base Area
Here are all the base area dimensions you might need:
- Length: 95.5 inches
- Width: 86 inches
- Base area: 57.0 square feet
5. Pad Sizing
Now, here’s what 4 single pads look like inside the Wireless 4. They fit quite nicely, with not much leftover space (3-5in on all sides of the pads):

If you don’t need to cram 4 people into this tent, I think having 2 people on 1 queen bed is a much more comfortable fit (with between 8-12in of space on all sides of the bed):

6. Vestibules
The Kelty Wireless 4 comes with 2 vestibules, and here are all the dimensions:
- Width: 40.5 inches
- Length: 95.5 inches
- Area of 1 vestibule: 13.4 sq. ft.
- Area of 2 vestibules: 26.8 sq. ft.


7. Doors
Under the vestibule, you’ll find the 2 doors of the tent.


8. Storage
Here are the storage options in the Kelty Wireless 4:
- Pockets: 6 (4 x small: 7 x 6 inches, 2 x big: 17 x 8 inches)
- Loops: 5

9. Seam Taping
Here are all the seams that are taped:
- All rainfly seams
- All flooring seams – (the Wireless doesn’t have a tub floor!)

10. Vents
The Kelty Wireless 4 has 2 vents – 1 on each side of the tent. I really liked that they face downwards instead of sideways, for better rain protection.

11. Rainfly
Moving onto rainfly protection, it’s a full-coverage rainfly, extending almost all the way to the ground.
Apart from the vestibules at the lengths, you can’t pull the widths away from the tent, because there isn’t an extra guy-out point there; the rainfly is a bit too far off the ground.

12. Rain Test
I put the Kelty Wireless 4 through a 1-hour heavy rain test. I found that there were no leaks (the rainfly flap was slightly damp though, but this was not a big issue).
13. Mesh
This is what the Kelty Wireless 4 looks like without its rainfly:

14. Materials
Here are all the materials of the Kelty Wireless 4:
- Flooring: 68D polyester (1,200mm)
- Rainfly: 68D polyester (1,200mm)
- Tent body/canopy: 68D polyester (1,200mm)
- Poles: Fiberglass (0.625in thick)
- Mesh: 40D no-see-um
- Guylines: Shockcord (with tensioner)
- Stakes: Kelty NoBendium stakes
15. Portability
Here are the packed dimensions and weight of the Kelty Wireless 4:
- Packed size: 28.5 x 10.5 x 8in
- Total weight: 13lbs/5.9kg
16. Pros, Cons, Recommendations
Now, what are the pros and cons, and would I recommend the Kelty Wireless 4?
Pro #1 – Reasonable price
I really liked the affordable price for a pretty good quality tent. At full price this family tent comes in at less than $200.
Pro #2 – More than average livable space
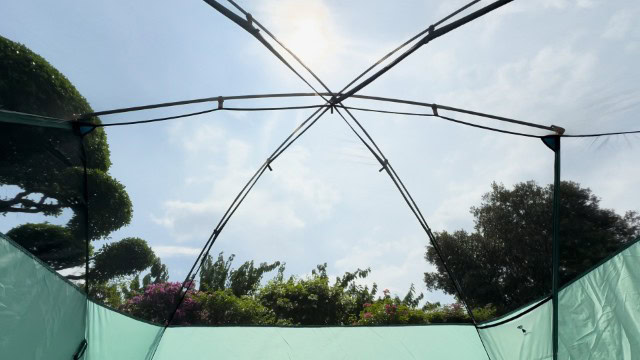
This tent has:
- A 3-pole structure
- 2 vertical walls
- An extended peak height
This is the only Kelty tent with all these features.
Pro #3 – Decent base area
There’s also a decent amount of base area and vestibule space too, complete with not 1 but 2 vestibules.
Pro #4 – Feature-rich
It is also one of the few 4-person tents with 2 doors, and also comes with more than average storage options.
| Kelty Tent | Doors | Pockets | Loops |
|---|---|---|---|
| Wireless 4 | 2 | 6 | 5 |
| Rumpus 4 | 1 | 4 | 5 |
| Discovery 4 | 1 | 4 | 5 |
| Tallboy 4 | 1 | 4 | 5 |
A quick table comparing all the features of various Kelty tents.
Pro #5 – Great in rain
It’s great in the rain, and survived the 1-hour heavy rain test no problem at all.
Con #1 – Needs guy-out points at widths
However, I was a little disappointed that this tent can’t be guyed out at the widths, like most other Kelty tents can.
Con #2 – More mesh would be nice
I would also have liked there to be more mesh, so the ventilation would have been better.
Con #3 – Poles are fiberglass
Ideally, the poles would also be made of aluminum instead of fiberglass, but I guess this is a budget tent so hence the fiberglass.
Recommendation #1 – Overall a great budget tent
But overall, there are relatively few cons to this tent, and I can see why the Kelty Wireless is one of Kelty’s best-selling tents. Ultimately, it is a great budget tent, and I enjoyed my time in it.
Recommendation #2 – Get the 6P instead
You can’t typically stand in 4-person tents, so I’d recommend the 6-person version instead.
17. Bonus – MUST Read!
If you’re still on the lookout for tents that are less than $200, I tested the Kelty Wireless 4 against other similar tents in my Best Tents Under $200 round-up.
Or, check out the Kelty Wireless 4: