Budget backpacking tents · Review
Kelty Late Start 2 Tent Review (Bought & Tested!)
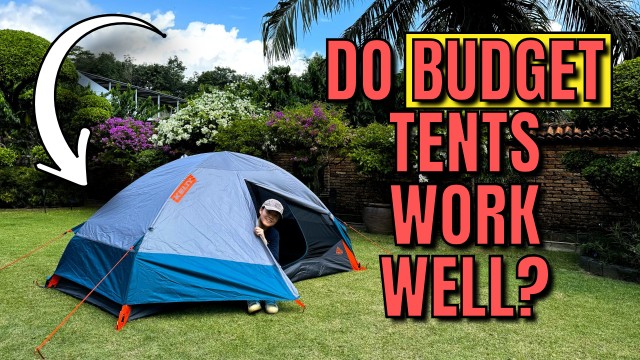
I bought this tent with my own money and put it through 8 hands-on tests.
- Setup 5.25 min
- Peak 41.5in
- Inner area 29.3 sq ft
- Vestibule 7.7 sq ft
This page contains affiliate links, and that means that I may earn a commission if you buy something, at no extra cost to you. You can find my full disclosure policy here.
Test scorecard · scored against budget backpacking tents
If you’re looking for a 2-person tent that’s not only inexpensive, but performs well in the summer, the Kelty Late Start 2 is a decent option.
- Inexpensive
- Easy setup
- Lots of mesh
- No vents
- Not very roomy
- Only 1 door
If you prefer watching to reading, check out my video here instead.
See the 8 tests
In the Box
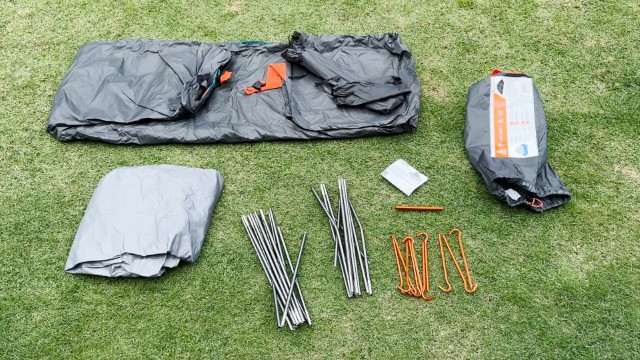
Out of the box, this is what I got:
- Tent body
- Rainfly, with 4 pre-attached guylines
- Poles × 2
- Stakes × 10
- Pole repair splint
- Carry bag
- Instructions
Set Up & Pack Away
- Set-up time (1 person) 5.25 minfaster than most other 2-person tents
- Pack away 6 min
The entire set-up is pretty straightforward:
- Lay the tent body on the ground.
- Stake down the 4 corners.
- Secure the 2 pre-bent poles into the Quick Corner sleeves.
- Secure the 9 pole clips.
- Secure the color-coded rainfly buckles.
- Stake the vestibule and the back vent.
- Guy out the 4 guylines.
Want the full step-by-step? Watch my Late Start 2 set-up walkthrough on YouTube.
Spaciousness
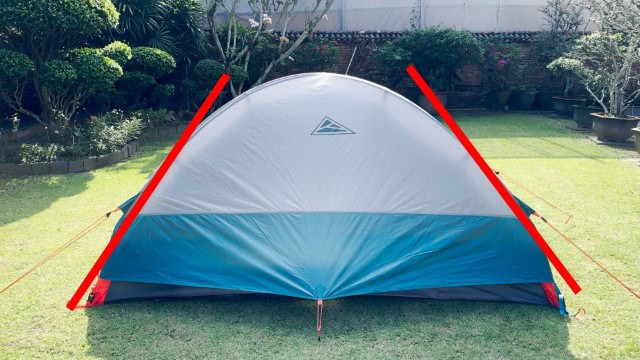
- Peak height 41.5inonly at the center — the walls slope down from there

- Length 87.5in
- Head width 52.5in
- Foot width 44in
- Base area 29.3 sq ft
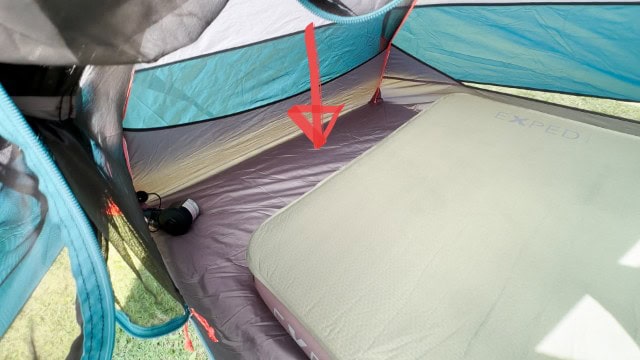
Pro Tip 25-inch pads or wider will not fit — the foot of the tent is too narrow (only 44in).
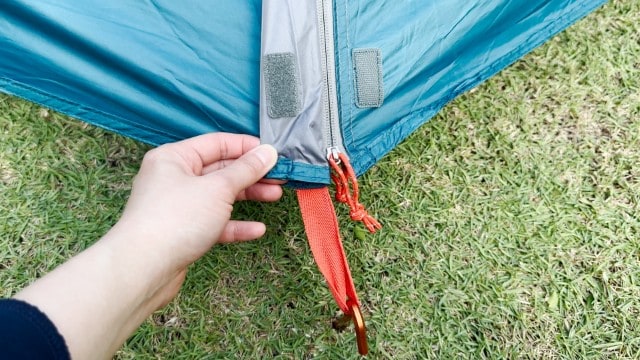
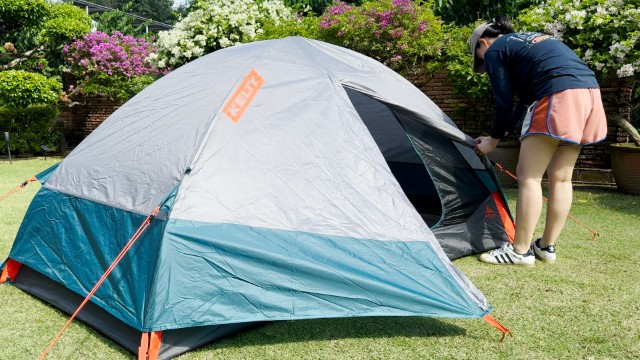
- Vestibules 1 (25.5in wide, 87.5in long)
- Area 7.7 sq ft
- Zippers 2unbranded, but pretty smooth

Comfort & Features
- Doors 1most 2-person tents come with 2
- Door size 41 × 32in
- Zippers 2unbranded, but very snag-free
- Held open by A toggle by the side

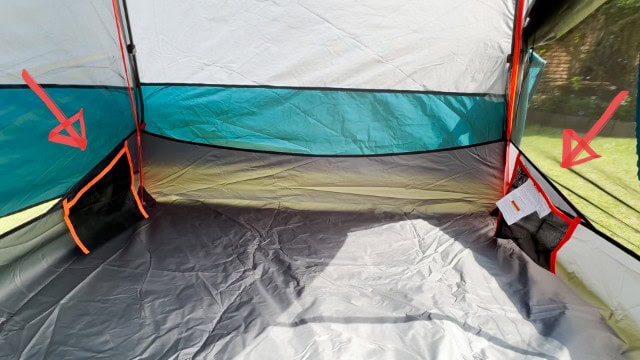
- Pockets 32 rectangles at the bottom (9 × 7in), 1 trapezoid at the top (13 × 7in)
- Loops 5 loops
Ventilation
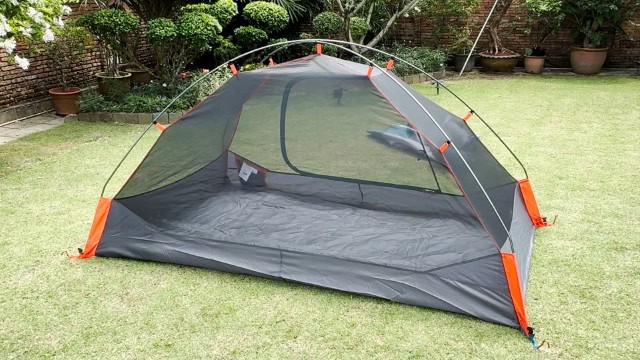
- Mesh ~80% of the tent body
- Fabric ~20%strictly a 3-season tent, for summer
- Vents Noneno extra vents in the rainfly or the tent body, which really limits ventilation on rainy days
Rain Protection
- 1 hour light rain No leaks
- 1 hour moderate rain No leaks
- 1 hour heavy rain No leaksthough the rainfly was getting slightly damp
- Seam taping All rainfly and flooring seamsplus the gaps in the tent body the rainfly doesn’t cover
- Tub floor 10.5in at the widths, 7in at the lengths


The rainfly is full coverage and extends almost all the way to the ground. What I didn’t like is that it can’t be pulled away at the widths of the tent, only at the lengths where the vestibule is.
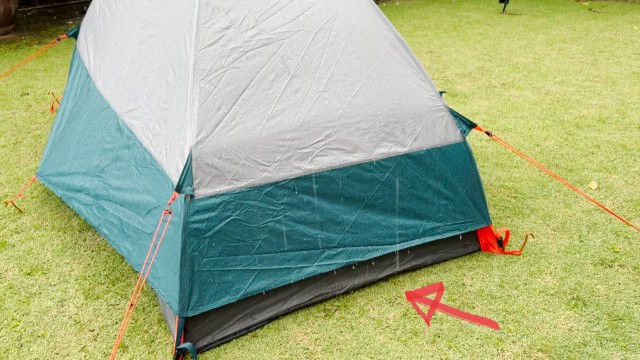
- Guylines 4with guyline pockets to stuff them into for pack away

Want to see the water hitting it? Watch my full Late Start 2 rain test on YouTube.
Quality
- Flooring 68D polyester
- Rainfly 68D polyester
- Poles Aluminum
- Mesh Micro mesh
- Guylines Shockcordwith tensioner
- Stakes Shepherd-hook
Portability
- Packed size 18 × 8.5 × 7in
- Pole length 14in
- Total weight 4.87 lbs (77.9oz)
- Tent body 26.9oz
- Rainfly 23.9oz
- Poles 19.9oz
- Stakes (10) 5.8oz
- Carry bag 1.4oz
Pros, Cons, Recommendation
Now, what are the pros and cons, and would I recommend the Kelty Late Start 2?
Very inexpensive
I liked how affordable this tent is, especially at the price point I paid during Amazon’s Black Friday sale.
Lifetime warranty
And you even get a limited lifetime warranty.
Easy setup process
The entire tent took only about 5 minutes to set up; it’s faster than most other 2-person tents.
Insane amount of mesh
This is a perfect budget tent for summer, with loads of almost transparent mesh on all four sides of the tent.
Overall good quality
There are no loose threads, the seam taping is perfect, you get all sorts of little details like guyline pockets.
Waterproofing is not premium
While the waterproofing is better than budget tents like Coleman, it’s not as good as more premium brands like REI and The North Face. Here’s the breakdown:
| Brand | Rain Test |
|---|---|
| REI / The North Face | >12 hours |
| Kelty | ~2 hours |
| Coleman | <1 hour |
My recommendation is that without extra waterproofing, the Kelty Late Start 2 is great for the occasional heavy rain, but not persistent downpours.
Needs more vents
There are no extra vents in the rainfly or the tent body, which really limits ventilation on rainy days.
1 door & 1 vestibule only
There’s also only 1 door and 1 vestibule. Most two-person tents come with 2 doors and 2 vestibules.
Not a very roomy tent
This tent has only a very simple 2-pole structure (with no extra ridge pole), so you don’t get as much headroom inside.
Overall recommendation
Overall, if you’re looking for a tent that’s not only inexpensive, but performs decently, the Kelty Late Start 2 is great. It’s a no-frills functional tent, but don’t expect premium quality.
Bonus – MUST Read!
I know this because I tested the Kelty against 7 other similar tents — check out my Best Budget Backpacking Tents article (TBA) to find out.
Or, check out the Kelty Late Start 2:
Every figure above is from my own testing — measured by hand, bought with my own money.