REI Co-op Skyward 4 Tent Review (Bought & Tested!)
This is my REI Skyward 4 tent review. I bought this camping tent and tested it for its ease of use, spaciousness, rain protection, and loads more.
This page contains affiliate links, and that means that I may earn a commission if you buy something, at no extra cost to you. You can find my full disclosure policy here.
Recommendation
The REI Co-op Skyward Tent is one heck of a versatile camping tent. It’s perfect if you’re looking for a cabin tent with a vestibule, and this vestibule can even be turned into an awning.
But my biggest gripe with this camping tent is the tiny rainfly. It’ll leak the moment there’s wind blowing rain under the rainfly. For a more comprehensive list of pros and cons, do continue reading this review!

Check out the REI Skyward 4:
Or, you can just watch my YouTube video right here, if you prefer watching to reading:
Check out the REI Skyward 4:
RELATED: Best Cabin Tents
In the Box
Here’s everything that I got out of the box:
Stuff sack
Tent body
Rainfly
Stakes x 10
Guylines x 6
Poles x 7
Pole repair splint
Instructions
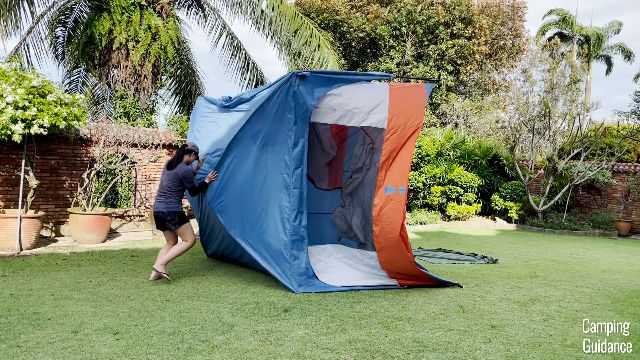
Set Up
It usually takes me about 12 minutes to set up this REI Co-op Skyward, and here’s the gist of it.
The roof assembly requires 2 aluminum poles, assembling the walls requires another 4 aluminum poles, and the last pole is for the awning. After that, set up the rainfly and guy out the entire tent.
For a step-by-step guide on this set up, you can watch my YouTube video embedded here:
The entire setup process is relatively fuss-free, the instructions were pretty good, but there’s one major problem I noticed – the first time I set this tent up, the awning pole was ridiculously difficult to setup.
For myself, it took me a good 15 minutes just trying to get the awning into place, and one of my viewers told me that she even ripped the pole trying to set it up. So, word of caution here – be careful with this pole.

Pack Away
Packing away the REI Co-op Skyward took me about 12 minutes as well, which is kind of long. It would have been much faster if the stuff sack had a top-loading opening instead of a side-loading one.

Base Area
Here are my personal measurements of my REI Co-op Skyward 4:
Length: 98.5 inches
Width: 85.5 inches
Base area: 58.5 square feet
I could fit 2 double pads (which is equivalent to 4 single pads) into the Skyward 4, and here’s what it looks like.

Notice there’s not much floor area left.
Alternatively, I could fit just 1 queen bed in it, but with plenty of leftover floor space for gear storage.

Essentially, this Skyward 4 is great for small groups of people. Ideally, 2 people, though you can squeeze up to 4.
Peak Height
I found the peak height at the center of the REI Co-op Skyward 4 Tent to be about 78 inches. And of course, I’m not very tall (I’m just 5’3), so I can stand completely upright under the peak height.

On the other hand, the lowest height of the tent at the 4 corners came in at about 61 inches.
Side Walls
This REI Co-op Skyward also features near-vertical walls, and here’s what these side walls look like.

This gives it a nice cabin shape, as well as quite a bit of livable space inside the tent. I really liked that I could stand up everywhere inside the tent, and I could walk around everywhere too.
Vestibule Area
This REI Co-op Skyward has 1 vestibule at the front of the tent, and here are the dimensions of the vestibule floor area:
Longest length: 99 inches
Shortest length: 59 inches
Width: 43 inches
Vestibule area: 23.6 square feet
Vestibule Sizing
As for what you can fit into the vestibule, here’s my Helinox Chair One.
It looks like it can fit into the vestibule, but the thing is, when I sit on my Helinox, my knees are almost touching the vestibule door.
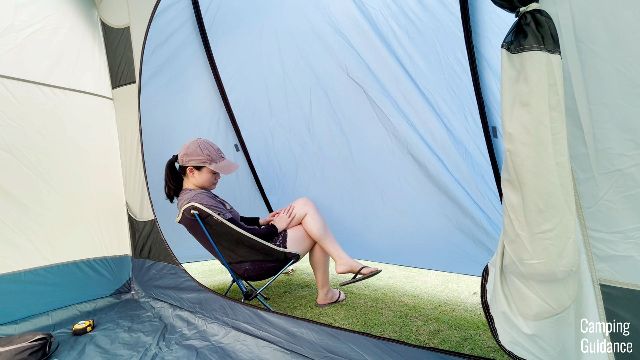
I think the vestibule isn’t the biggest, it’s mainly for gear storage, rather than chairs and tables.
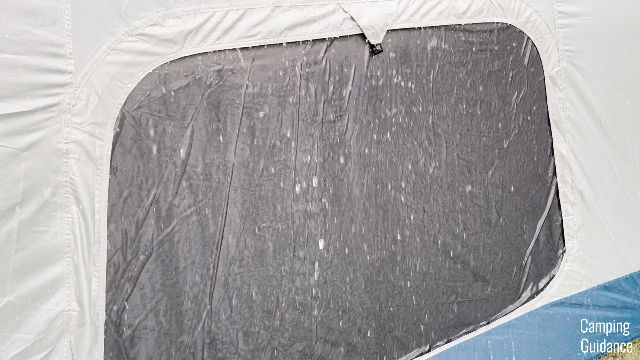
Windows
My REI Co-op Skyward 4 came with only 2 windows, one at the front, and the other at the back. I do wish there could have been windows on every wall of the tent though.

On top of that, both windows aren’t very big, here are their sizes:
Front window: 58 by 21.5 inches
Back window: 48.5 by 21.5 inches
The zipping wasn’t snaggy, but I felt that it wasn’t very smooth, and the zippers didn’t glide over the zipper tracks that easily. There’s no branding on the zippers too.
I also found it weird that the front window couldn’t be shut, which is definitely a privacy issue with the vestibule open.

Tent Door
The Skyward 4 comes with 1 D-shaped door at the front of the tent. I do wish there could have been two doors instead of only one door.
The zipping experience for this front door is really great; I can zip and unzip the door completely without a single snag at all. Plus, the door zippers are YKK.
When the door is open, there’s one door toggle by the side that you can use to hold the door fabric up.

And here are my personal measurements of this tent door:
Door length: 59 inches
Door width: 50 inches
Height from ground to top of door: 60 inches
Vestibule Door
While the tent door was great, the vestibule door was not-so-great, because the storm flap kept snagging the zippers. So, every time I zipped up the vestibule door, it would snag at least 2 to 3 times.
Thankfully, the zippers are also YKK, so they’ll last despite all the ridiculous snagging.
Also, the vestibule door has 2 toggles at the top to tie the door fabric up. This gave me a slight overhang over the door, protruding out by about 15 inches from where the door is, and this is the Skyward’s tiny little awning.

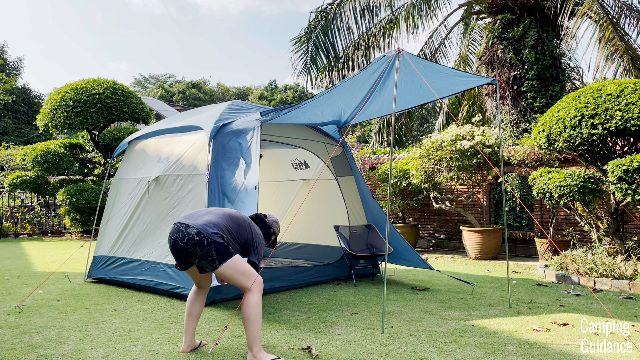
Awning
I know that the tiny little awning is kind of short, and it doesn’t provide a whole lot of shade on the outside.
But here’s the best thing that I loved about the vestibule – you can get rid of it entirely, and turn it into a huge extended awning over the tent! The vestibule door comes with 1 grommet in each corner, and you can stick the awning poles into these grommets to set it up.

Sadly, no awning poles were provided by REI, so I had to buy them on my own (I got mine from Decathlon).
But here’s what it looks like after you set up the awning, and it gives you a whole lot more shade, which is perfect for summer camping.
Pockets
The REI Co-op Skyward 4 has 4 pockets, and they’re all on the front wall of the tent.

Each of the top pockets measure about 11 by 10 inches, while each of the bottom pockets measure about 17 by 9 inches.
Loops
There’s also 1 loop at the top center of the tent, which I usually use to hang a lantern, and there are also another 4 loops around it, 1 in each corner of the tent, for a total of 5 loops altogether.
Heavy Rain
For the heavy rain test, I used this water hose to simulate heavy rain, and I did this for one full hour.

After the hour was up, I found that the entire tent was still dry, and there was not a single drop of water inside the tent.
2 reasons why:
The Skyward was very thoroughly seam taped; and
There was no strong winds at all the day I did this test.
Rain and Wind
However, I noticed that the moment there’s relatively high winds, it’ll blow the rain right under the rainfly and into the tent.
So, in my second rain and wind test, I found that the mesh under the rainfly was completely soaked, and it dripped down into the tent, forming puddles on the tent floor.

Rainfly
And that’s because the rainfly is ridiculously tiny. It covers only the very top of the tent, it doesn’t extend over the mesh paneling very much, and I think it’s honestly one of the smallest rainflies I’ve ever seen.
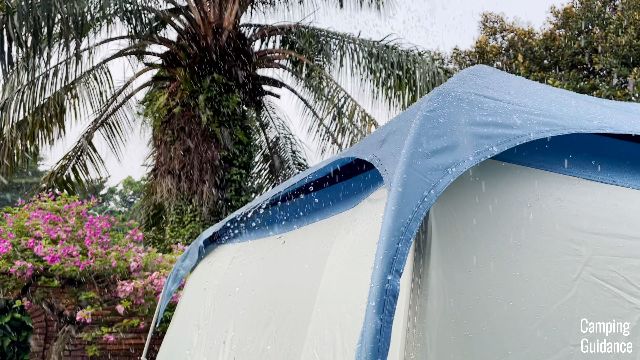
If it were longer, the rain wouldn’t have gotten into the Skyward so easily.
REI made it a ‘cap-style fly’ to encourage ventilation, but this reduces rain protection at the same time. I would much prefer a longer fly instead.
So, for weather protection, this Skyward isn’t the best. It’s not terrible, but it’s not great either, and I wouldn’t use it for extreme conditions.
Ventilation in Rain
Also, when it comes to rainy day ventilation, again because the rainfly is so tiny, the window got completely drenched, and there’s absolutely no way to open this on rainy days for any ventilation.
There are also no vents in this tent at all.
For more info on the REI Skyward 4 rain test, you can check out my YouTube video here:
Ceiling Mesh
On the other hand, for hot days, I like to take the rainfly off to get a little more ventilation through the ceiling mesh, and here’s what it looks like.
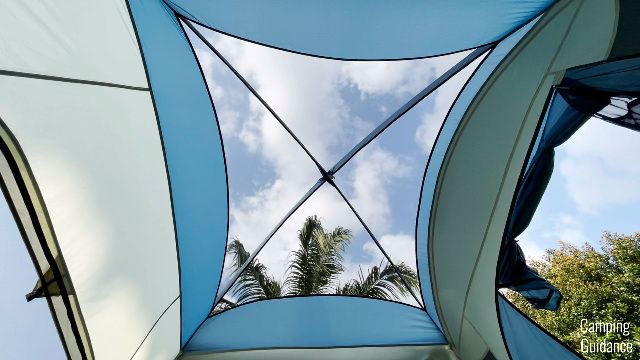
This is also great for stargazing or looking at sky views.
Guylines
Another thing I liked about this Skyward Tent are the guylines.
And that’s because even with the rainfly off, I could still guy out the entire tent with all 6 guylines, because they’re attached to the tent body and not the rainfly. (These don’t come pre-attached though, so you’ve got to attach them for the first setup.)

All the guylines come with a small reflective strip too, so you can see them at night.
Materials
The flooring of the Skyward is made of 150-denier polyester, the rainfly fabric is made of 75-denier polyester, so half as thick, and the rest of the tent body/canopy fabric is made of nylon.
The window zippers are not branded, the door zippers are YKK, the mesh is micro-mesh (and it’s solution dyed mesh), and all the poles of this tent are aluminum poles.
I never had any breaking or bending issues with my aluminum poles, and they held up pretty well.
Stitching
I felt that the seams in this Skyward Tent are pretty good quality, mostly double-stitched, and pretty consistent throughout the entire tent.
I also didn’t find any loose threads in this tent.
Seam Taping
On top of that, every single seam was perfectly taped, which is a big reason as to why this tent held up to rain pretty well (if there’s no wind, of course).
Portability
The packed size of my Skyward 4 was about 25 by 10 by 9.5 inches. Here’s what it looks like beside my Coleman 2-Person Sundome Tent, and also one of my 32-ounce Nalgene bottles.

It weighs about 14.2lbs for everything, and comes with 1 shoulder strap and 1 hand strap.

Because of the weight, this is strictly a car camping tent, and isn’t for backpacking at all.
Pros
Here are all the pros (basically, what I loved) on this REI Co-op Skyward 4 camping tent:
The only cabin tent I have that comes with vestibule space.
Vestibule is useful in the rain.
Vestibule can be used as an awning instead. Very feature-rich!
Cabin shape gave me lots of livability and interior space.
Dimensions are accurate.
High quality materials.
Not too expensive.
Door is big and user-friendly.
Decent storage.
Cons
On the other hand, here’s what I didn’t like about the REI Co-op Skyward 4:
The rainfly is tiny! So, weather protection isn’t the best (especially in wind).
Ventilation can be better.
The first-time setup is super tight.
Pro Tips
And here are some pro-tips I have to help you deal with the cons of this camping tent:
Use the vestibule for rainy days, and use the awning on hot days.
Set up a tarp over the tent for better protection.
Break in this tent before using it for real. This deals with the tight first-time setup.
Bonus: Must Read!
Overall, I really did quite enjoy using this REI Co-op Skyward 4-person tent, I think it’s a solid cabin tent for the price, it’s a pretty great 3-season summer car camping tent, rain or shine, especially if you follow some or most of my pro-tips above.
But before you buy this tent, I highly recommend that you check out this blog post where I bought and tested 6 other cabin camping tents in the market. Perhaps one of these other best tents might be better for you. See you there!
Alternatively, check out the REI Skyward 4: