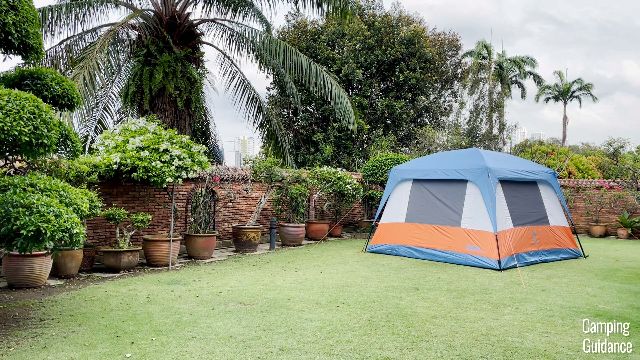
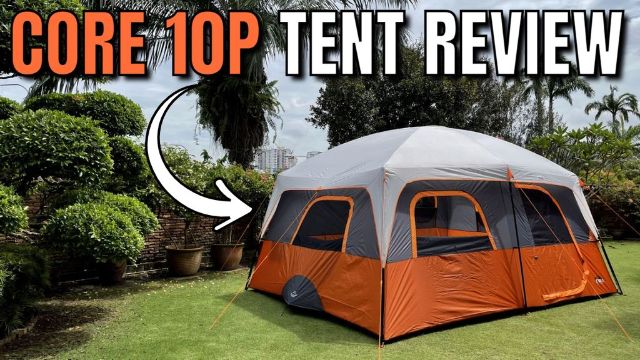
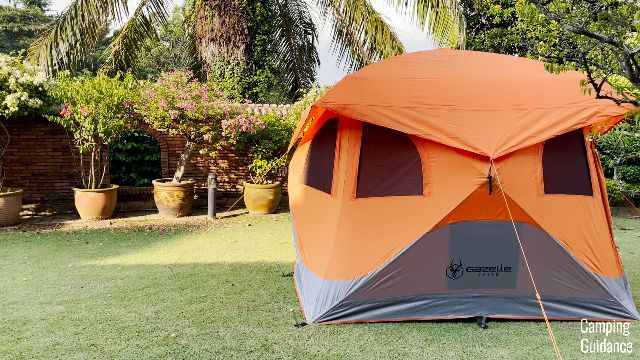
Gazelle T4 Hub Tent Review (Bought & Tested!)
This is my Gazelle T4 Hub review. I bought this tent, went camping in it about half a dozen times, and also tested it for its ease of setup, ease of pack away, livability, weather protection, and much more.
This page contains affiliate links, and that means that I may earn a commission if you buy something, at no extra cost to you. You can find my full disclosure policy here.
Recommendation
The Gazelle T4 Hub Tent is easily one of the best instant tents I’ve ever used for car camping. The instant mechanism is superb, setup and pack away is incredibly easy, the flooring is removable, the materials used are superb, and there’s a ton of livable space inside the tent.
However, it’s more expensive, and packs down much bigger than all my other instant tents. If you don’t mind these 2 biggest cons, the Gazelle T4 is easily the best instant tent for you.

If you prefer watching to reading this review, check out my YouTube video here:
Check out the Gazelle T4:
RELATED: (1) Best Instant Tents, (2) Best Cabin Tents, (3) Best Family Tents
- Recommendation
- In the Box
- 1. Ease of Setup
- 2. Ease of Pack Away
- 3. Base Area
- 4. Single Pad Sizing
- 5. Queen Bed Sizing
- 6. Peak Height
- 7. Lowest Height
- 8. Side Walls
- 9. Hub-to-Hub Length
- 10. Livable Space
- 11. Windows
- 12. Doors
- 13. Pockets
- 14. Gear Loft
- 15. Loops
- 16. Ceiling Mesh
- 17. Rain Test
- 18. Seam Taping
- 19. Ventilation
- 20. Guylines
- 21. Materials
- 22. Flooring
- 23. Instant Mechanism
- 24. Stitching
- 25. Portability
- What I Loved
- What I Didn't Quite Like
- Pro Tips
- Bonus: Must Read!
In the Box
I bought my Gazelle T4 from REI Co-Op, but it’s also on sale on Amazon and direct on the Gazelle website. It’s one of the most popular Gazelle ground tents, so it should be easy to find.
And here’s everything that I got out of the box:
Carry bag (orange)
Tent body (with pre-attached poles and hubs)
Rain fly (also orange)
Stakes x 12
Guylines x 4
Instructions
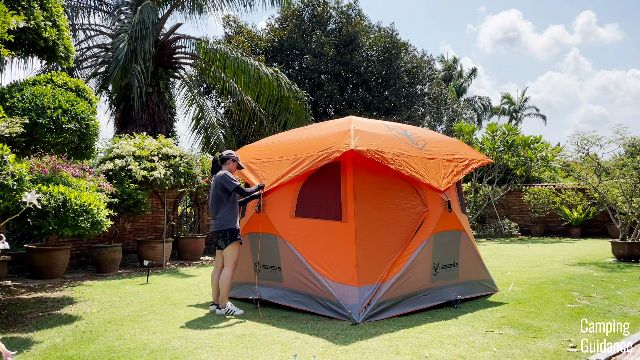
1. Ease of Setup
I found that my Gazelle T4 was able to pop open in 1 minute and 45 seconds. (This involves just taking it out of the stuff sack/carry bag, unfolding it on the ground, then pulling on all the hubs. No rain fly, stakes, or guylines.)
On the other hand, the full setup, which includes setting up the rain fly, stakes and guylines as well, took me about 5 minutes instead.
If you need a step-by-step guide on how to set up your Gazelle T4, here’s my full setup video that I published to YouTube:
2. Ease of Pack Away
As for the pack away process, including un-staking the entire tent and also removing the rain fly, the Gazelle T4 Hub took me about 6 minutes to take down and pack away back into the carry bag.
I have another step-by-step YouTube video on how to pack away the Gazelle, so do check it out if you need more instructions and tips:
3. Base Area
As for the dimensions of the T4 Hub Tent, here’s my own personal measurements (which may differ slightly from the brand’s):
Length: 94 inches
Width: 93.5 inches
Base area: 61.03 square feet
4. Single Pad Sizing
Here’s what having 2 double pads, which basically equivalent to 4 single pads, looks like on the floor of the tent. I’ll also give you the dimensions of all my pads.

Surprisingly, even though my pads are a little wider than regular size, which usually comes in at about 20 inches wide, there’s enough room to fit 4 of them, and they don’t even look too squished on the floor.
On top of that, I even got a little bit of extra room for gear storage at the foot of each pad. So, technically, this tent does sleep 4.
5. Queen Bed Sizing
And for the queen bed sizing, I can fit just 1 queen bed into this T4 Hub Tent. There isn’t enough room to fit another queen bed, though I got lots of leftover floor space for gear storage.
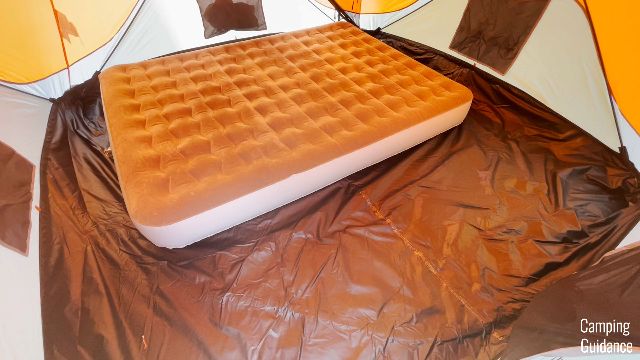
I’d recommend sleeping no more than 2-3 campers in this tent. Though you can technically sleep 4 people, it’s gonna be a bit tight.
6. Peak Height
The peak height at the center of this Gazelle T4 Hub Tent comes in at about 77.5 inches. And because I’m not very tall (I’m only about 5’3), I can stand completely upright under the peak height.
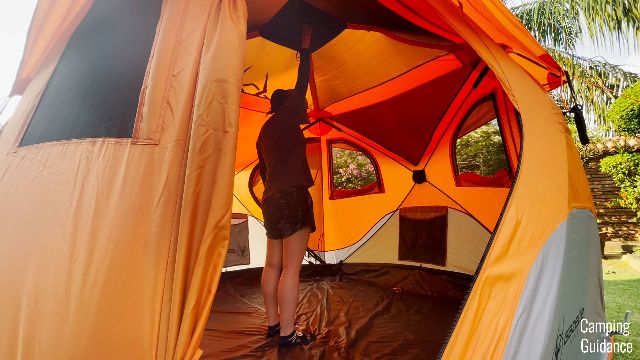
I also really liked that I could fit pretty thick 9-inch mattresses into the tent as well, and still stand under the peak height no problem at all.
7. Lowest Height
On the other hand, for the lowest height of the tent in the corners, that comes in at a whopping 67 inches.
That’s actually taller than my height, so I could stand completely upright under the lowest height as well, still with a few inches of headspace above me.

8. Side Walls
The side walls of the T4 Hub Tent are pretty much almost vertical, and this is what one of the walls looks like:
These vertical walls gave the T4 a nice cabin shape, and also gave me a lot of space to stand upright and walk around everywhere inside the entire tent.
9. Hub-to-Hub Length
Why does the Gazelle T4 Hub have such vertical walls?
Well, it has 1 hub in all 4 walls, right at the center of the walls, and the hub-to-hub length is the length from the hub on one wall to the hub on the opposite wall.
And I measured the hub-to-hub length to be about 102 inches.

And remember the base area of the tent, which comes in at only about 94 by 94 inches?
So, what these hubs are doing is actually to pull the tent fabric outwards, giving you the vertical walls I talked about, which equals to more livable space inside the tent.
10. Livable Space
How does the Gazelle T4 Hub compare to other cabin tents on interior space?
Well, in most other cabin tents that I have, I noticed that when I sleep at the sides of the tent, it always feels pretty tight. My arm usually touches the wall when I raise it up, and so does my head when I sit up at the side.
However, in this T4, not only do my arms not touch the walls when I raise them up, they’re at least 5 inches away from the wall, maybe even more. That’s a huge difference.
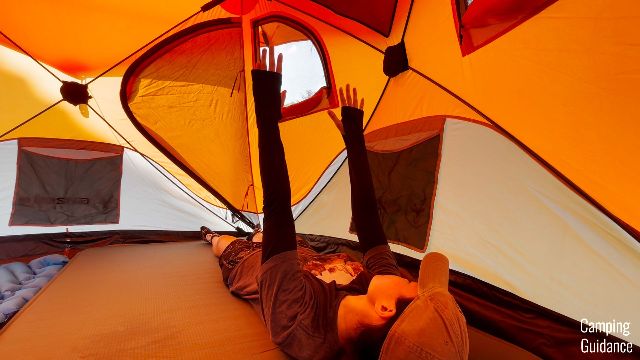
Also, my head doesn’t touch the walls when I sit up either, and I still have so much leftover interior space because of the hubs pulling the fabric out.
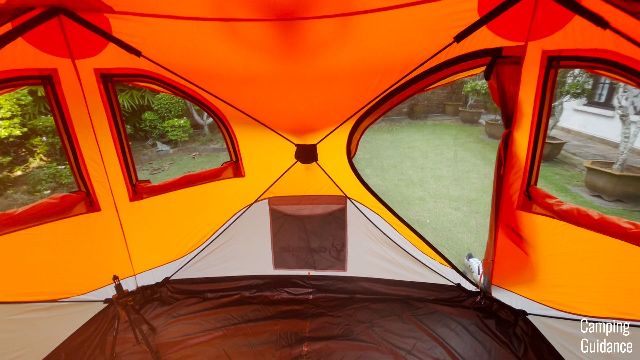
11. Windows
The Gazelle T4 Hub has a total of 8 windows around the tent.
6 of them are these smaller windows, measuring about 19 by 21 inches each.
The last 2 windows are the bigger ‘door’ windows, which measured about 28 by 53 inches.
The zipping experience for both types of windows was good, there were no snags at all, and it felt pretty smooth.
I noticed though, that the zippers for the smaller windows are not branded, while the bigger windows are YKK. I think that’s probably because there’s a lot more zipping and unzipping with the bigger windows.
12. Doors
The Gazelle T4 Hub has two D-shaped doors, one door in one corner, and the other door in the opposite corner.
Door Size
I thought that the D-shaped doors weren’t really all that big, and here are the dimensions:
Longest width: 26 inches
Longest length: 50 inches
From ground to top of door: 56 inches
But even though the longest width was 26 inches at the center, they really taper down at the top and the bottom. Notice how little space there is at the bottom?
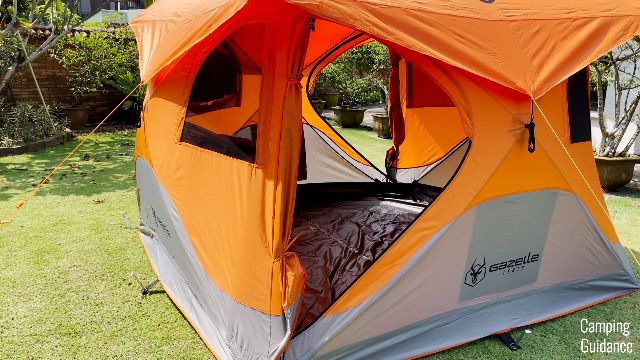
I did have to get used to not tripping over the door when I first started using this tent.
And of course, because these D-doors aren’t big at all, you would have to inflate your mattresses inside the tent, you can’t take the entire mattress in inflated.
Door Zippers
The zipping experience of both doors was really good though, with zero snags, and the storm flaps never got in the way of the zipper track. Oh, and the zippers are YKK too.
Door Tie-Downs
But one thing I didn’t quite like about these doors is that there are these 2 tie-downs. It takes some time to get them tied up, and I think having toggles (like those you see in most other tents) would be much more user-friendly.

13. Pockets
Moving onto storage options, we’ll first start with pockets, and there are 6 huge pockets in this T4 Hub.
Each bottom pocket measures 18 by 15 inches, which is already pretty big, while each top pocket is even bigger, measuring almost 59 by 26 inches.

14. Gear Loft
On top of the pockets, I even got 1 removable gear loft for additional gear storage, and it measures about 20 by 20 inches.

Each corner of the gear loft has a toggle, which you can hook up to the 4 loops at the top of the tent.
15. Loops
Apart from the 4 gear loft loops, there isn’t a dedicated lantern loop inside the tent, though there is this strap hanging down from the top hub on the roof, which you can use to hang a lightweight lantern on it.

What I’m using here is a Black Diamond Moji, a pretty lightweight camping light, and I highly recommend not hanging anything too heavy on this strap. That’s because you don’t want the hub to get pulled down by the weight and hit someone on the head. (It does hurt, trust me, I made that mistake.)
And even with the gear loft in place, you can still fit a small lantern in there, which is nice.
16. Ceiling Mesh
On hot days, which is usually the weather that I’m camping in, I like to take the rainfly off to get a little more ventilation through the ceiling mesh on the roof, and here’s what it looks like.
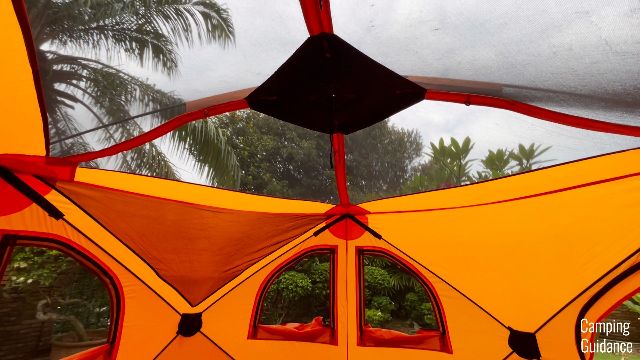
That, coupled with the windows and doors, makes for an overall decent amount of ventilation inside the tent.
But because of all this ceiling mesh on the roof, this is strictly a 3-season summer camping tent.
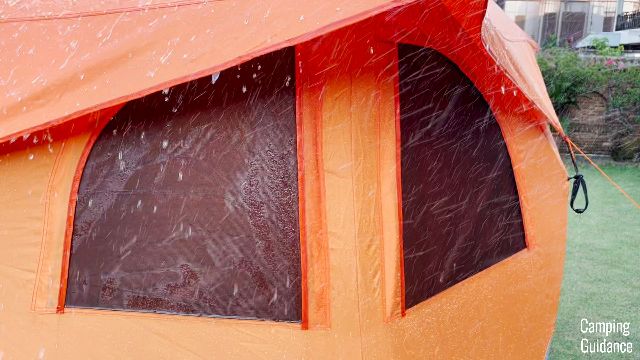
17. Rain Test
Now, how waterproof is the Gazelle T4? For my rain test, I used a water hose to simulate heavy rain, and I did this for one full hour.
Problem #1
After the hour was up, I found some parts of the top mesh panels to be a little damp, and there were also a few droplets of water on the tent floor, because it dripped down from the mesh.

That’s because the rainfly isn’t very long, so it doesn’t overlap the top mesh panels by very much. With heavy enough rain, and the wind at the right angle, it will blow right under the rainfly and into the tent.
Problem #2
Another problem is these pockets right here, and after the rain test, I noticed that this pocket seam here has been soaked with water.

Problem #3
And the last problem is the hubs in the center of each wall, they were also a little damp from the inside.
Because of these 3 problem areas, this tent is by no means waterproof. For my full rain test video, you can check out my YouTube video embedded here:
18. Seam Taping
I checked the entire tent, and all the seams that were not covered by the rainfly were fully and perfectly taped.
Pocket Seams
But if you look at these pocket seams pictured above, you’d see that the seam taping covers only the top of the pocket. The rest of the pocket wasn’t taped.
And because a lot of water flows over the pocket seam in the heavy rain, the water gets into the seam, and then soaks the pocket on the inside.

There isn’t a lot of water in the seam after 1 hour, so I’d give this tent about 5 to maybe 10 hours of heavy rain before it soaks the entire pocket and starts leaking into the tent.
Hub Seams
And for the hubs, the seams around the hub are taped, but the hub itself can’t be taped, and it is exposed to the outside with these hub loops on the other side.

So, the same issue with the pocket seams, again, I’d give this tent maybe 5 to 10 hours of heavy rain before any real leaking issues.
The only real way to solve these issues is to have a longer rainfly, and not have any of these outside elements exposed to the rain.
19. Ventilation
As for rainy day ventilation, there aren’t any vents at all.
Also, there’s no way to open any of the windows in the rain. The rainfly doesn’t cover much of the windows at all, and all the windows were soaked from top to bottom.
20. Guylines
The Gazelle T4 has 4 guylines around the entire tent, and I recommend guying this entire tent out in moderate to strong winds. That’s because if the wind’s strong enough, it could push on the hub and your tent will fold in and collapse.
One pro-tip here is to use the hub loops at the center of each wall on the outside to secure the guylines. This provides more stability to the hubs.
One thing I really liked here is that these hub loops aren’t attached to the rainfly, so you can guy out the entire tent without the rainfly.
But one thing I didn’t like is that the guylines are not reflective, and can’t be seen even on clear nights. It would be a huge improvement to add a small reflective strip on each guyline.
21. Materials
The tent body and the rainfly is made of 210-denier oxford weave polyester and regular polyester respectively, with a 2,000-millimeter hydrostatic head rating. And on top of that, they have UPF 50+ rating as well.
The mesh isn’t micro-mesh though. This is supposed to be tight-weave mesh, but it feels like regular mosquito netting that most budget tents like Coleman have.

And honestly, I was also shocked to find that the poles are made of fiberglass, they felt so sturdy I thought they were aluminum or steel.
The stakes are made of fairly thin aluminum, and the guylines are made of standard cording.
22. Flooring
I was completely floored by the quality of the flooring (no cheesy pun intended), so I thought it deserves its own section.
First up, the material of the flooring is superb. It’s a super thick 300-denier oxford weave polyester, and it also has a 5,000-millimeter hydrostatic head rating.
And by far the most mind-blowing pro of the flooring is that it’s entirely removable. There are flooring toggles at each corner of the tent, and the rest of the flooring is connected to the tent body via a super long Velcro strip all around the entire tent.

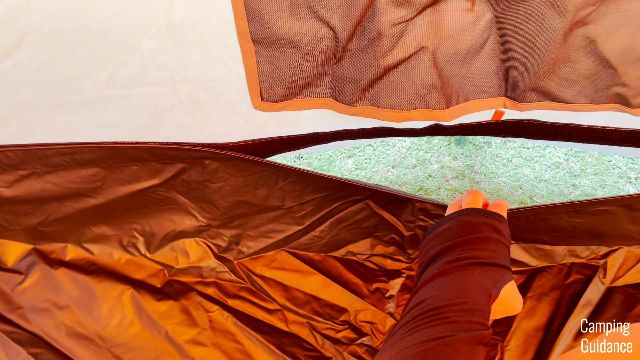
It’s super user-friendly, and I used almost no strength at all to rip it off the Velcro. That’s pretty cool.
When re-attaching the removable floor, all I had to do was to line up these little orange tabs on the flooring to the orange tabs on the tent body. There are 4 of them around the tent, one on each wall, which is a nice feature to have.

23. Instant Mechanism
The overall instant mechanism is fantastic, with the Gazelle T4 having a total of 5 hubs around the entire tent. (4 on the 4 walls, and 1 on the roof.)
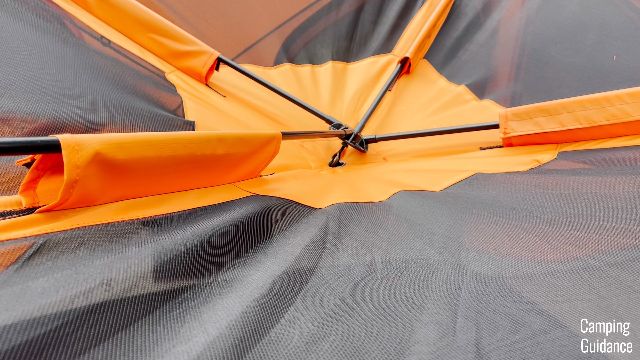
On top of the insane number of hubs, this T4 also has poles running all around the entire tent, from hub to hub.
On the other hand, most other instant tents are made of just a central hub and 4 elbow joints, which are much more flimsy.
The Gazelle T4, in contrast, is much sturdier, and holds up really well in light to moderate winds.
24. Stitching
The stitching and seams in the T4 were very good quality and double-stitched throughout the entire tent, I didn’t find any inconsistent areas or loose threads in the tent at all.
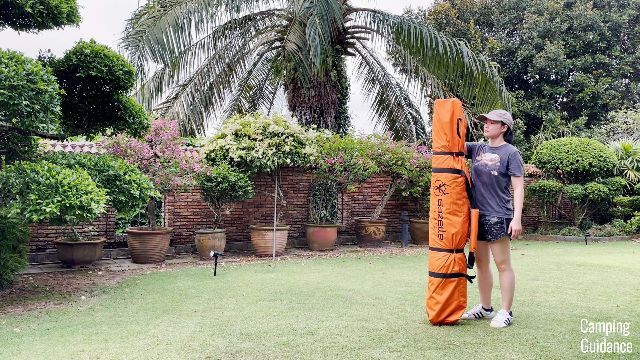
25. Portability
Moving onto portability, I measured the packed size of my Gazelle T4 to be about 68 by 13 by 10 inches. It’s really long, so I’d recommend getting the dimensions so it can fit into your car or pickup truck.
The carry bag has a whopping 3 handles in total, 2 at both ends of the bag, and 1 in the middle of the bag.
And this tent has a weight of about 34.0lbs for everything.
What I Loved
There’s so many things that I loved about this Gazelle T4, let me try to list all of them here for you:
High quality and well-built instant mechanism (more hubs and poles than other instant tents)
Pops open in 2 minutes, a very quick deployment
Super easy pack away
Removable floor makes it easy to clean and easy to remove air when packing up
Loads of livable space (high peak height and lowest height)
Lots of features (storage, windows, doors, UPF 50+ rating)
High quality and thick materials (210D-300D polyester)
What I Didn’t Quite Like
Now for the cons. These aren’t deal-breakers, but I think it’s important for you to know before buying this tent:
Not exactly waterproof, and therefore not for inclement weather or extreme conditions. (Not for high winds, crazy rains, extreme winter, or setting up at base camp.)
Humongous packed size (the length of the packed up tent in its carry bag is taller than me!).
Pricier than your average instant tent.
Short warranty of 1 year.
Pro Tips
Now, to get the best use out of your Gazelle T4, here are some pro-tips I’d recommend you take note of:
For better weather protection, set up a tarp over the tent.
To increase the lifespan of your tent, read all instructions and be gentle when setting up and packing away.
Set up a tarp underneath this tent to prevent puncturing the tent floor.
You need to be able to drive your car/truck up to your camp site and immediately set up for the night, you can’t lug this tent too far.
Overall, I’d highly recommend the Gazelle T4 as long as you have enough space and budget for it.
Take Note: I usually deal with car camping or ground tents rather than rooftop tents. I don’t have the overland edition of the Gazelle T4 Hub Tent (so, I don’t know anything about getting this tent up on a roof rack of a truck/car, etc.).
Bonus: Must Read!
I’d recommend the Gazelle T4 as a great instant tent for your camping trip any day, but if you’re wondering how it compares to other instant tents on the market, check out this blog post right here where I bought and tested more than 5 of the best instant tents (including the Gazelle T4, of course).
I also tested a whopping 7 cabin tents in this other blog post here. And more than 30+ camping tents in a family-size here.
Alternatively, check out the Gazelle T4:
I’m looking forward to reviewing more Gazelle tents (and other ground tents too) in the future, and I’ll link to all of them here if I do.