Cheap Tents VS. Expensive Tents: $100 vs $500 (REAL Pictures!)
This page contains affiliate links, and that means that I may earn a commission if you buy something, at no extra cost to you. You can find my full disclosure policy here.
I bought the Coleman Sundome 6 for ~$100, and this has become one of my favorite budget-friendly camping tents. On the other hand, I paid close to $500 for The North Face Wawona 6, and this is one of my favorite higher-end, more expensive tents.
This article goes through 13 key differences I noticed after weeks of using both these tents. First, a quick summary:
Expensive tents tend to have more features, more livable space, more storage, better rain protection, and much higher quality materials. On the other hand, budget tents have less features, less space, much less storage, lower quality materials, and they tend to leak in the rain much more easily.

RELATED: (1) Best 6-Person Tents, (2) Best Coleman Tents, (3) Best Tents Under $100
| Characteristics | $500 Tent | $100 Tent |
|---|---|---|
| No. of Vestibules | 1 | 0 |
| Vestibule Area | 51.0 square feet | 0 |
| No. of Poles | 4 | 3 |
| Set Up Timing | 20 minutes | 11.5 minutes |
| No. of Doors | 2 | 1 |
| No. of Pockets | 9 | 2 |
| No. of Loops | 8 | 1 |
| 1-Hour Rain Test | Passed | Failed |
| Waterproof Rating | 1,200mm | None |
| Seam Taping | Yes | No |
| Zipper Quality | SBS | No brand |
| Mesh Quality | Micro mesh | Regular mesh |
| Flooring Material | 150D polyester | Polyethylene |
| Tent Body Material | 75D polyester | 68D polyester |
| Pole Material | DAC MX | Fiberglass |
| Warranty | Lifetime | 1 year |
If you enjoyed this video, do consider subscribing to my YouTube channel:
Check out the $500 tent (Wawona 6):
Or, check out the $100 tent (Sundome 6):
1. Vestibule
I think the biggest difference you might have noticed between these 2 tents is the vestibule.
$100 Tent
For the $100 tent, the Sundome 6, there’s no vestibule at all. It’s just a very simple dome tent.
There is a slightly overhanging rainfly pole (pictured below), but it protects only the door of the Sundome, and nothing else outside the tent.

So, even your footwear outside the tent will get wet in the light rain.
$500 Tent
On the other hand, for a much more expensive $500 tent like the Wawona 6, you’ll get a super huge vestibule, and it’s so big, that I could fit not just 2 chairs, but I even have a ton of leftover space for even a camping table.
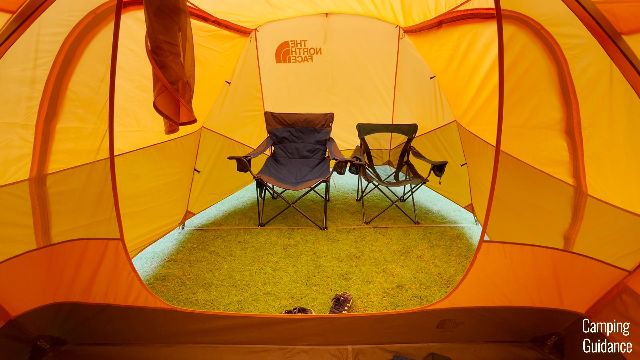
In fact, the base area of the Wawona’s vestibule came in at a whopping 51.0 square feet, which is huge.
2. Livable Space
On top of the vestibule, I also got a lot more livable space in the inner tent of the Wawona than the Sundome.
$100 Tent
For the Sundome, it’s a very simple 2-pole set-up, with just 2 poles crisscrossing each other to give you this simple dome shape.
There’s not a lot of livable space in this set-up, because the walls slope inwards the most. So, when I take just 2 steps away from the peak height, my head would touch the top of the tent, right here.
$500 Tent
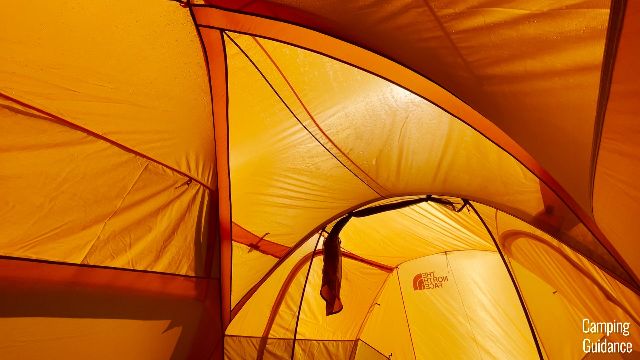
On the other hand, the Wawona’s inner tent has a slightly more complex 3-pole set up.
You have the same 2 poles crisscrossing each other to give you that dome shape, so basically the same as the Sundome.
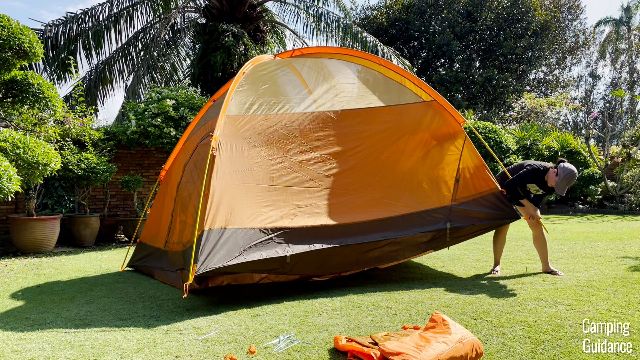
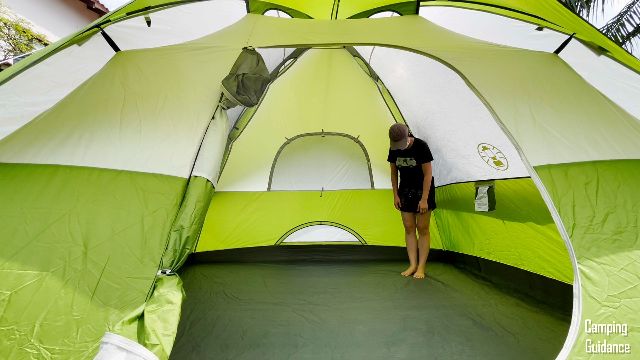
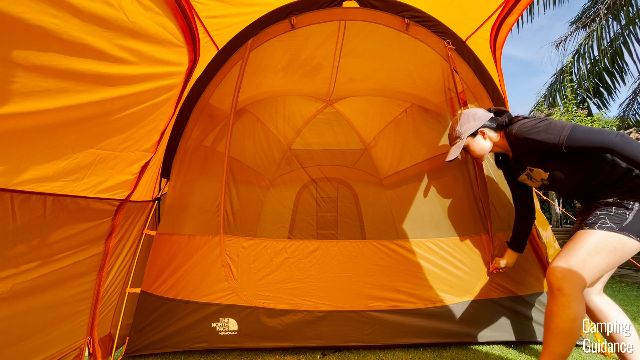
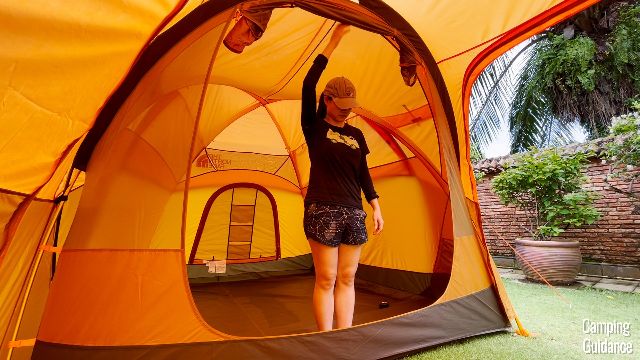
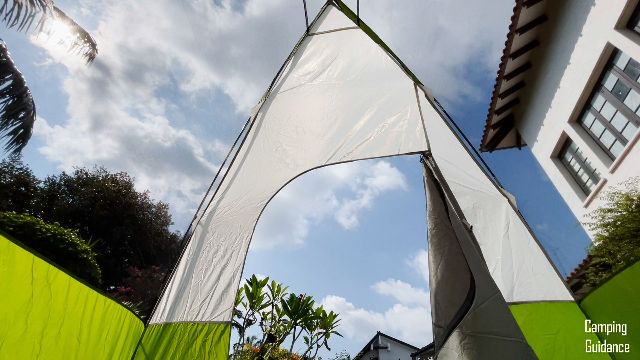
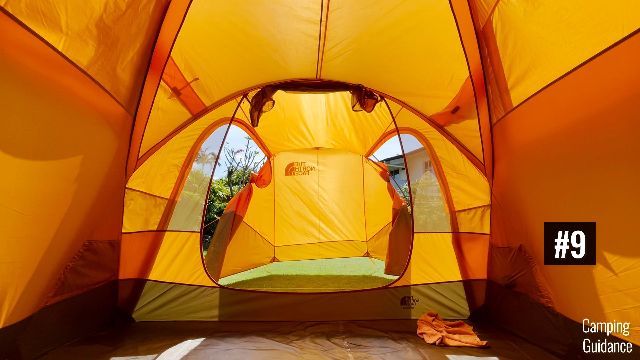
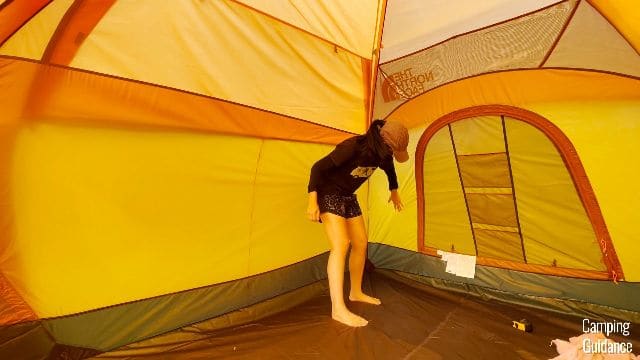
But the Wawona has an additional third pole for the inner tent, which extends the tent fabric upwards, and outwards. In fact, it gave me a completely vertical front wall.
I think you can see it better without the rainfly. Okay, so this is me standing in front of the wall, and notice how I’m able to stand completely upright? That’s how vertical it is.

And this is the part in front of the wall that gives you a little bit more livable space than any other regular dome tent.
3. Set Up
$500 Tent
But because I got not just the extra vestibule, but also an extra pole to set up for the inner tent, the Wawona 6 took me longer to set up, coming in at about 20 minutes.

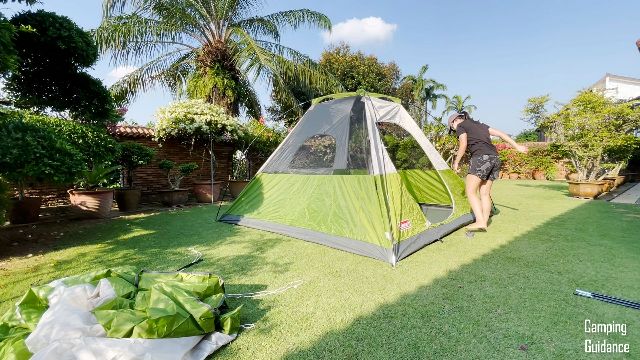
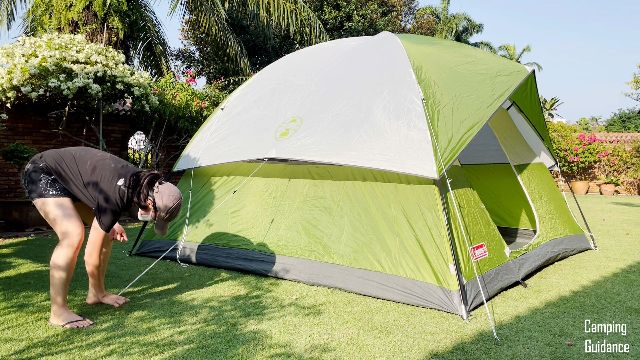
$100 Tent
On the other hand, the Sundome 6, without any vestibule, and with just a very simple dome set up, took me only 11.5 minutes, which is about half the time of the Wawona.
Pro Tip: Basically, the more features, like vestibules and extra poles, which you’ve got to set up, the longer it’ll take you.
4. Door Quality
I also found that the door quality in more expensive tents is much better than in budget-friendly tents.
$500 Tent
For example, in my $500 Wawona 6, I had not just this front door, but also a smaller back door at the other end of the tent, so a total of 2 doors (not including the other 2 doors of the vestibule). You can see both doors in the picture below:

I found that my doors are completely snag-free, I needed to use only 1 hand to unzip the entire door, and unzipping it takes just 3 seconds.
On top of that, the doors on expensive tents are usually super huge, taking up almost the entire wall of the tent, and I can easily take entire double pads in and out of the tent.

They’re also usually super tall, this door measures 70 inches from the ground to the top of the door, so when walking in and out of the Wawona 6 through this front door, I never had to duck at all, which is super nice.
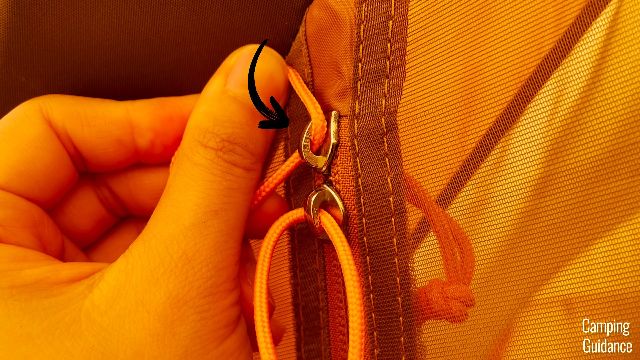
The zippers are made of SBS, so a grade lower than YKK, but at least it’s still branded.
$100 Tent
On the other hand, for my $100 tent, the Sundome 6, there’s just 1 door.
The door is much smaller, it clearly doesn’t take up the entire wall of the tent, it measures just 56 inches from the ground to the top of the door, so a whopping 14 inches lower than the Wawona, and I had to duck when getting in and out of the tent through this door.

The zippers are non-branded, which is usually what I find in budget-friendly tents, and the zipping experience is usually not as good.
For the Sundome, there’s this rain flap that keeps getting in the way of the zipper track, so it makes the zipper come off as snaggy, and it’s definitely not as user-friendly.
So, I usually use one hand to hold the rain flap away when zipping the door up, and I use my other hand to zip up the door. Also, not one-handed like the Wawona.
5. Mesh Quality
The quality of the mesh is also very different in expensive tents and budget tents.
$500 Tent
For my Wawona 6, notice that the holes of the mesh are very fine, so it keeps out even the smaller bugs. Whenever it rains, I would find a lot of bugs hiding under my Wawona’s vestibule, but none of them were able to get into the inner tent, which is really nice.

Also, when I run my hand over the mesh, it feels really soft, very silky, and definitely feels higher quality.

$100 Tent
On the other hand, for my Sundome 6, notice that the holes of the mesh are much bigger, so it definitely doesn’t keep out smaller bugs like no-see-ums, if you have that where you’re camping.
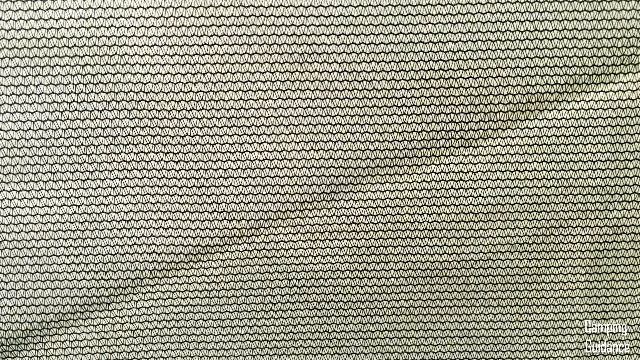
And also, when I run my hand over the Sundome’s mesh, it doesn’t feel as smooth, it feels rougher, and less expensive, for sure.
Pro Tip: It’s definitely more expensive to manufacture no-see-um mesh rather than just regular mosquito netting, that’s why only the more expensive tents tend to have no-see-um mesh.
6. Amount of Mesh
On top of the quality of the mesh, I also like to look at the amount of mesh there is on a tent. Here, I’m comparing 3-season summer tents, so for me, the more mesh there is for ventilation, the better.
Pro Tip: And mesh is typically more expensive to manufacture than just regular fabric, so less expensive budget tents tend to have way more fabric than mesh.
$500 Tent
On the other hand, more expensive 3-season tents tend to have more mesh than fabric. For example, my Wawona 6 has a ton of mesh.
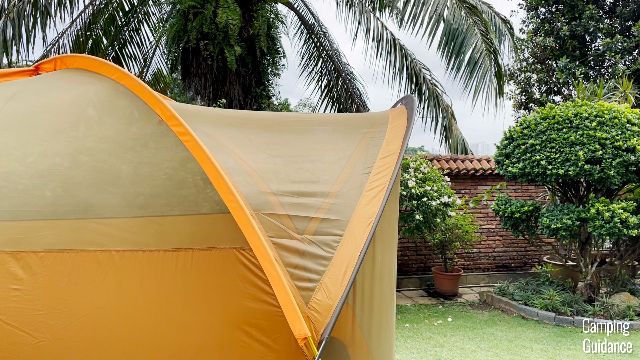
For the front vertical wall, a good three-quarters of this wall is made of mesh for tons of ventilation.

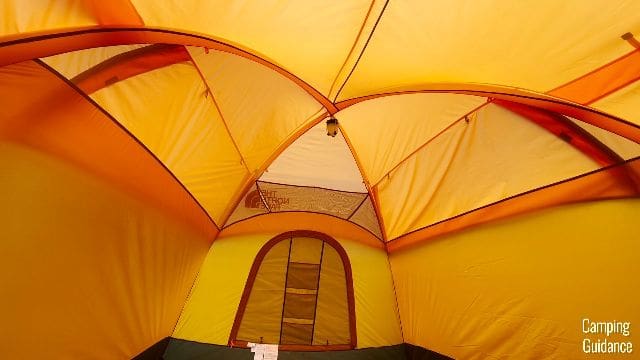
And on top of that, the 4 walls of the tent all have mesh panels that join together at the top, giving you a mesh ceiling, which is really nice.
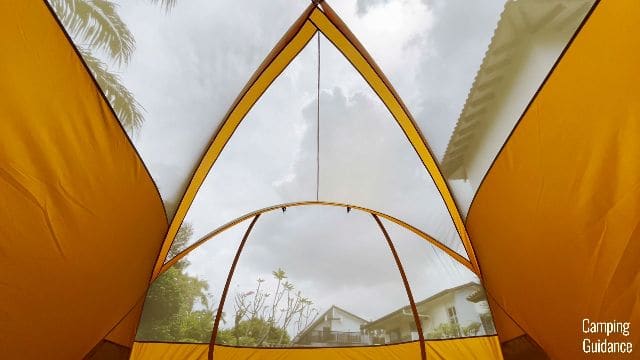
And I could even open the back window for more ventilation as well.
$100 Tent
For more budget-friendly tents, like the Sundome 6, notice that there’s a little less mesh than the Wawona. But honestly, I think this isn’t too bad for a budget-friendly tent.
I’ve seen much worse no-brand tents, which have way more fabric and too little mesh, because it’s cheaper to make tents that way.
7. Storage Options
$500 Tent
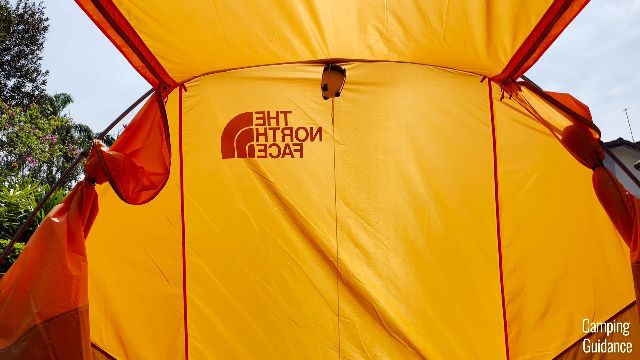
For storage, my more expensive Wawona 6 comes with a total of 9 pockets. There are 4 pockets over the small back door, and 3 pockets on the window fabric of the back door, and you can see all 7 pockets in this picture below:

To make up the 9 pockets, there are another 2 more pockets at the sides nearer the front of the tent, 1 at each side, and you can see both of them here:
The Wawona 6 also comes with 8 loops to hang stuff from, 1 loop right at the very top of the tent, at the center, plus 4 more loops around it (so that’s 5 loops here):
There are another 3 loops in the vestibule, making up the total of 8 loops.
$100 Tent
On the other hand, my Sundome 6 comes with just 2 pockets inside the tent, and just 1 lantern loop at the very top of the tent. This is way too little storage for a 6-person tent.

8. Storage Placement
On top of just the number of storage options, also take note of the positioning of the pockets.
$100 Tent
For more budget-friendly tents, I find that the brand sometimes just places pockets wherever they want to.
For example, not my Sundome 6 but my Instant 4, Coleman just put the pockets at the 2 sides of the tent, and when I rain tested my Instant 4, the pockets leaked water into the tent, which is definitely not good.
$500 Tent
On the other hand, expensive brands tend to put the pockets in more thoughtful places.
For example, in the Wawona 6, I love that all these pockets are protected by either the back door fabric, or the rainfly fabric, so that there won’t be any leaking into the tent through the pocket seams.
For the 2 pockets at the front of the Wawona 6, notice the outline of the rainfly, and how the rainfly completely protects the entire pocket from any leaking:

9. Rain Protection
Speaking of the rain test, this is one of the bigger differences.
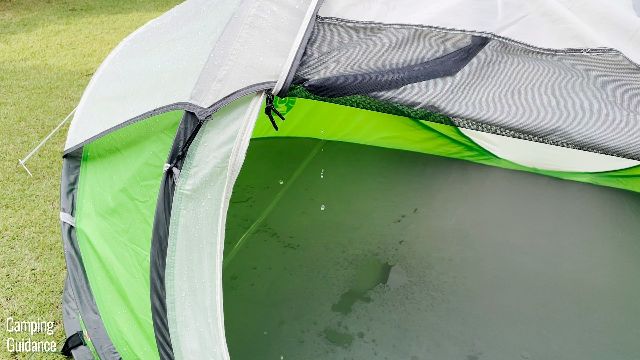
$100 Tent
For my $100 tent, the Sundome 6, when I rain tested this tent, I found the first drop of water got into the tent after just 35 minutes of heavy rain.

And you might find this surprising, but the Sundome is already one of my better Coleman tents. I’m not even kidding.
I also rain tested my Coleman Instant Tents, and they leaked within 15 minutes, because the rainfly is a lot smaller.
The exact same thing happened when I rain tested my Coleman Pop Up Tents as well.

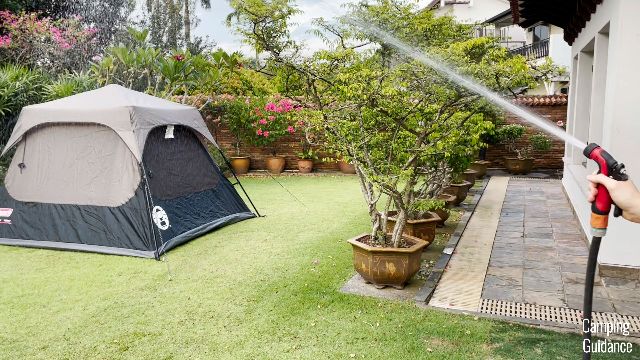
$500 Tent
As for my Wawona 6, well, I put this tent through 3 whole hours of heavy pouring rain, even heavier than the Sundome, and it stayed completely dry.
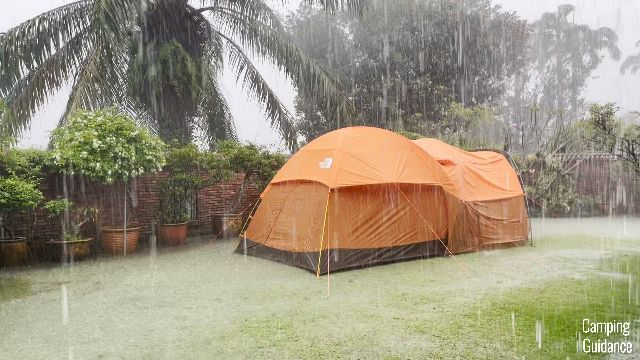
That’s the difference between expensive tents and budget tents. Why exactly do expensive tents stay dry for much longer? Well, I think there are 2 reasons.
10. Waterproof Rating
First, the waterproof rating.
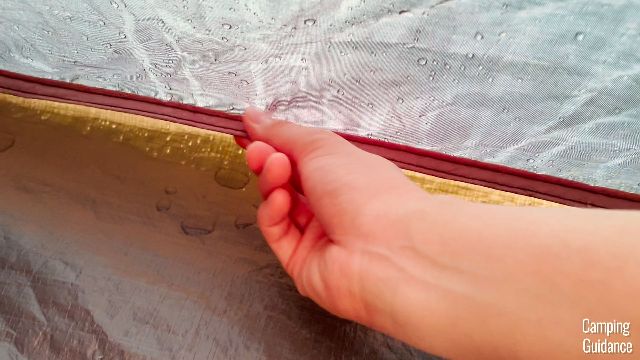
$500 Tent
For the Wawona 6, every single part of the tent has been treated with a 1,200 millimeter polyurethane coating. This includes not just the rainfly, the flooring, but also the tent body.
In fact, I rain tested my Wawona 6 through not just 3 hours of heavy afternoon pouring rain, but 3 days of this kind of rain, at least over 3 hours every single day.

And it was only after the third day that I found that the back wall was a little bit damp. It didn’t leak into the tent or anything, but it was slightly damp when I touched the wall.
$100 Tent
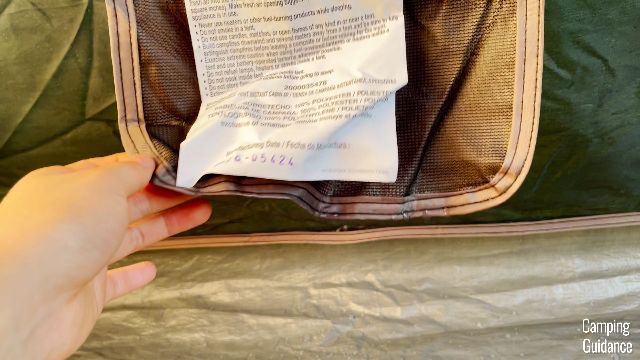
On the other hand, Coleman tents tend to not really advertise their waterproof rating, I don’t usually know what they are, and sometimes after my more thorough rain testing, I would find that the fabric actually absorbs the water instead of wicking it away. Definitely not as good.

11. Seam Taping
The second reason is the seam taping.
$500 Tent
For my Wawona 6, I checked the entire tent, and all the seam taping was perfect.
So basically, all the rainfly seams were taped, and on the inside of the tent, all the seams not covered by the rainfly have been seam taped. Yes, every single one.
$100 Tent
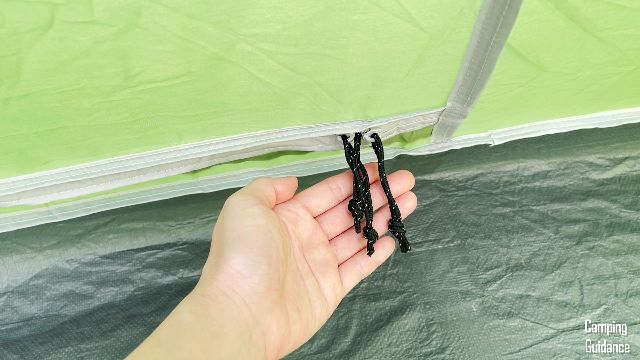
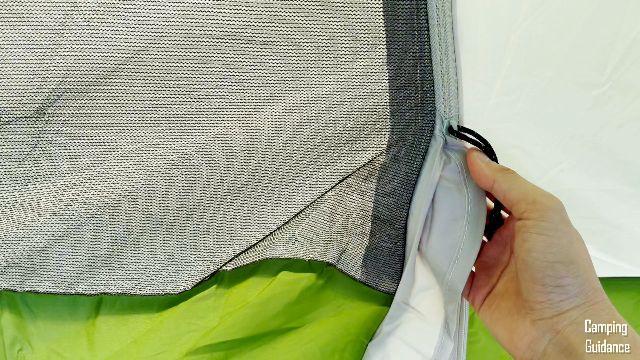
On the other hand, Coleman likes to use what they call their WeatherTec system, which includes inverted, but un-taped seams. And I find that these generally don’t hold up well to heavy rain.
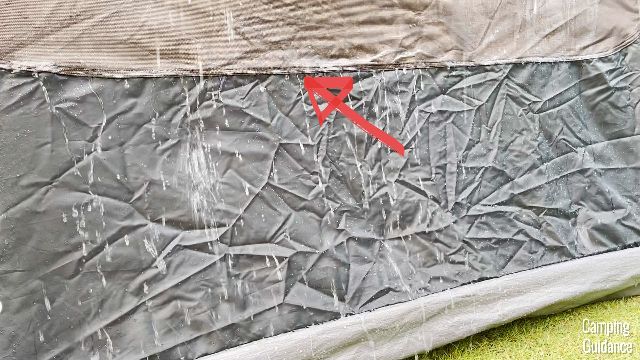
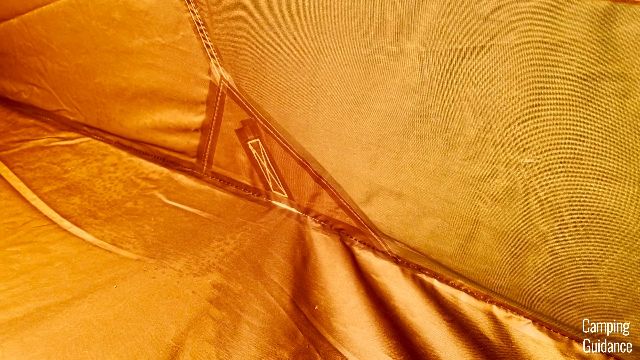
Here’s what the inverted bathtub flooring to tent body seam in the Sundome 6 looks like:
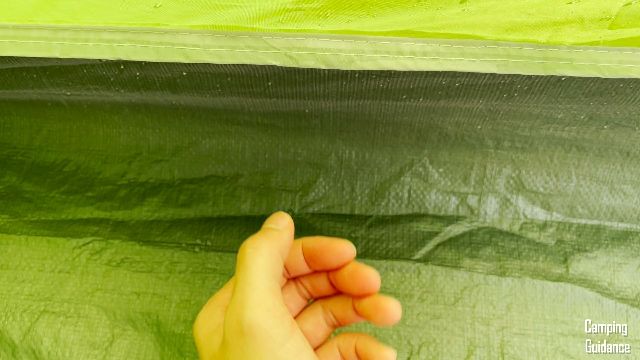
If you look closely in the picture above, you’ll find a few droplets of water on the floor next to my hand.
Pro Tip: The most leaking from my rain test actually came from these types of seams. So, if you’re expecting heavy rains, you gotta seal these seams yourself.
12. Materials Used
The materials used in expensive tents are definitely better than budget tents.
$500 Tent
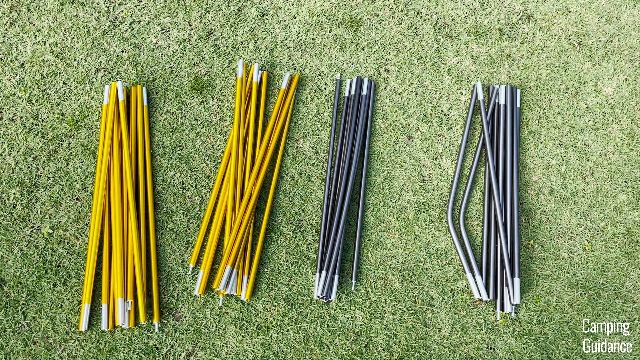
For my Wawona 6, the flooring is made of 150-denier polyester, the rest of the tent body and the rainfly is made of 75-denier polyester, and all 5 poles are made of high-quality DAC MX, which is top-of-the-line aluminum.

I found that these DAC poles were very user-friendly, they snapped together easily, and they didn’t even bend at all through my weeks of testing.
$100 Tent
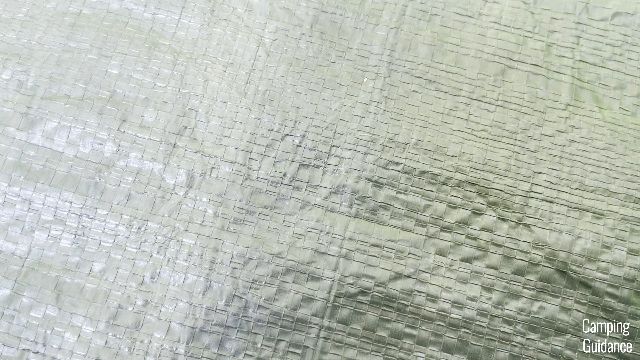
On the other hand, for my Sundome 6, you have pretty much all the budget materials, like polyethylene flooring, which is this really inexpensive tarp-like material, it’s not as nice to step on, it’s less smooth and sounds crunchier and louder when you step on it.
You also get slightly less thick rainflies and tent bodies, coming in at 68-denier polyester, and all the poles are usually made of fiberglass, so less sturdy and they break more easily.


For example, some of my thinner fiberglass poles from Coleman just snapped out of the box, like this rainfly pole from my Coleman Red Canyon 8:

13. Warranty Length
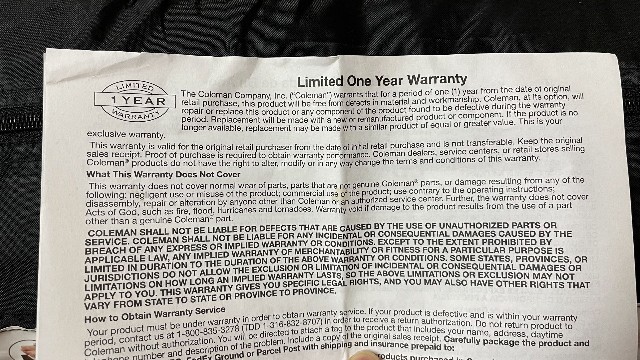
When it comes to the length of the warranty each brand provides, The North Face gives you a limited lifetime warranty, while Coleman gives you just a 1-year warranty. So, this is a pretty good indication of how long the brands are willing to back their product.

Conclusion
So, basically, that’s a pretty in-depth look at what budget tents will give you, and also what expensive tents will give you. Now, the question is, is it worth it?
Well, I think it depends on a few things. For example:
- Do you have a large budget?
- Is it your first-time trying out camping?
- Do you plan to camp often?
- Do you plan to camp in just fair weather?
When to Buy a Budget Tent
If it’s your first time camping, you don’t know if you’re gonna wanna camp more often, and there’s no need for insane rain protection or anything, you can just get a budget tent, like the Coleman Sundome 6.

I think it’s one of the better budget-friendly tents on the market, you get a pretty decent family camping tent for just $100.
When to Buy an Expensive Tent
On the other hand, for me personally, it’s not my first-time camping, I do camp quite often in the summer, sometimes in crazy, unpredictable rains, so I would want to splurge a little bit more on a more expensive, premium tent, like the Wawona.

Ultimately, I know that this tent will last me for years, so, on a per-year basis, I think the Wawona will give me more bang for my buck, rather than just throwing out budget friendly tents year after year.
Bonus: Must Read!
But I know not everyone will be able to afford an expensive camping tent, so if you’re looking for a good quality budget-friendly tent that suits your budget, you can check out this article here (coming soon!): I Bought & Tested the Best Budget Tents Under $100!
For now, you can check out this article, for a way more in-depth comparison of both the Sundome 6 and Wawona 6, pitted against 5 other 6-person tents.
Or, check out the $500 tent (Wawona 6):
Or, check out the $100 tent (Sundome 6):