7 tests × 7 tents
The 7 Best 6-Person Tents (Bought & Tested!)
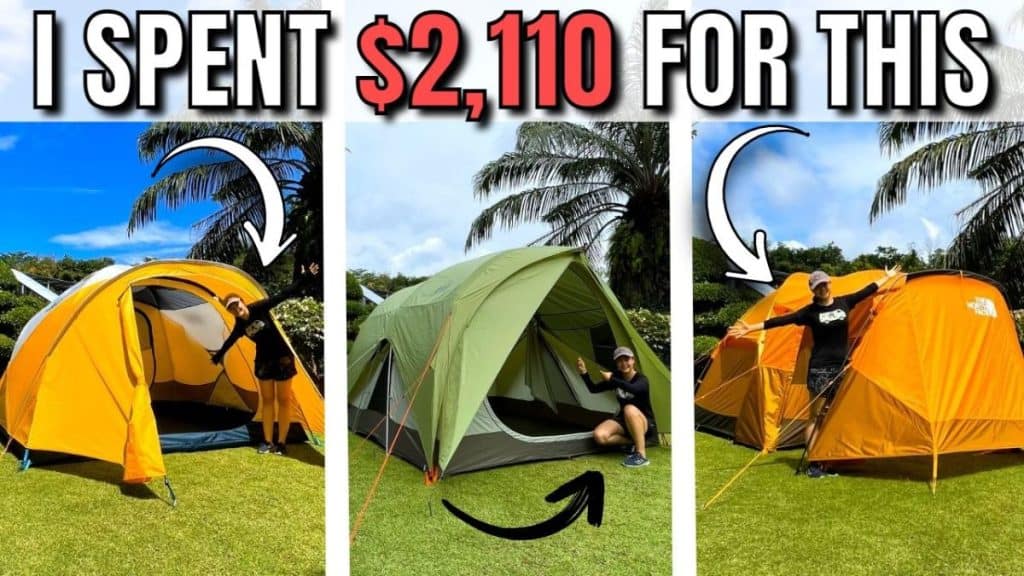
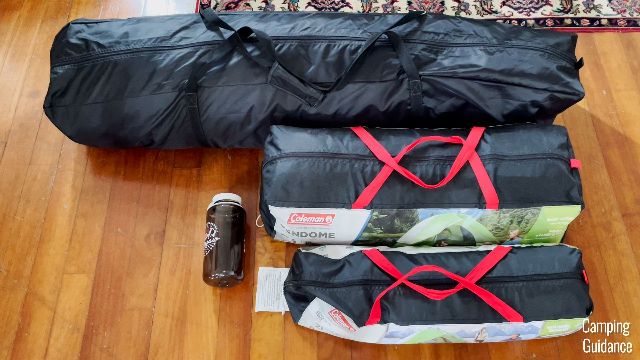
I spent a total of $2,110 buying these seven 6-person tents, and a good 6 months testing all of them.
This page contains affiliate links, and that means that I may earn a commission if you buy something, at no extra cost to you. You can find my full disclosure policy here.
The Podium
Quick Summary
Here’s everything I recommend.
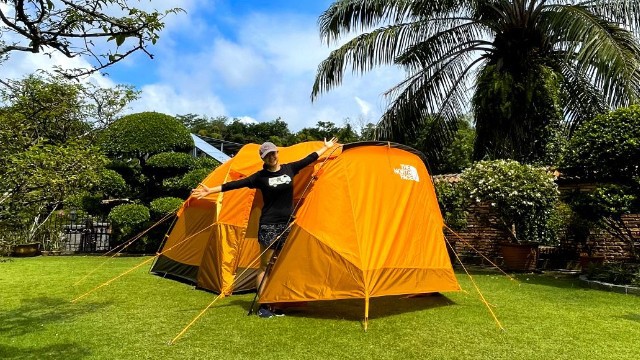
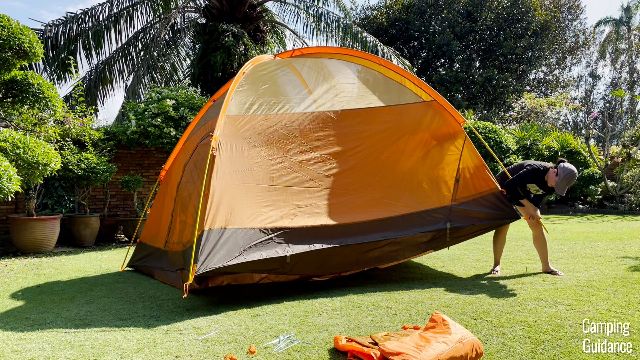
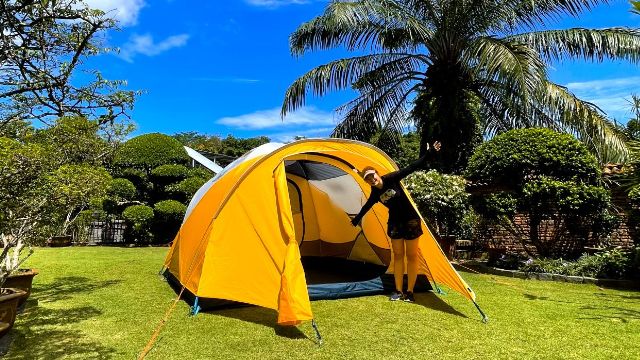
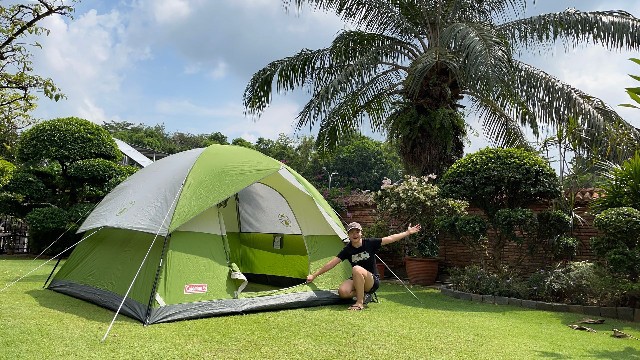
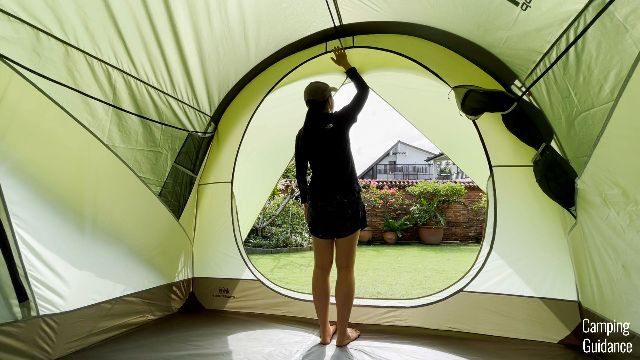
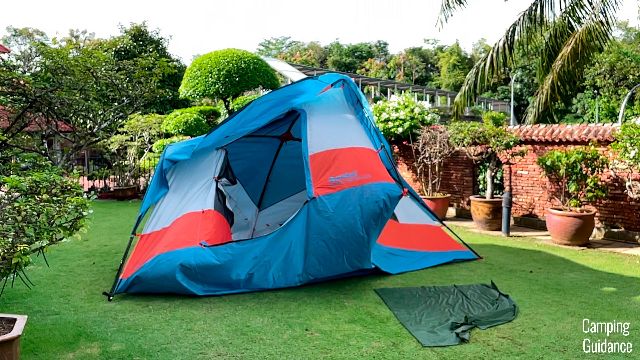
The North Face Wawona 6
The best overall score of all 7 tents, and my best all-rounder — rain or shine.
8.1/ 10 overall

Runner Up Pick
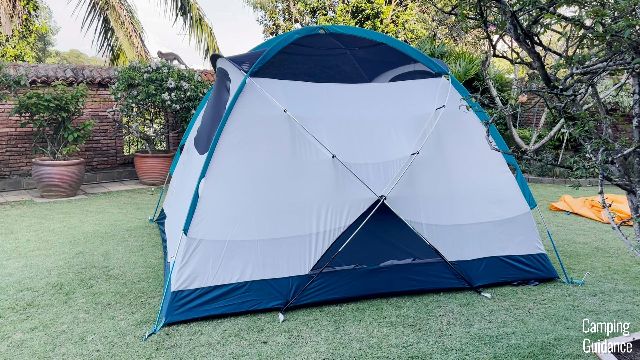
REI Co-op Base Camp 6
 7.8/10
- Also: Best for shoulder season
- Full-length rainfly
- Most user-friendly vents
- Most storage: 14 pockets, 20 loops
- Vestibules: 52.4 sq. ft. total
- Weight: 20.6 lbs
Fastest Set Up
Caddis Rapid 6
 7.0/10
- Sets up in 9.5 mins
- Packs away in 7.5 mins
- Superb instant mechanism
- Thickest fabric: 190D-210D polyester
- Base area: 95.1 sq. ft.
- Peak height: 77 in
Best Budget Pick
Coleman Sundome 6
 6.8/10
- Least expensive
- Lightweight: 16.0 lbs
- Surprising amount of ventilation
- Set up (1P): 11.5 mins
- Base area: 92.6 sq. ft.
- Peak height: 74.5 in
Jump to: The Rest of the Best ↓ How I Tested ↓ Why You Can Trust Me ↓
The video
If you prefer watching to reading, check out my video here instead.

Camping Guidance
30K+
Table of contents
Best Overall
The North Face Wawona 6
Test scorecard
The North Face Wawona 6
8.1out of 10
Ease of Use6.5
Spaciousness7.8
Features8.6
Ventilation7
Rain Protection9.7
Quality9.3
Portability7.5
Key info
- Peak height77 in
- Base area75.7 sq. ft.
- Vestibule51.0 sq. ft.
- Weight19.4 lbs
- Packed size26 x 16 x 10 in
- Storage9 pockets, 8 loops
- Set up (1P)20 mins
- Take down (1P)14 mins
Pros
- Best rain and wind protection
- No seam sealing required
- Highest quality DAC MX poles
- Most spacious vestibule
- Perfect for summer (both hot and rainy days)
Cons
- Inner tent base area is smaller than average
- Requires breaking in before use
TL;DR
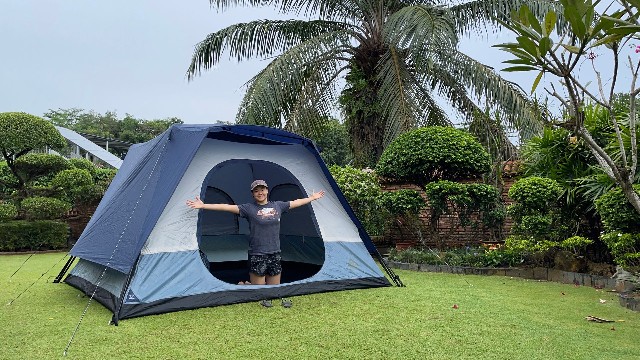
The Wawona 6 is easily my top pick — it has the best overall score, and it’s my best all-rounder tent, rain or shine.
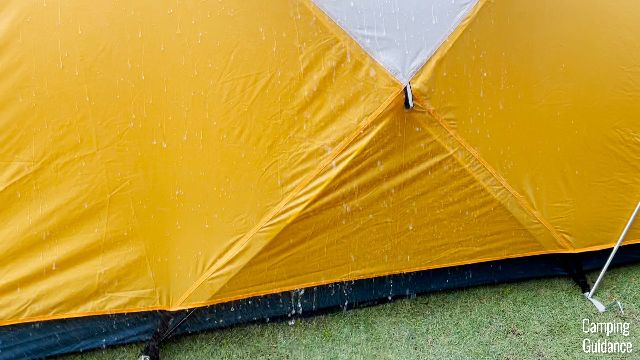
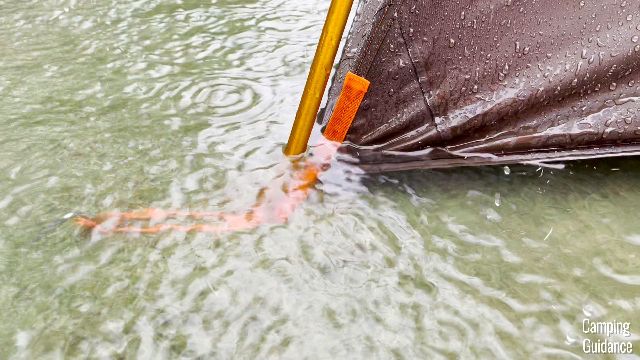
It scored better than every other tent here in not just quality, but rain and wind protection too. I put my Wawona through the heaviest rain test of all my tents — after 3 hours of non-stop super heavy rain, it was completely dry.

You don’t have to seal any of the seams either — every single seam is perfectly taped. My yard actually flooded during that rain, one corner sat in 2 inches of water, and there wasn’t any leaking into the tent.
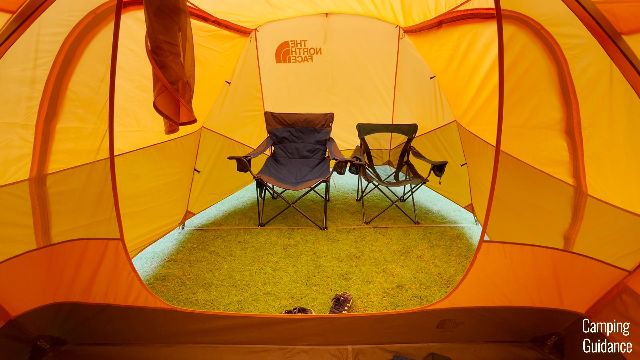
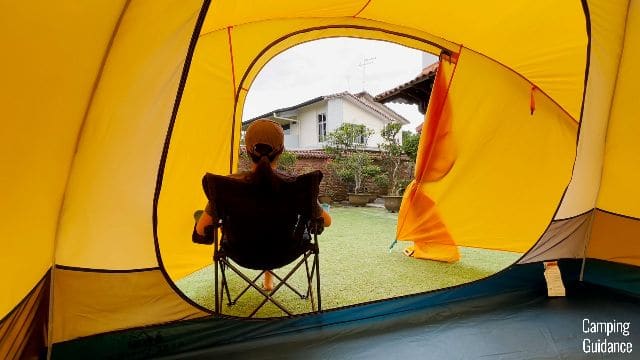
It also has the most awesome vestibule, super useful for storing wet gear. The shortest height in it is still a whopping 65 inches, so I could stand upright throughout. (I’m 5’3.)
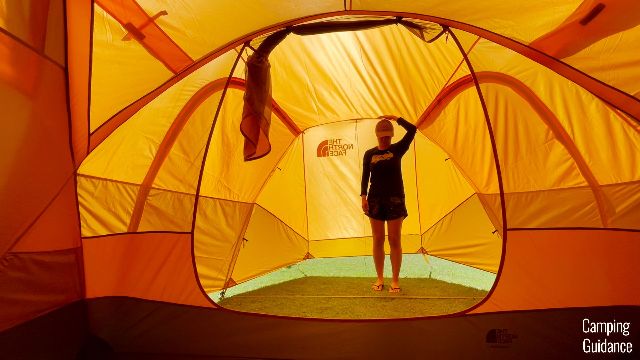
It fits 2 camping chairs with plenty of space left over for a big camping table — easily the most spacious vestibule of all the tents here.
For wind, its top-of-the-line DAC MX poles are much stronger and sturdier than every other tent’s here — through crazy rains and some winds, none of mine bent at all, even in the slightest.
Just bear in mind that the inner base area is the smallest on this list — I’d recommend a maximum of 3-4 adults in the tent, definitely not 6.
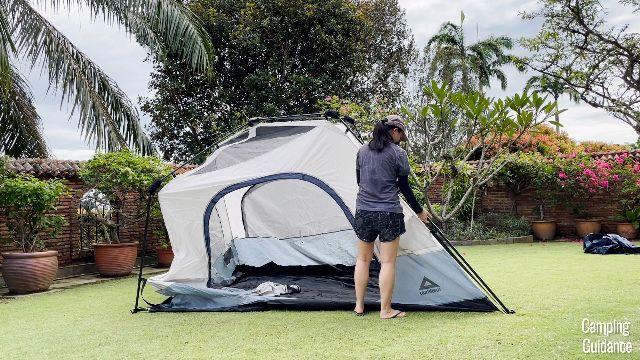
Also, the first time I set it up, the last corner took me ~30 minutes, no joke. It gets so much easier after the first use — so break this tent in in your yard before going camping.
Check out the The North Face Wawona 6:
Related: Wawona 6 V.S. Base Camp 6 · Wawona 6 V.S. Wonderland 6 · Wawona 6 V.S. Sundome 6
Runner Up Pick
REI Co-op Base Camp 6
Test scorecard
REI Co-op Base Camp 6
7.8out of 10
Ease of Use6.5
Spaciousness7.8
Features8.5
Ventilation6
Rain Protection8.7
Quality9
Portability8
Key info
- Peak height73 in
- Base area82.5 sq. ft.
- Vestibule52.4 sq. ft.
- Weight20.6 lbs
- Packed size28 x 13 x 9.5 in
- Storage14 pockets, 20 loops
- Set up (1P)17.5 mins
- Take down (1P)15 mins
Pros
- Full-length rainfly
- Most user-friendly vents
- 2 big vestibules
- Lots of storage
Cons
- Carry bag can be improved
- Less suitable for summer
TL;DR
After the Wawona, my runner up pick has got to be the REI Co-op Base Camp 6 — the second best score, and it performed almost as well as the Wawona in all 7 tests.
Here’s how to decide between these 2 tents — while the Wawona is more of a 3 season tent, for camping in summer, the Base Camp is more of a 3+ season tent, for camping in the shoulder season. In fact, it’s the only 3+ season tent on this list.
First, it’s the only tent here with a fantastic full-length rainfly. It keeps the heat in on colder days, and it works incredibly well in heavy rain — it survived my 1-hour hose test, which is much heavier than your average rain.
There’s also a lot less mesh on the inner tent itself, so it never feels drafty in the cold. In comparison, the Wawona’s entire front wall is almost entirely mesh — not made for the shoulder season at all.
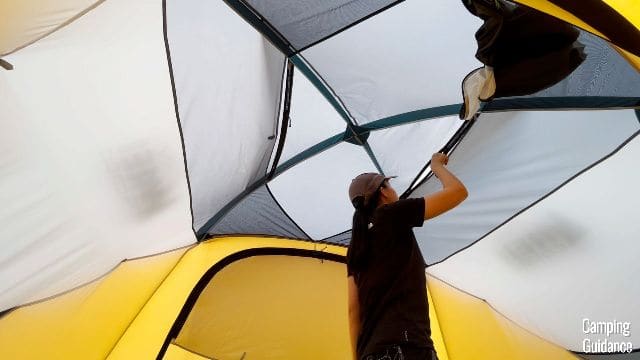
Second, it has the most user-friendly vents of all the tents on this list — the only vents I could open and shut from the inside of the tent.
You also get 2 huge vestibules — I used the smaller one for storing gear, and the bigger one for lounging around.
And for a 6-person tent, a whopping 14 pockets and 20 loops — easily the most storage options of all the tents here.
The biggest con has got to be the carry bag. It’s side-loading and not even appropriately big enough, so it can be a struggle to get everything back in — I’d change it out for a more user-friendly stuff sack or duffel bag.

Check out the REI Co-op Base Camp 6:
Related: Base Camp 6 V.S. Wawona 6 · Base Camp 6 V.S. Wonderland 6
Fastest Set Up
Caddis Rapid 6
Test scorecard
Caddis Rapid 6
7.0out of 10
Ease of Use10
Spaciousness7.3
Features4.8
Ventilation8.3
Rain Protection5.4
Quality8.7
Portability3
Key info
- Peak height77 in
- Base area95.1 sq. ft.
- Weight25.0 lbs
- Packed size50 x 15 x 9.5 in
- Storage6 pockets, 1 loop, 1 loft
- Extras1 power port
- Set up (1P)9.5 mins
- Take down (1P)7.5 mins
Pros
- Super fast set up
- Equally fast pack away
- High quality instant mechanism
- Great ventilation
- Super thick fabric
Cons
- Huge packed size
- Not for strong winds and rain
TL;DR
If you’re looking for a 6-person tent that’s super easy to set up, the Caddis Rapid 6 is the pick — the only instant tent on this list, and the only one that sets up in less than 10 minutes.
One heads up: Caddis has since discontinued the Rapid 6, but it’s still in stock at the retailers below.
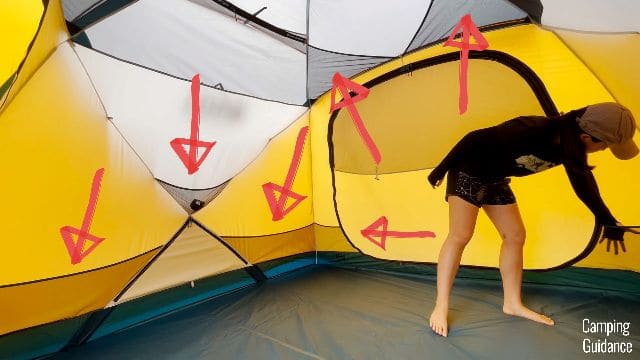
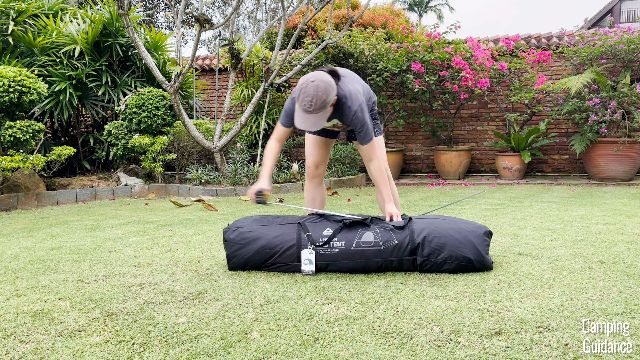
The other cabin tents here took me anywhere between 50-100% longer to set up. The instant mechanism is that fast — all the poles are pre-attached, so I just unfolded them, extended each pole upwards, and set up the rainfly. 9.5 minutes, and packing away took just 7.5.
The instant mechanism is very high quality too. The center hub is thoughtfully designed and user-friendly — better than most instant tents I’ve tested — and the inside underneath the hub and joints is reinforced with extra fabric for added durability.
Ventilation is really good, with pretty big windows on every wall (3 of them become huge vents with the rainfly in place), and the fabric is super thick — 190D polyester for the body and 210D for the flooring, against 75D-150D on everything else here.
The trade-off: instant tents are long. Packed up, this one is at least one and a half to two times longer than the other tents on this list.
And the exposed mesh at the front of the tent means it’s not for strong winds and rain — the wind will blow the rain right into the tent.
Check out the Caddis Rapid 6:
Best Budget Pick
Coleman Sundome 6
Test scorecard
Coleman Sundome 6
6.8out of 10
Ease of Use9
Spaciousness5.8
Features5.8
Ventilation7.5
Rain Protection4.9
Quality6.3
Portability9.5
Key info
- Peak height74.5 in
- Base area92.6 sq. ft.
- Weight16.0 lbs
- Packed size27 x 12 x 9.5 in
- Storage2 pockets, 1 loop
- Extras1 e-port
- Set up (1P)11.5 mins
- Take down (1P)10 mins
Pros
- Very inexpensive
- Simple set up & pack away
- Surprising amount of ventilation
- Lightweight
Cons
- Waterproofing work is definitely required for heavy rain
- Not enough storage
TL;DR
The biggest pro of the Coleman Sundome 6 is easily its highly inexpensive price-tag — I’ve tested and found it to be one of the best budget 6-person tents out there.
It has a surprising number of pros beyond the price. Set up and pack away are very manageable as a single person — after the instant Caddis, the Sundome is actually the quickest here.
It also has tons of rainy day ventilation — 2 mesh wall vents spanning the entire width of the tent, plus a small ground vent at the back, for a whopping 3 vents in total.
And it’s lightweight — the second-lightest tent on this list.
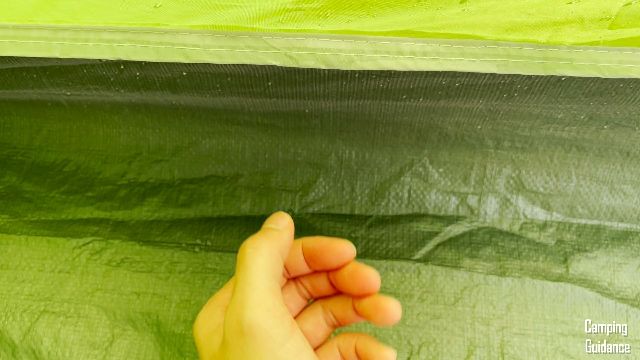
The biggest con is prepping it for rainy days. Seal the bathtub flooring seam at the bottom of the tent before any heavy rain — it’s always the first place to leak (after just ~30 minutes) — and a waterproofing spray for the fabric is useful too. Higher quality tents come with taped seams; for budget tents like this one, you’ve got to do it yourself.
Storage is the other big miss — just 2 pockets and 1 lantern loop. That’s way too little for a 6-person tent.
Everything else I tested
The Rest of the Best
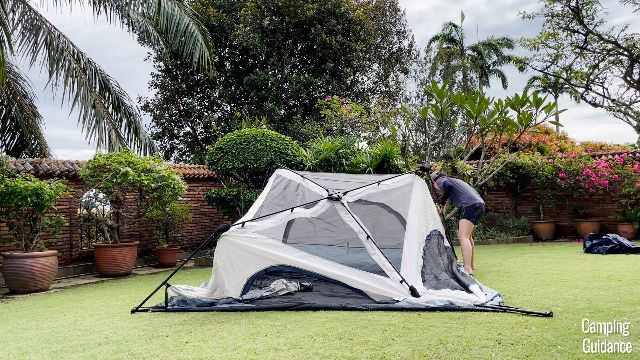
Above are my 4 Top Picks. The other 3 tents I bought and tested have all since been discontinued — I can’t recommend a tent you can’t buy, but their tested data stays in every table below, and my full reviews of all 3 stay up:
- REI Co-op Wonderland 6 (7.5): My old Best Cabin Tent pick — the most vertical walls I’ve ever seen in a cabin tent, 2 of the best doors I’ve ever used, and tons of mesh for hot days. REI has discontinued it, so for a cabin tent my Caddis Rapid 6 is the pick now.
- Eureka Copper Canyon LX 6 (7.0): The highest peak height here — a full 7 feet, so I could stand up everywhere inside — with a fantastic carry bag and a friendly price. Eureka has discontinued it.
- NTK Cherokee 6 (6.5): I bought it to pit against the Sundome, and the Sundome 6 beat it in almost every way — the Cherokee is only a little lighter and more compact, with slightly bigger pockets. It has since been discontinued too.
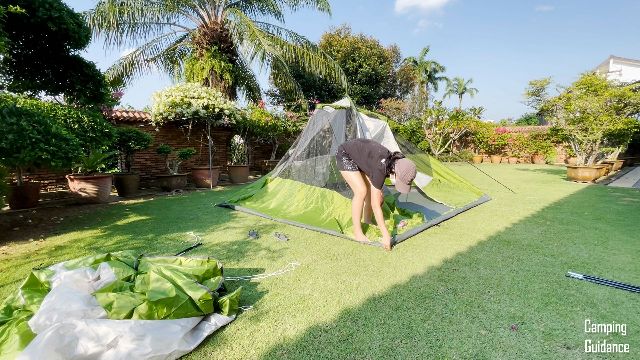
The 7 testsHow I Tested All 7 Tents
I put each 6-person tent through 7 scored tests: ease of use, spaciousness, comfort and features, ventilation, weather protection, quality and portability — over a good 6 months of testing in my own yard.
- All my own measurements: The lengths, widths and base areas below are my personal calculations, and may differ from the brands’ marketed specifications
- Timings are 1-person: I was able to set up every one of these tents on my own, including staking and guying out
- The 3 discontinued tents stay in the data: The REI Wonderland 6, Eureka Copper Canyon LX 6 and NTK Cherokee 6 are in every table below — the testing was real and earned — they just aren’t buyable any more
Ease of Use
For ease of use, I looked at how easily I could set up, as well as take down and pack away, each of these 6-person tents — my highest rated first:
| 6-Person Tent | Set Up (1P) | Pack Away (1P) |
|---|---|---|
| Caddis Rapid 6 winner | 9.5 mins | 7.5 mins |
| Sundome 6 | 11.5 mins | 10 mins |
| Cherokee 6 (discontinued) | 13 mins | 10 mins |
| Eureka LX 6 (discontinued) | 14 mins | 12 mins |
| Base Camp 6 | 17.5 mins | 15 mins |
| Wawona 6 | 20 mins | 14 mins |
| Wonderland 6 (discontinued) | 19.5 mins | 16.5 mins |
All timings are 1-person, and include staking and guying out the tents.
- The instant mechanism is why the Caddis wins: All the poles are pre-attached — I just unfolded them, extended each pole upwards, and set up the rainfly
- Simple domes are next: The Sundome and Cherokee share the same 3-pole set up — 2 criss-crossed for the tent body, 1 for the rainfly. The Cherokee’s rainfly straps have to be tied up though, which took me 1.5 minutes longer than the Sundome’s Velcro attachments
- Cabin tents take a little longer than dome tents: More poles to deal with — the Eureka has a standard 6-pole cabin set up. And the more features a tent has, the longer it takes: the Base Camp adds 2 extra body poles plus 2 vestibules
- The Wawona took me the longest: Its rainfly has a lot of fabric and pole clips that always catch on the tent fabric or the poles, so it takes me 2-3 tries to get it up, compared to 1 try for the rest
- Top-loading carry bags are the easiest: The Sundome, Cherokee and Eureka all have decently big top-loading openings, and the Wawona’s opening is so huge that even its extra material packs away easily
- Both REI bags are side-loading: The opening is a lot smaller, and both my REI tents were more of a struggle to get packed up

Spaciousness
For spaciousness, I looked at the peak height, the livability, and the base area of each tent — my highest rated first:
| 6-Person Tent | Peak Height | Floor (L x W) | Base Area | Vestibule | Total Area |
|---|---|---|---|---|---|
| Eureka LX 6 (discontinued) | 84 in | 9.67 x 9.67 ft | 93.4 sq. ft. | — | 93.4 sq. ft. |
| Wonderland 6 (discontinued) | 81 in | 10.0 x 8.25 ft | 82.5 sq. ft. | — | 82.5 sq. ft. |
| Base Camp 6 | 73 in | 9.08 x 9.08 ft | 82.5 sq. ft. | 52.4 sq. ft. | 134.9 sq. ft. |
| Wawona 6 | 77 in | 9.67 x 7.83 ft | 75.7 sq. ft. | 51.0 sq. ft. | 126.7 sq. ft. |
| Caddis Rapid 6 | 77 in | 9.75 x 9.75 ft | 95.1 sq. ft. | — | 95.1 sq. ft. |
| Sundome 6 | 74.5 in | 9.67 x 9.58 ft | 92.6 sq. ft. | — | 92.6 sq. ft. |
| Cherokee 6 (discontinued) | 70 in | 9.58 x 9.58 ft | 91.8 sq. ft. | — | 91.8 sq. ft. |
Floor and base area are my own measured calculations of the inner tent; Total Area adds the vestibules back in. The Base Camp’s vestibule area splits into a 31.1 sq. ft. front and a 21.3 sq. ft. back; the Wawona’s single vestibule measures 8 ft 3 in at its longest by 7 ft at its widest.
- A humongous 20 sq. ft. spread: Between the smallest inner tent (the Wawona, 75.7 sq. ft.) and the biggest (the Caddis Rapid, 95.1 sq. ft.) — but only the Wawona and Base Camp have vestibules, which flips the totals their way
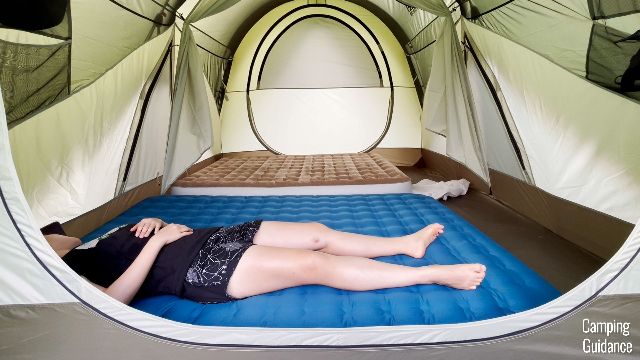
- Wall slope decides livability: Basic 2-pole domes (the Sundome and Cherokee) slope inwards the most — my head grazes the wall when I sit up at the sides of the tent
- Complex domes claw that space back: The Base Camp’s 4 intersecting poles and pole clips pull the fabric outwards — my head doesn’t even touch the wall — and the Wawona’s extra front pole gives it a completely vertical front wall
- I could stand up everywhere in the cabin tents: The lowest heights in the Eureka and Caddis are about 66 and 68 inches — taller than my 5’3
- The Wonderland is the most spacious inside: Completely vertical left and right walls, and the peak height runs the entire length of the tent (now discontinued)

- All 7 fit 6 single sleeping pads: Even the smallest Wawona — but after the 6 pads go in, there’s hardly any space leftover for anything else
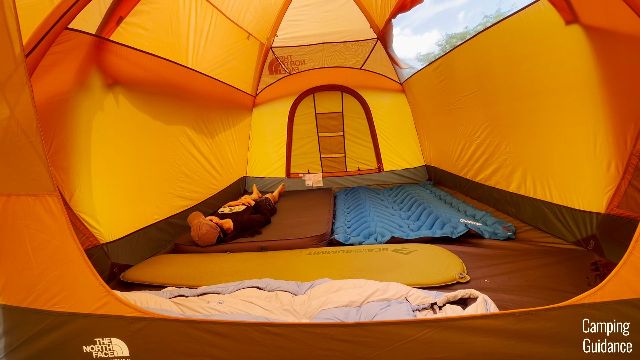
- Only the Wonderland fits 2 true queen beds: Its base is a rectangle. The Base Camp fits 1, and the rest fit 2 slightly-smaller-than-queen airbeds at most
Comfort and Features
For comfort and features, I focused on the door quality, the storage options, plus any other features — my highest rated first:
| 6-Person Tent | Doors | Biggest Door | Pockets | Lofts | Loops | Extras |
|---|---|---|---|---|---|---|
| Wonderland 6 (discontinued) | 2 | 66 x 64 in | 8 | 0 | 7 | 1 divider, 2 awnings |
| Wawona 6 | 2 | 60 x 58 in | 9 | 0 | 8 | — |
| Base Camp 6 | 2 | 74 x 59 in | 14 | 0 | 20 | — |
| Eureka LX 6 (discontinued) | 1 | 58 x 50 in | 4 | 2 | 5 | 1 power port |
| Sundome 6 | 1 | 54 x 42 in | 2 | 0 | 1 | 1 power port |
| Cherokee 6 (discontinued) | 1 | 51 x 43 in | 2 | 0 | 1 | 1 power port |
| Caddis Rapid 6 | 1 | 58 x 55.5 in | 6 | 1 | 1 | 1 power port |
Doors counts the inner tent only — the Wawona and the Base Camp each add 2 vestibule doors on top.
- The best doors I’ve seen in a family camping tent: The Wonderland’s — huge, super tall (72.5 in, so no ducking), YKK zippers, completely snag-free and one-handed in just 3 seconds, with a pocket to tuck the door fabric into (now discontinued)
- The Wawona’s front door is second best: Also huge and snag-free, though rolling the fabric up and tying its 2 toggles takes about 15 seconds — and its back door is super small, so I had to duck through that one
- The Base Camp’s doors are huge but not as tall: I had to tilt my head a little at 62.5 inches, and zipping up past one bend sometimes needs 2 hands, because there are no extra stake loops beneath the door
- 1 door is already a big downgrade: The Sundome, Cherokee, Eureka and Caddis have 1 smaller door each, I had to duck through all of them, and each has a rain flap that sometimes gets in the way of the zippers
- Surprisingly, the Eureka and Caddis doors weren’t great: The Eureka’s was super tight until it broke in after a few days, and the Caddis’ was the snaggiest of all the tents in this article
- Storage is where the premium tents pull away: The Base Camp has huge pockets and loops running all around the tent — 34 storage spots in total — while my Sundome has 2 pockets and 1 loop. That’s it
- Weirdly, only the less expensive tents have power ports — and only the Wonderland comes with a room divider
Ventilation
For ventilation, I looked at both hot day and rainy day ventilation — my highest rated first:
| 6-Person Tent | Windows | Vents | Doors | Stays Open in Heavy Rain |
|---|---|---|---|---|
| Caddis Rapid 6 winner | 4 | 3 | 1 | 1 window + 3 vents |
| Wonderland 6 (discontinued) | 4 | 2* | 2 | 2 windows |
| Sundome 6 | 2 | 3 | 1 | 2 windows + 3 vents |
| Wawona 6 | 3 | 4 | 2 + 2 vestibule | 4 vents |
| Base Camp 6 | 2 | 4 | 2 + 2 vestibule | 4 vents |
| Eureka LX 6 (discontinued) | 4 | 0 | 1 | 1 window |
| Cherokee 6 (discontinued) | 1 | 2 | 1 | 2 vents |
*The Wonderland’s 2 above-door vents are so small they didn’t do very much — I didn’t even consider them to be vents.
- Hot days — the Wonderland is in a league of its own: Mesh covers easily more than half the tent, extending down the sides, with 360 views from its 4 windows and cross-ventilation from its 2 huge doors (now discontinued)
- The other cabin tents follow: The Caddis has pretty big windows on every wall — 5,995 sq. in. of window ventilation in total — and the Eureka is about 5% behind it, at 5,697 sq. in.
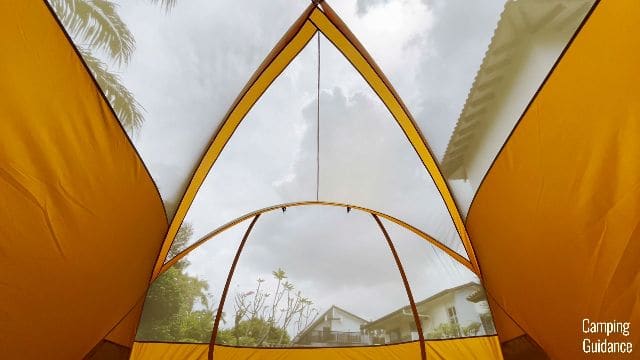
- The best-ventilated dome is the Wawona: A good three-quarters of its front wall is mesh, all 4 walls have mesh panels joining at the top, and its 4 doors — 2 in the inner tent, 2 in the vestibule — give you a ton of cross-ventilation
- Rainy days — the Sundome is, surprisingly, the best: Its 2 mesh wall vents span the entire width of the tent, there’s a small ground vent too, and I could crack the 2 windows open if the wind isn’t too heavy
- Only the Base Camp’s vents work from inside: Its 2 roof and 2 floor vents were the only ones I could open and shut without going out of the tent
- The Eureka has no vents at all: Only its front window could be cracked open slightly — and the Cherokee has just 2 small mesh wall vents
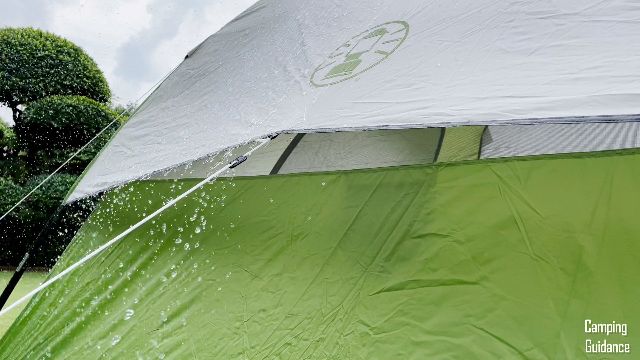
Weather Protection
For weather protection, I looked at both rain and wind. Each tent went through a pretty brutal 1-hour heavy rain test — and when it didn’t rain, I made my own with a water hose:

| 6-Person Tent | Heavy Rain (1 Hr) | Tent Shape | Guylines | Poles |
|---|---|---|---|---|
| Wawona 6 winner | Passed | Dome | 11 | DAC MX |
| Base Camp 6 | Passed | Dome | 6 | Aluminum |
| Wonderland 6 (discontinued) | Failed | Cabin | 14 | Aluminum |
| Caddis Rapid 6 | Failed | Cabin | 7 | Steel |
| Eureka LX 6 (discontinued) | Failed | Cabin | 8 | Steel & fiberglass |
| Sundome 6 | Failed | Dome | 6 | Fiberglass |
| Cherokee 6 (discontinued) | Failed | Dome | 4 | Fiberglass |
- The Wawona went through 3 hours, not 1: Non-stop super heavy rain, plus a flooded yard with one corner sitting in 2 inches of water — and it still passed with flying colors, every seam perfectly taped
- The Base Camp passed too: A full hour under the hose, thanks to its full-length rainfly. Its flooring seams are only inverted though, not taped — spraying the tent body directly leaked at those seams after an hour
- Cabin tents leak sooner: The rainfly is much smaller, so more water runs over the tent body and into the seams — the Wonderland leaked at its divider-loop seams, the Eureka at its vertical seams, and the Caddis at its corner seams
- The 2 budget tents leaked at 35-40 minutes: Seam taping in budget tents is usually always lacking — seal the seams and use a waterproofing spray before any heavy rain
- Wind — cabin tents are definitely not great: Their vertical side walls don’t shed wind. My Eureka blew over in a light 5-10 mph breeze the moment I removed the stakes and guylines
- The Wawona held 10-20 mph winds like a champ: The best-equipped poles here, and I had almost the entire tent guyed out — the more guylines, the better your tent does in wind
Quality
For quality, I looked at the flooring, the tent body, the poles, zippers, mesh, and the seams — my highest rated first:
| 6-Person Tent | Flooring | Body & Rainfly | Poles | Zippers | Mesh |
|---|---|---|---|---|---|
| Wawona 6 winner | 150D polyester | 75D polyester | DAC MX | SBS | Micro mesh |
| Base Camp 6 | 150D polyester | 75D polyester | Aluminum | YKK (doors only) | Micro mesh |
| Wonderland 6 (discontinued) | 150D polyester | 75D polyester | Aluminum | YKK (doors only) | Micro mesh |
| Caddis Rapid 6 | 210D polyester | 190D polyester | Steel | No brand | Micro mesh |
| Eureka LX 6 (discontinued) | 75D polyester | 75D polyester | Steel & fiberglass | SBS | Micro mesh |
| Sundome 6 | Polyethylene | 68-75D polyester | Fiberglass | No brand | Regular mesh |
| Cherokee 6 (discontinued) | Polyethylene | 68D polyester | Fiberglass | No brand | Regular mesh |
- DAC MX trumps regular aluminum: The Wawona’s top-of-the-line poles snap together super easily and are a lot stronger — a friend even ran his Wawona through 50 mph winds with only a slight bend to show for it
- My Wonderland’s regular aluminum poles did bend: A few of them, after some use — without even going through a strong wind test

- The Caddis’ fabric thickness surprised me: 190D body and 210D flooring is a lot thicker than even the more expensive tents here — yet it skimped on no-brand zippers
- YKK only on the REI doors: Both REI tents’ windows still get no-brand zippers, while the Wawona and Eureka run SBS — a grade lower than YKK, but on both the doors and the windows
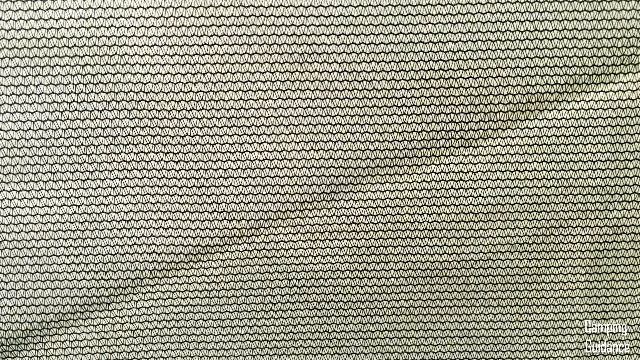
- Micro mesh vs mosquito netting: The first 5 tents’ mesh feels like no-see-um, with really fine holes; the Sundome and Cherokee get regular netting with much bigger holes
- Premium seams are reinforced and consistent: The budget tents have more loose threads, less consistent stitching, some larger holes in the seams — and their seam taping is really lacking
Portability
For portability, I looked at the weight as well as the packed size of each 6-person tent — my highest rated first:
| 6-Person Tent | Weight | Packed Size |
|---|---|---|
| Cherokee 6 (discontinued) | 15.2 lbs | 26 x 12 x 8.5 in |
| Sundome 6 | 16.0 lbs | 27 x 12 x 9.5 in |
| Base Camp 6 | 20.6 lbs | 28 x 13 x 9.5 in |
| Wawona 6 | 19.4 lbs | 26 x 16 x 10 in |
| Eureka LX 6 (discontinued) | 22.4 lbs | 29 x 13 x 9 in |
| Wonderland 6 (discontinued) | 23.6 lbs | 30 x 15 x 10 in |
| Caddis Rapid 6 | 25.0 lbs | 50 x 15 x 9.5 in |
- Budget tents are lighter: Thicker materials mean more weight, and steel and aluminum poles are heavier than fiberglass — that’s the general rule, though DAC MX is actually more lightweight than regular aluminum
- The Caddis is the trade-off: Instant tents pack much longer — at 50 inches, it’s 40% longer than any other regular 6-person cabin tent
All Test Scores
The scoreboard
Based on the 7 tests above, here are the overall scores of all seven of these 6-person tents.
- The North Face Wawona 6Best Overall8.1
- REI Co-op Base Camp 6Runner Up Pick7.8
- REI Wonderland 6 (discontinued)7.5
- Caddis Rapid 6Fastest Set Up7.0
- Eureka Copper Canyon LX 6 (discontinued)7.0
- Coleman Sundome 6Best Budget Pick6.8
- NTK Cherokee 6 (discontinued)6.5
Highlighted rows = my 4 picks reviewed above. The REI Wonderland 6 (7.5) genuinely outscored two of them, but REI has discontinued it — as with the Eureka Copper Canyon LX 6 and NTK Cherokee 6, its tested data stays in every table above, minus the buy links.
See every sub-score side by side

The methodWhy You Can Trust Me
Unlike most 6-person tent reviews (especially these “Best 6-Person Tents” reviews) that you find on the internet, I actually own, used and thoroughly tested all of these tents.
$2,110
The first part is buying all seven of these 6-person tents with my own savings — I blew my budget of $2K! I don’t accept free products from manufacturers, and I don’t accept sponsored posts or YouTube videos that could make me give a biased review.
6 months
Next came a good 6 months of testing all of them — setting up, taking down and rain testing every single tent in my own yard — not including the time it took to put together this series of articles and YouTube videos.
7 tests
Every tent went through the same 7 scored tests: ease of use, spaciousness, comfort and features, ventilation, weather protection, quality and portability. Every score in the matrix above comes from those tests.
30,000+
I also run a YouTube channel with over 30,000 subscribers that focuses just on reviewing camping gear. It’s my jam 🙂
Because I’m dedicated to giving you the very best information you can possibly find on these tents.
Every figure above is from my own testing – measured by hand, bought with my own money.