Coleman Red Canyon 8-Person Tent Review (Bought & Tested!)
This page contains affiliate links, and that means that I may earn a commission if you buy something, at no extra cost to you. You can find my full disclosure policy here.
Rating and Summary
This Coleman Red Canyon 8-Person Tent is a shockingly huge tent (that fits 10 people, not just 8 people), while being very feature-rich and incredibly inexpensive at the same time.
However, I found that the rainfly fiberglass poles were subject to a lot of tension (so arm yourself with a couple of pole repair splints, just in case), and I also recommend applying some seam sealant to the bathtub flooring seam (if you’re expecting super heavy rains).
But overall, I feel that the many pros definitely outweigh the relatively few cons, and I quite enjoyed my camping experience in this Red Canyon. Read on to find out more about this tent, as well as more pros and cons!
If you enjoyed this video, please consider subscribing to my channel here:
Check out the Coleman Red Canyon 8-Person Tent:
Product Details
Here’s what we’ll discuss here:
- Unboxing
- In the Box
- Specifications
Unboxing
I bought my Coleman Red Canyon 8-Person Tent from Amazon, and here’s what it looked like directly out of the Amazon cardboard box:

In the Box
Inside the package, I got a gear loft, poles for the tent, a floor mat, a carry case with 17 stakes, 2 room dividers, and the tent body and rainfly.
Specifications
Here’s all the data (including my personal measurements) that I gathered on this Coleman Red Canyon 8-Person Tent:
- Peak height: 73 inches
- Length: 16 feet 4 inches
- Width: 9 feet 7 inches
- Base Area: 140.6 square feet
- Floor material: Polyethylene
- Bathtub Flooring: Yes, ~8 inches
- Tent body material: Polyester
- Rainfly material: Polyester
- Poles material: Fiberglass
- Mesh: Regular
- Packed size: 26 x 13 x 10 inches
- Weight: 20.2 pounds
- Number of dividers: 2
- Number of guylines: 6
- Number of stakes: 17
- Number of doors: 1
- Number of vents: 3
- Number of pockets: 2
- Number of gear lofts: 1
- Number of lantern loops: 1
- Number of clotheslines: 1
- E-port: No
- Hinged door: No
- Black-out: No
I also did some testing on my own, and came up with this data:
- Set up timing (2 people): 10.5 minutes
- Set up timing (1 person): 20.5 minutes
- Take down timing (2 people): 7 minutes
- Take down timing (1 person): 14 minutes
- Number of single sleeping pads: 10
- Number of queen-sized mattresses: 3
I go through all the above specifications in the sections below, in more detail, if you’re interested.
Testing and Performance
I put my Coleman Red Canyon 8-Person Tent through these 7 tests:
- Ease of use: Set up, take down
- Spaciousness: Base area, height, mattress sizing
- Comfort and features: Door, windows, storage, dividers
- Ventilation: Hot day ventilation, rainy day ventilation
- Weather protection: Light rain test, heavy rain test
- Quality: Material, mesh, seams, stitching, zippers, poles
- Portability: Weight and packed size
Set Up
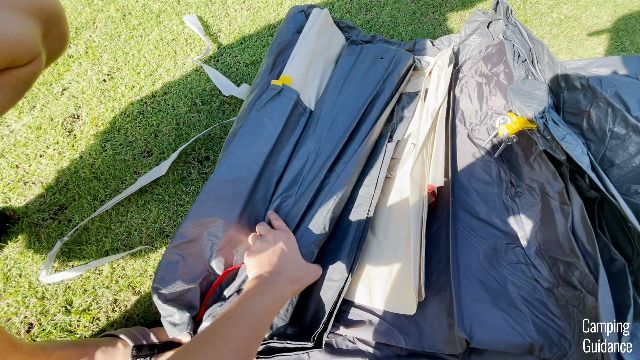
Before I provide you with the set up instructions, here’s what all 6 fiberglass poles look like, fully assembled:

Set Up Instructions
Now, to set up this Coleman Red Canyon 8-Person Tent, first insert the 2 red colored fiberglass poles, which are the longest poles, into the 2 red pole sleeves at the center of the tent. This will form an X shape across the tent.

After that, prop both red fiberglass poles up, by inserting the ends of both poles into one of these pins at the bottom of the tent. I usually use the pin between the yellow fabric.

Then, attach the pole clips.

There are 3 pole clips on each side of the red fiberglass poles.

Next, grab the 2 white colored poles, and insert each of them through the red pole sleeves at the sides of the tent. This is the right side of the tent.

Prop the pole up, and secure each end into the remaining pin at the bottom of the tent. Also, attach the pole clips, there are 2 on each side of the white poles (pictured above).
And this is the left side of the tent, from a different angle:

Then, drape the rainfly over the tent, and secure these S-hooks of the rainfly to the rings at the bottom of the tent where your poles are attached.

There are 2 S-hooks for each ring (pictured above), and 2 rings at the front of the tent, and another 2 rings at the back of the tent (pictured below).

There are also Velcro attachments along each pole to better align the rainfly, if you want to use them.

The last 2 shortest and thinnest black fiberglass poles are for holding the rainfly away from the tent body, like so:

There’s one of these rainfly poles at the front, and another at the back.

To set this pole up, there’s a short pole sleeve at the tip of the rainfly, and 2 rings in the tent body for the 2 ends of the pole.

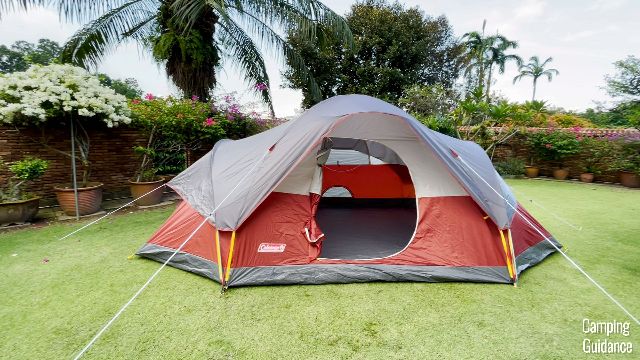
After that, stake down and guy out the entire tent. There are 8 stake loops for the tent body (4 at the front, and 4 at the back), and 6 guylines around the tent (2 at the front, 2 at the 2 sides, and 2 at the back).
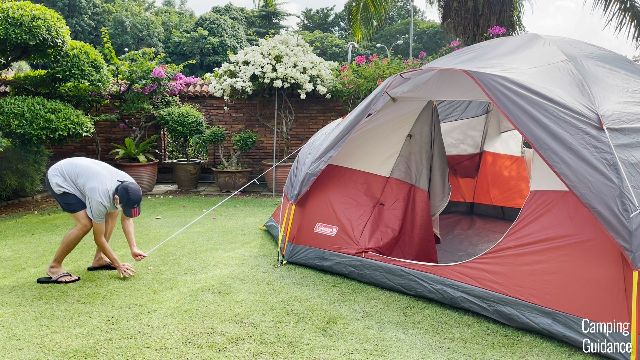
Also, stake down the vent at the back of the tent too.
Set Up Timing
It took my bro and I about 10 and a half minutes to set up the entire Coleman Red Canyon 8-Person tent, and I set up the entire tent on my own in about 20 and a half minutes, so slightly less than double the time.
Take Down
Taking down the Coleman Red Canyon 8-Person Tent is just the opposite of the set-up, and it took my bro and I about 7 minutes for the entire take down and pack up. On my own, it took me about 14 minutes, so about double the time.
For more details on the set up, take down and pack up, I have this separate video on my channel.
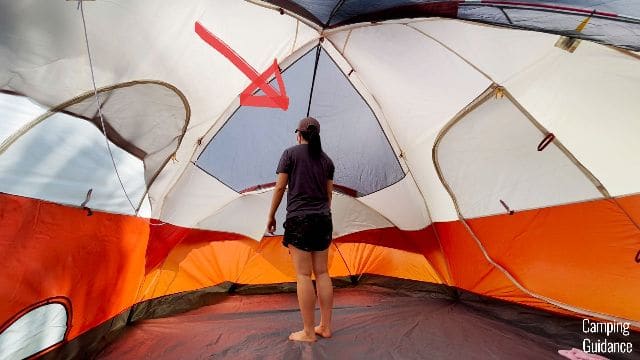
Height
The peak height in this Red Canyon 8-Person Tent is about 73 inches, and I can stand upright here. (I’m only 5’3”, by the way.)

But because the shape of this Red Canyon is like an extended dome, the peak height is only at the center, and the roof of the tent slopes downwards from there.
I took about 3 tiny steps back, and my head was already touching the mesh at the top of the tent.
Base Area
The longest length of this Coleman Red Canyon 8-Person Tent is about 16 feet and 4 inches (smaller than marketed length of 17 feet), while the longest width is about 9 feet and 7 inches (smaller than marketed width of 10 feet), so slightly smaller than marketed dimensions.

Mattress Sizing
Single Pads
The base area of this Red Canyon Tent is actually really quite big for an 8-person tent, and I could easily fit 8 regular sleeping pads in this tent. Here’s what it looks like.

While you do have to sleep almost shoulder to shoulder, there’s a little bit of leftover room for gear at the very sides of the tent.
I would recommend using the sides of the tent for storing gear instead of sleeping, because the corners of the tent slope off quite a bit, and my head touches the wall of the tent when I sit up.

Queen Beds
Instead of 8 pads, you can fit 3 queen-sized camping mattresses, and here’s what the Red Canyon 8-Person Tent looks like with these 3 mattresses.
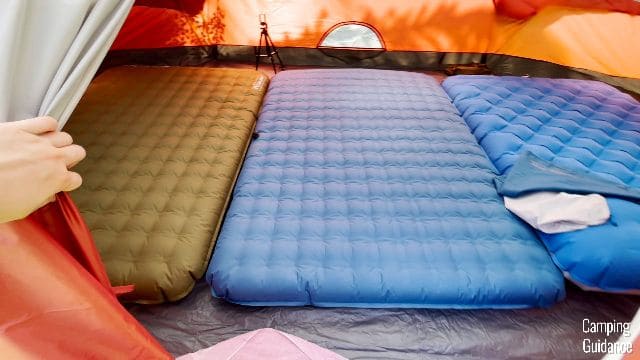
There’s quite a bit of leftover room for storing gear, which is always very nice to have.
Dividers
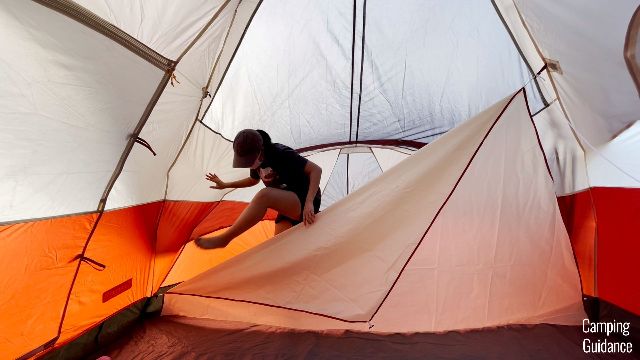
The Coleman Red Canyon 8-Person Tent comes with 2 dividers, which you can put up at the 2 sides of the tent. Here’s what each divider looks like.

In the middle, you can fit 4 regular sleeping pads or 2 double pads, and behind each divider, you can fit either a double pad, or 2 separate pads, but nothing bigger. I couldn’t fit a queen or even full bed behind each divider.

The provided divider is a little see through, and has gaps at the top of the divider, and also at both sides. There’s also no zip down the middle for easy access into each room, so I had to take down one of the latches, and then climb over the divider.
Windows
This Red Canyon 8-Person Tent has 2 windows, 1 on each length of the tent. Both are about the same size, with the window on the left measuring 42 inches in length and 26 inches in width, while the window on the right measures 38 inches in length and 24 inches in width.

Each window has 2 yellow zippers, and a window latch to hold the fabric when it’s open.

There’s also a bug net to prevent larger bugs from getting in.
Door
This Coleman Red Canyon 8-Person Tent has only 1 door on the front length of the tent, which comes with 2 yellow zippers, as well as 2 door latches by the side to hold the door open.

This door measures about 51 inches in length, about 39 inches in width, and about 53 inches from the ground to the top of the door. I’m 5 foot 3, so I had to duck when getting in and out of the tent through this door.

Storage
There are 2 pockets inside this Coleman Red Canyon 8-Person Tent, 1 on each width, each measuring about 9 by 8 inches.

There’s 1 loop at the top of the tent for a lantern, plus 4 more loops near it for a gear loft. Coleman gives you this square gear loft when you buy this tent.

On top of that, you get another 8 more loops to hang 2 dividers around the tent (4 loops for each divider). Two of these divider loops have this pre-attached string that you can use as a clothesline.

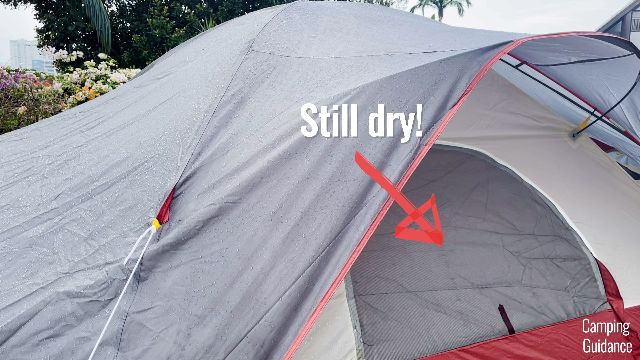
Light Rain Test
It rained very lightly while I was using this Coleman Red Canyon 8-Person Tent. After the rain stopped about 15 minutes later, I found that there were no leaks inside the Red Canyon, and the tent was still dry.
I found these fiberglass poles that hold the rainfly away from the tent body pretty useful, because it protected my door and window mesh fabric from getting wet, so I could leave them open in light rain.
However, the rainfly poles cover only up to the edge of the tent, so anything outside the tent will get wet (like your footwear).

Heavy Rain Test
To test for heavy rain, I had to use this water hose on the tent, and I concentrated the rainfall on the front length of the tent.

After 15 minutes of heavy rain, this is when I noticed a few droplets of water seeping into the tent through the un-taped seam connecting the tent body to the bathtub flooring.

There were a few droplets of water along the length of the tent, and a little bit more around the corner.
But thankfully, the white fabric of the tent was still dry, and so was the red fabric, even though I ran a lot of water over it.

The rainfly was still dry as well when I checked it.
Rainfly Poles vs. Heavy Rain
Even though most of the heavy rainfall dripped to the sides of the tent, I found that the window mesh here will still get damp, especially when there’s wind to blow the rain towards the mesh.

Also, my fiberglass pole for the back window of the tent broke, and there’s nothing to hold the rainfly up anymore, so the window got super soaked.

Here’s a short video on how I rain tested my Red Canyon Tent:
Ventilation
Rainy Day Ventilation
During the heavy rain test, even though I couldn’t leave both windows open because they got soaked, there was still a little bit of ventilation from the 3 vents inside the tent.

The mesh of all 3 vents was still dry after the 15 minutes of heavy rain.

I wouldn’t really consider this a window, it’s more of a vent, because you can’t really look out, and you can’t zip them shut either.

There are 2 of these vents, and one smaller vent at the bottom of the tent (2 pictures above). The 2 larger vents each measure about 31 by 21 inches, while the smallest vent measures about 23 by 9 inches.

Hot Day Ventilation
On a hot day, you can remove the rainfly from the outside, and get plenty of ventilation from the ceiling mesh of this Red Canyon 8-Person Tent. Once the rainfly is removed, you will have not 2, but 4 windows, because the vents at the sides will no longer be covered.

Quality
Flooring
The flooring of this Red Canyon 8-Person Tent is made of polyethylene, and the bathtub feature extends up to about 8 inches.

After 15 minutes of heavy rain, no water seeped through the bathtub flooring itself.

Tent Body
I think the main tent body and rainfly are made of made of polyester like all other Coleman tents. It’s supposed to be “Double-thick Polyguard”, and both the white fabric and even the red fabric was dry after my 15-minute heavy rain test that I put this tent through. The rainfly was dry as well.

Seams
Most of the seams in this Red Canyon 8-Person Tent have been inverted, but not seam taped, like this white fabric to red fabric seam.

The only seams that were taped was the seam on the vent as well as the seams on the rainfly.

Stitching
The double stitching was consistent and pretty good quality, with only a few loose threads around the tent. I also found one small hole in one of the seams. But otherwise, it’s pretty good.

Mesh
The mesh is just regular mesh, not no-see-um mesh, and it’s decent quality.
Zippers
The zippers are also decent quality, with no leaking issues, and all of them are catch-free. I didn’t have snagging issues on the windows, and also no snagging issues on the door, whether I’m zipping it open or shut from the inside or the outside.

Poles
The poles of the Coleman Red Canyon 8-Person Tent are color-coded for an easy set- up, but I didn’t like that they’re all made of fiberglass, which is not the sturdiest.
First, this makes putting up the 2 longest red poles on my own a little difficult until I got the hang of it.

And second, one of my thinnest black poles for keeping the rainfly up broke on my first use of this tent. I tried to duct-tape it back, but it didn’t work.

So, there’s nothing to hold the rainfly up anymore, so on hot days, half the window will be blocked, and on rainy days, the window will get super soaked.

Portability
Packed Size
This Red Canyon 8-Person Tent has a packed size of 26 by 13 by 10 inches, and here’s what it looks like beside a Coleman 2-Person Sundome Tent for a size comparison.

Weight
The Coleman Red Canyon 8-Person Tent weighs about 20.2 pounds for everything, including all stakes, guylines, etc.
Pros and Cons
Pros
For pros, I was shocked to find that the base area is huge. It’s so big that I could fit 8 pads, with quite a bit of leftover space inside. In fact, I calculated the base area to be a little over 140 square feet, which is as big as some of the 10-person tents that I have.
| Coleman Tents | Base Area (sq. ft.) |
|---|---|
| WeatherMaster 10-Person | 143.6 sq. ft. |
| Red Canyon 8-Person | 140.6 sq. ft. |
| Instant Cabin 10-Person | 135.7 sq. ft. |
Another big pro is that the Red Canyon is quite feature-rich, and it comes with 1 gear loft, not 1, but 2 room dividers, and even a clothesline. But there’s no e-port or hinged D-door though.

I also liked that there’s plenty of ventilation on hot days when the rainfly has been taken down. In fact, even in heavy rain, there’s still ventilation, because there are 3 vents in the tent.
This Red Canyon Tent is also very, very reasonably priced for an 8-person tent.
Cons
As for cons, I think the biggest one is how thin the rainfly fiberglass poles are. As I mentioned earlier, one of my poles broke very early on, and even though the tent still works fine, the rainfly now blocks the window.
Also, the other one of my thin rainfly poles became permanently bent after a few days of use. I kind of wish they designed the rainfly and its poles a little differently.

Another con is that there’s only 1 door in this huge 8-person tent, and I expected at least 2 doors.
This Red Canyon is also not great against heavy rain, and water started trickling in through this seam after 15 minutes of heavy rain.

It’s not a whole ton of water though, considering how much water was pouring over the Red Canyon tent. But, I still highly recommend using seam sealant for at least the seam connecting the red tent fabric to the bathtub flooring.

Recommendation
Overall, I really liked this Coleman Red Canyon 8-Person Tent, and I got a lot of tent, a lot of space, and a lot of features, for a very inexpensive price. It’s really good value for money, for sure.
If you’re on a budget, but looking for a super spacious tent that’s pretty good quality, I think this Coleman Red Canyon 8-Person Tent is definitely one of the most spacious for its price.
Bonus: Must Read!
How does this Coleman Red Canyon 8-Person Tent compare to other Coleman tents though? Well, don’t worry, because I’ve already done the comparison for you, in this blog post: I Tested the 14 Best Coleman Tents!

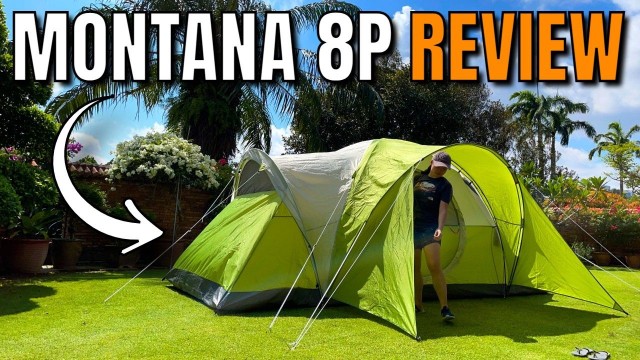
Or, if you’re interested in finding out how this Red Canyon 8 compares to the Montana 8, check out this blog post instead: Coleman Montana Tent V.S. Red Canyon Tent (I Bought Both!)

Or, check out the Coleman Red Canyon 8-Person Tent: