I Tested the Columbia Mammoth Creek 10-Person Tent (Review)
This page contains affiliate links, and that means that I may earn a commission if you buy something, at no extra cost to you. You can find my full disclosure policy here.
Rating and Summary
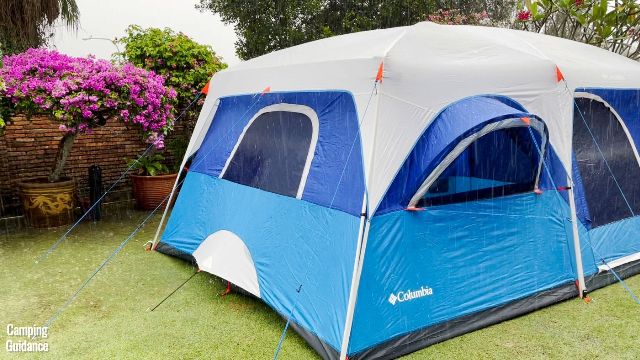
The Columbia Mammoth Creek Tent is a powerhouse of a cabin tent. It performed well across almost all categories, offering a great deal of spaciousness, comfort, features, ventilation (on both hot and rainy days!), and water protection. And last but not least, it’s very high quality.
However, its biggest con is that it takes a few extra minutes to set up, compared to tents of similar size (because it has more features). It’s also a little bit more expensive. Is it still worth it though? Read on to find out!
Note: I bought and tested the 10-person version, so this review will focus on that.
If you enjoyed the video, please consider subscribing to my YouTube channel right here:
Check out the Columbia Mammoth Creek:
RELATED: Best 10-Person Tents, Best Cabin Tents
Product Details
Here’s what we’ll discuss here:
- Unboxing
- In the Box
- Specifications
Unboxing
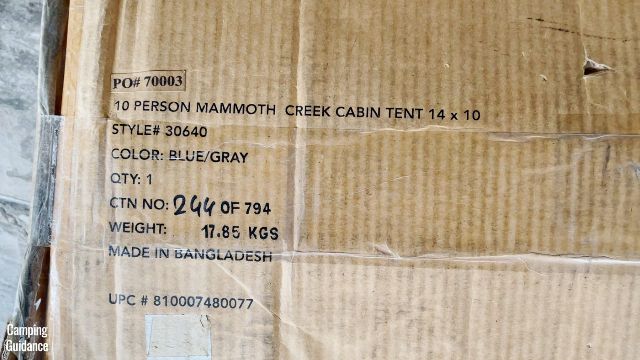
I bought the Columbia Mammoth Creek Tent (10-person variation) from Amazon. I got just a regular cardboard box with some details printed on it:
In the Box
Inside the Columbia Tent package, I got the carry bag, the tent body, the rainfly, poles with a separate pole bag, 19 steel stakes also with a separate stake bag, and some instructions on how to set up and take down this tent.

The Columbia Mammoth Creek Tent also comes with a room divider and 10 guylines, which are all pre-attached. (More on this later.)
Specifications
Here’s all the data (including my personal measurements) that I gathered on this Columbia Mammoth Creek Cabin Tent. This is based on the 10-person version:
- Peak height: 80 inches
- Lowest height: 62 inches
- Length: 13 feet 11 inches
- Width: 9 feet 11 inches
- Base area: 138.0 square feet
- Floor material: 150D Polyester (2,000mm)
- Bathtub Flooring: ~5 inches (I forgot to measure it)
- Tent body material: 75D Polyester (800mm)
- Rainfly material: 75D Polyester (800mm)
- Poles material: Fiberglass x3 (roof), steel x8 (walls x6, and part of the roof x2)
- Zippers: SBS
- Bug net: No-see-um
- Weight: 34.4 pounds
- Packed size: 30 x 14 x 12 inches
- Number of guylines: 10
- Number of stakes: 19
- Number of windows: 4 (2 are pull-out windows)
- Number of doors: 2
- Number of ground vents: 1
- Number of pockets: 2
- Number of gear lofts: None
- Number of lantern loops: 2
- Room divider: Yes (1)
- E-port: Yes (1)
- Black-out: No
I also did some testing on my own, and came up with this data:
- Set up timing (2 people): 14 minutes
- Set up timing (1 person): 28 minutes (Not recommended)
- Take down timing (2 people): 8.5 minutes
- Take down timing (1 person): 16 minutes
- Number of single sleeping pads: 10
- Number of queen-sized mattresses: 4
I go through all the above specifications in the sections below, in more detail, if you’re interested.
Testing and Performance
I put the Columbia Mammoth Creek 10-Person Cabin Tent through these 7 tests:
- Ease of Use
- Spaciousness
- Comfort & Features
- Ventilation
- Rain Protection
- Quality
- Portability
Here’s how the Columbia Tent performed.
Ease of Use
For ease of use, I looked at how easily I could put up, as well as take down and pack up, this Columbia 10-Person Tent. I did this on my own, so 1 person, and also, I tested this with 2 people as well.
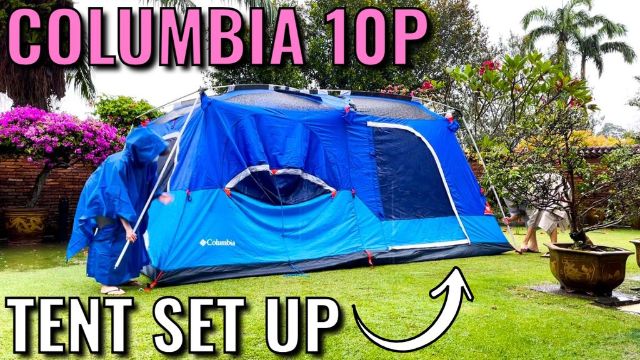
Ease of Set Up
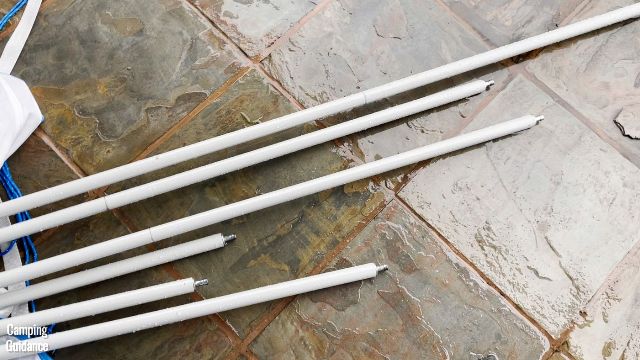
There are 4 fiberglass poles for the roof, plus an additional 2 steel poles for the roof as well, 6 steel poles for the walls, 10 pre-attached guylines, and 19 steel stakes.
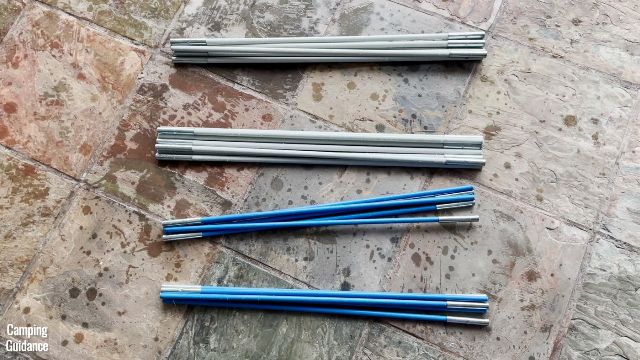
To set up this Columbia 10-Person Cabin Tent, first insert the 4 color-coded fiberglass roof poles (2 blue and 2 white, pictured above) through the color-coded pole sleeves.
The pole sleeves are mainly black, but have these blue- or white-colored tips for easy identification:
Then, connect these fiberglass roof poles to the ribbed side of the pole connectors (which is the side with the protrusions inside the connector).

The shorter blue poles will form an oval, while the longer white poles are diagonal across the roof.

To complete the roof setup, find the 2 longest white steel poles, and connect them to the extreme right and extreme left of the roof, like this.
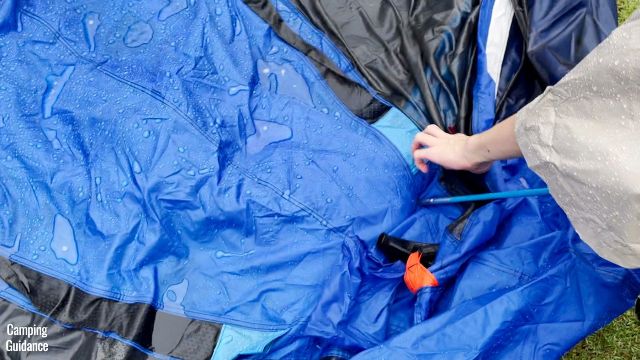
Next, attach the 6 steel wall poles to the pole connectors at one end, and the protruding pin at the other end to the ring at the bottom of the tent.
Tip 1: 2 of the steel poles have a black ring near the top of the pole, and these are the 2 middle steel poles.
Tip 2: It’s much easier to attach the steel wall poles when you get someone else to go inside the tent first. I found it practically impossible to do so without someone else’s help.
Then, attach the pole clips to the nearest steel pole.
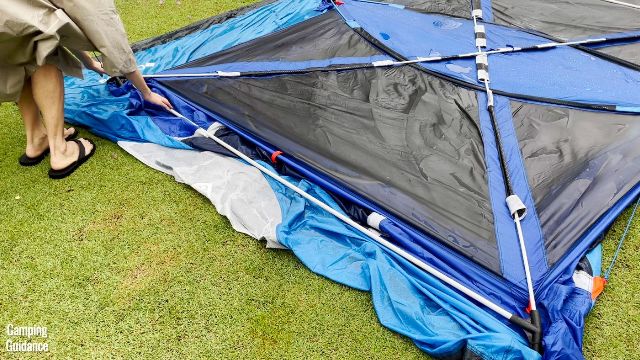
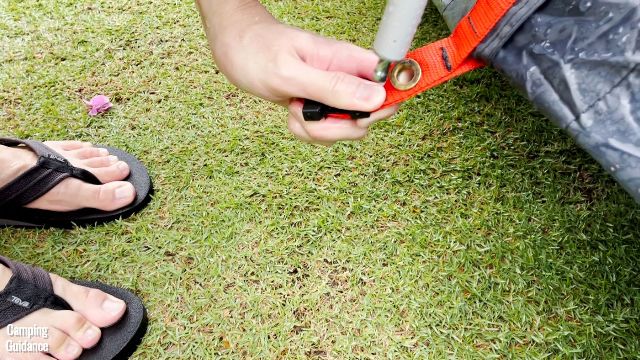
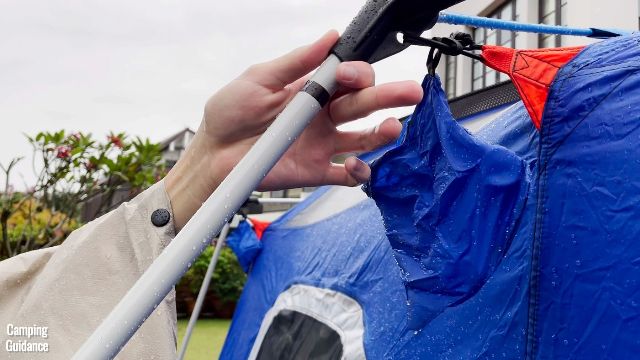
After, place the rainfly on the top, and secure it to the 6 steel wall poles with the buckle fasteners.
The next step is to stake out the entire tent. 8 stakes are for the tent body, 1 for the ground vent, and 8 are for the guylines.
Finally, assemble the 2 pull-out windows, and guy both of them out as well with the remaining 2 stakes.
It’ll take about ~14 minutes for 2 people to set up this Columbia 10-Person Cabin Tent.
I also tried to set up the tent on my own, but I could not insert the blue roof poles without some help. When I tried to do it on my own, I think I put too much strain on these fiberglass poles, and it started splitting.
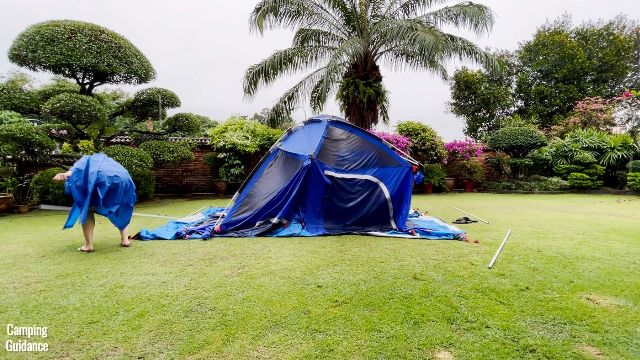
Ease of Take Down
Taking down the Columbia 10-Person Tent and then packing it up takes about ~8.5 minutes with 2 people, and about ~16 minutes on my own, excluding washing and drying, of course.
If you want more detailed instructions on how to set up, take down, and pack up this Columbia 10-Person Cabin Tent, check out this video that I uploaded, right here:
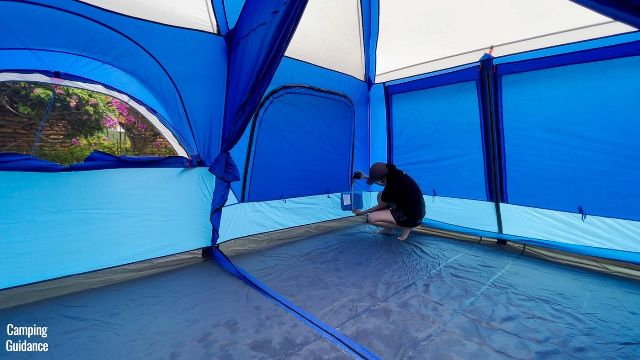
Spaciousness
For spaciousness, I looked at the peak height, slope of the walls, and base area.
Peak Height
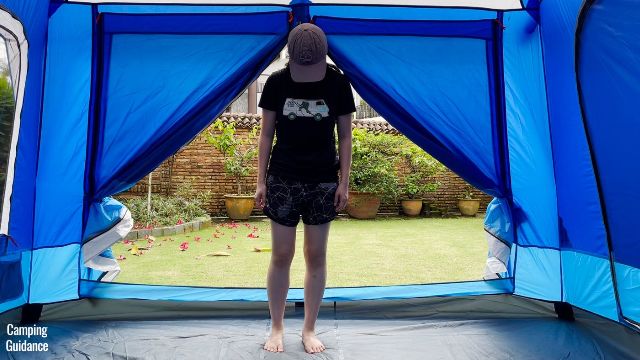
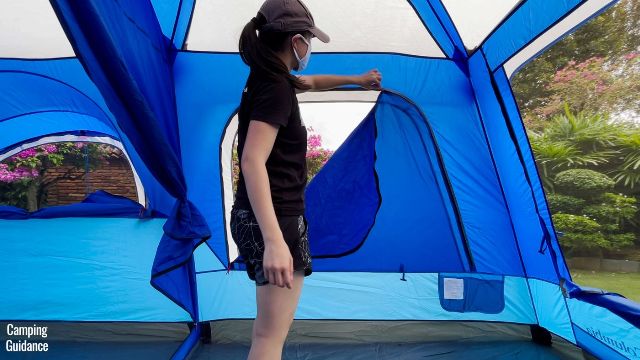
This Columbia Mammoth Creek 10-Person Cabin Tent has a peak height of 80 inches, and I can reach the top of the tent by stretching my arm out.

The lowest height in the tent, which is at the four corners, is about 62 inches.
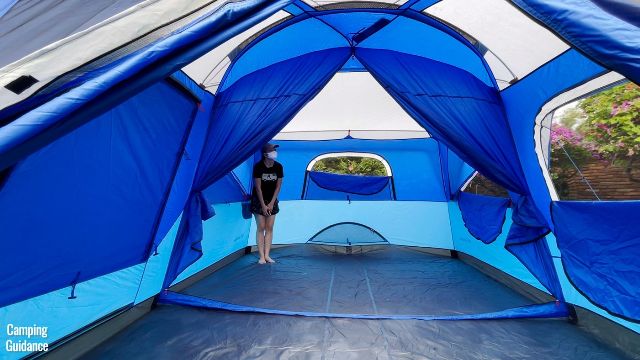
I’m about 5’3″ (so about 63 inches) tall, so I could stand up almost everywhere inside this Columbia Tent, except for the 4 corners. But as you can see from the picture above, I’m almost standing up straight, even at the corners.
Dimensions
The length of the Columbia 10-Person Tent is about 13 feet and 11 inches, while the width is about 9 feet and 11 inches, so slightly smaller than the marketed dimensions (which is about 14 by 10 feet).
Also, there’s no vestibule, so if you leave your shoes out, it will get wet if it rains.
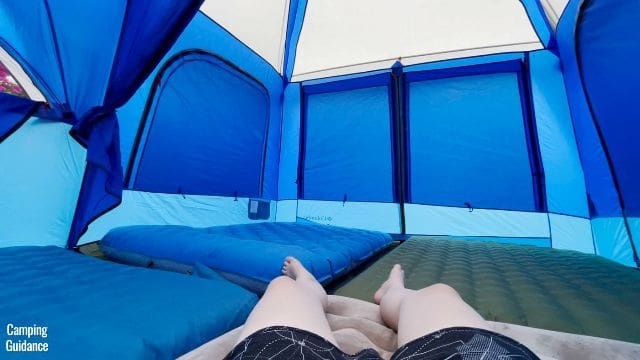
Mattress Sizing
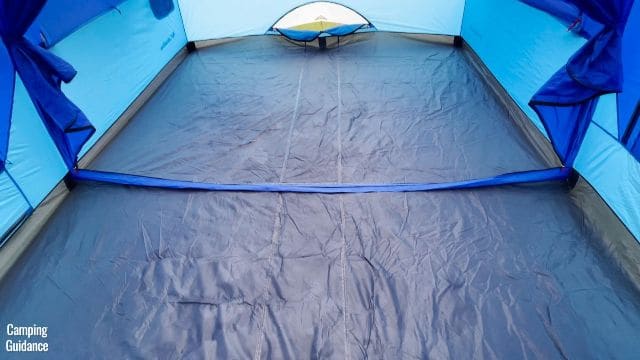
This Columbia Mammoth Creek 10-Person Tent can accommodate 10 single sleeping pads or sleeping bags, and here’s what having 10 pads in this 10-person tent looks like.

To accommodate 10 people in this tent, it’s almost shoulder-to-shoulder sleeping, although there’s some space down the middle for just a tiny bit of camping gear.
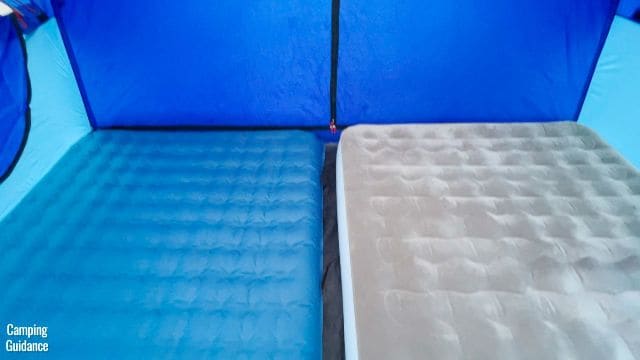
This Columbia 10-Person Tent can also fit 4 queen-sized camping mattresses, and here’s what the tent looks like with these 4 mattresses.
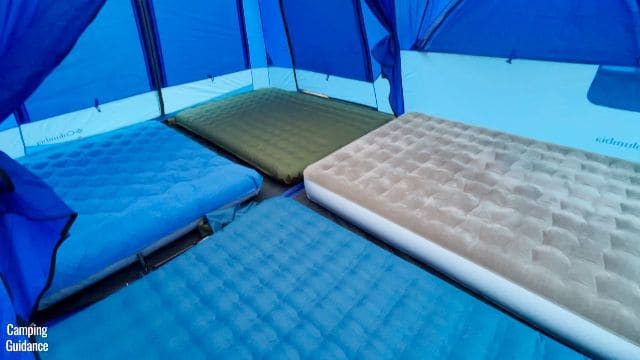
The mattresses that I used in this tent are slightly smaller than queen size, but almost queen sized (give or take a few inches). Even so, these 4 mattresses take up the entire tent, and there’s hardly any space leftover for camping gear.
Comfort & Features
For comfort and features, I looked at the windows, doors, bug nets, and more.
Windows
This Columbia 10-Person Tent has 4 windows, excluding the 2 doors, and the windows are all different sizes, so here are the dimensions:
- Smallest (non-tilted) window: 45 by 24 inches
- Tilted window: 45 by 22 inches (both are identical)
- Biggest window: 50 by 36 inches
Each window has 2 zippers, which are pretty much snag-free.
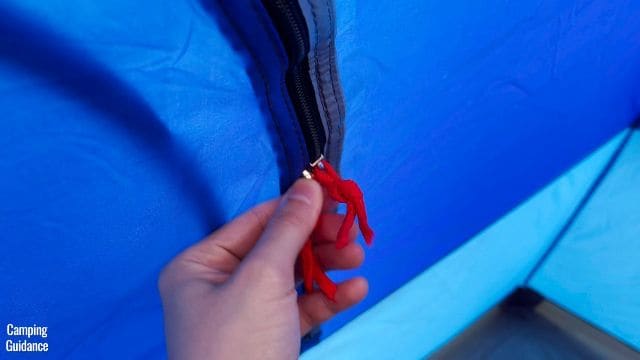
If there’s no rain, you can unzip the windows for more ventilation, and there’s a bug net to prevent bugs from getting in.
This is no-see-um mesh, so you don’t have to worry about any bugs getting in at all. There’s also a small latch on each window that you can use to tie the fabric of the windows up.
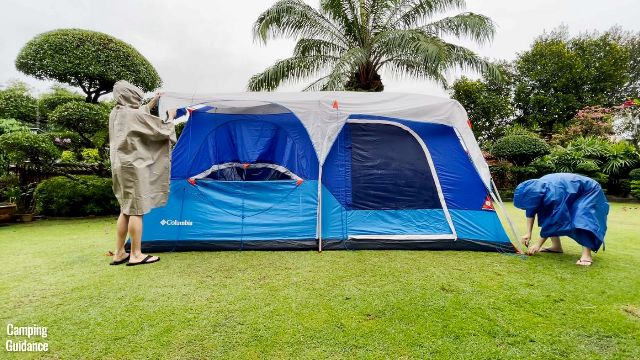
Doors
This Columbia 10-Person Tent has 2 doors.
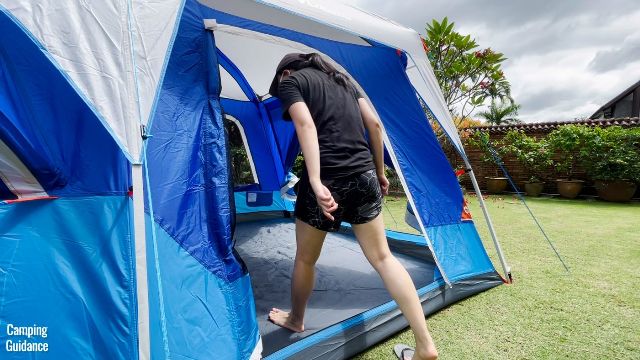
One is this humongous T-door, or double door, which measures about 91 by 55 inches in dimensions.
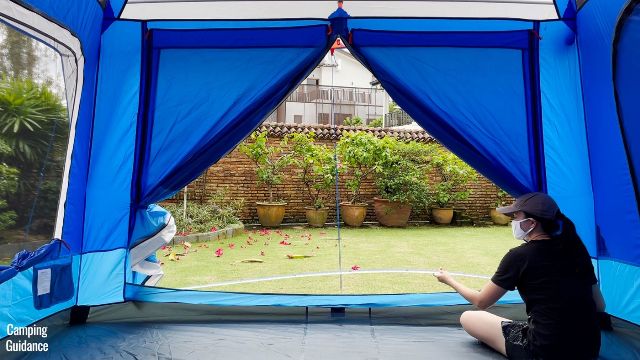
It’s about 60 inches from the floor to the top of the door, so almost full-sized, but I do need to duck a little when entering.
Here’s what this double door looks like in comparison to my size.
The other door is right next to the double door, it’s this smaller side door, that measures about 47 by 55 inches in dimensions, and is about 59 inches from the floor to the top of the door.
Both doors have no-see-um bug nets, spanning almost the entire length of the door, and I really enjoyed having tons of bug-free ventilation.

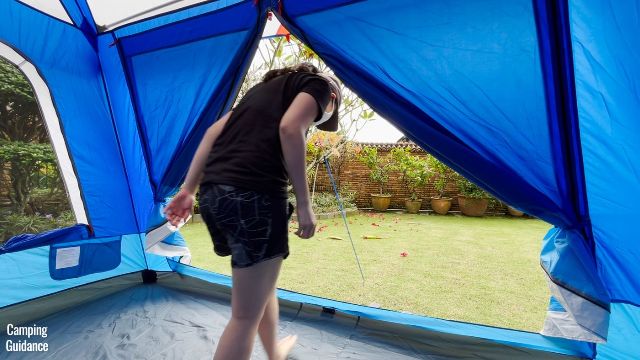
If there are no bugs though, I like to unzip both doors and leave them open. For the double door, just roll back the 2 sides of the door, and clip both to the sides, 1 clip on each side.
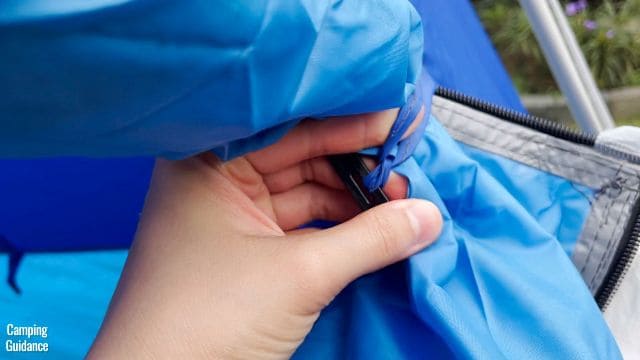
For the smaller side door, also roll back the door and clip it to the side as well, there are 2 similar clips, one at the top and one at the bottom.
The T-door or double door has 3 zippers for the door, while the smaller side door has 2 zippers for the door.

Both doors can be zipped up from the inside and outside. I did not have any snagging issues. Also, the T-door comes with a Velcro closure for easier access in case you don’t want to keep having to zip the door up.
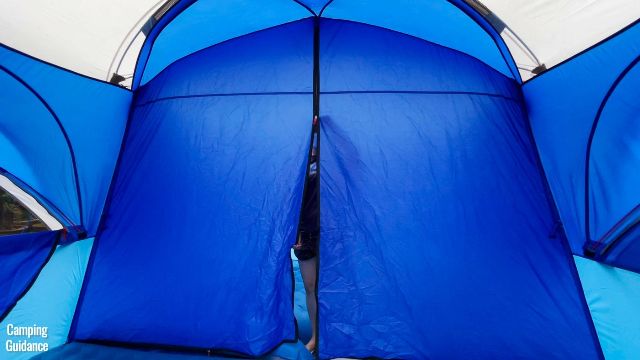
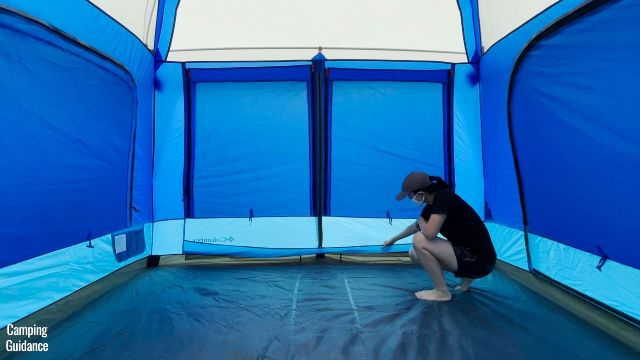
Room Divider
This Columbia 10-Person Tent comes with a pre-attached room divider, so you can split the tent into 2 rooms. Each “room” can fit either 2 queen-sized beds, or 5 sleeping pads or sleeping bags.
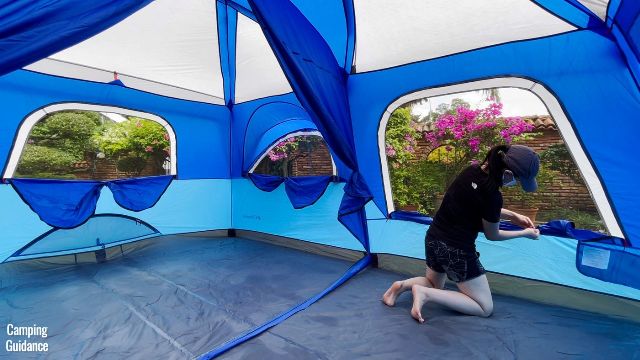
One of the rooms will have 2 doors (both the T-door and side door) and 1 window (the biggest window, see picture below), while the other room will just have 3 windows (the 2 pull-out windows and the smallest non-pull-out window).
The divider has a zip in the middle so that you can access either room, and you can also pull back the sides of the divider if you don’t want to use it.

What I really like about this pre-attached divider is that it provides a lot of privacy. The divider is completely full length, so there are no gaps, not even at the bottom like some of my other tents.
It’s also not very see-through, which is really nice.
Storage & Other Features
There are only 2 pockets in the entire tent, both measuring about 15 by 8 inches, which is very tiny for such a large tent.
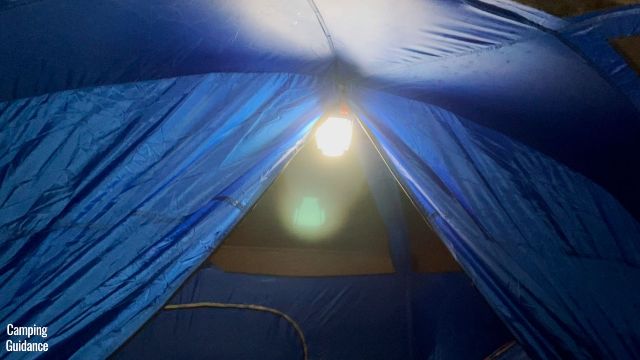
There are 2 lantern loops at the very top of the tent for some lighting at night, one for each room, in case you want to use the divider at the same time.
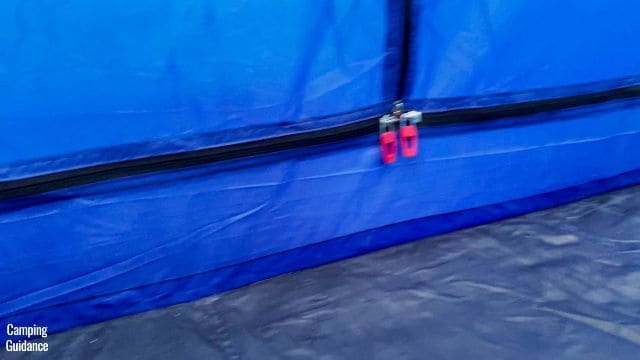
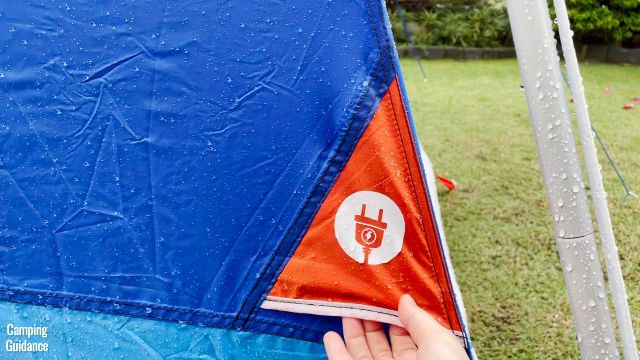
Also, there’s 1 e-port at the middle of the tent.
Ventilation
Ceiling Mesh
For ventilation, this Columbia 10-Person Tent has a lot of mesh on the roof of the tent.
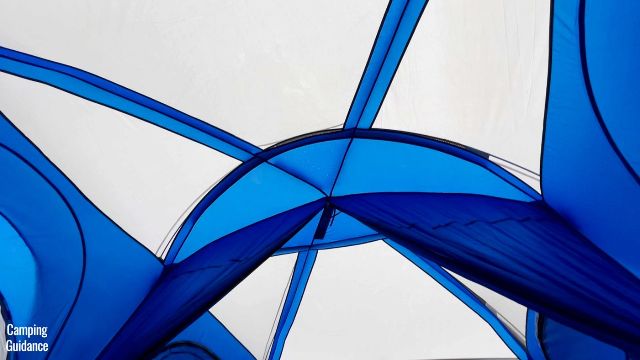
In the picture above, the rainfly is still attached, because it kept raining while I was using this tent. Take note that the rainfly is removable from the outside, and you can do so when it’s not raining.
Window + Door Mesh
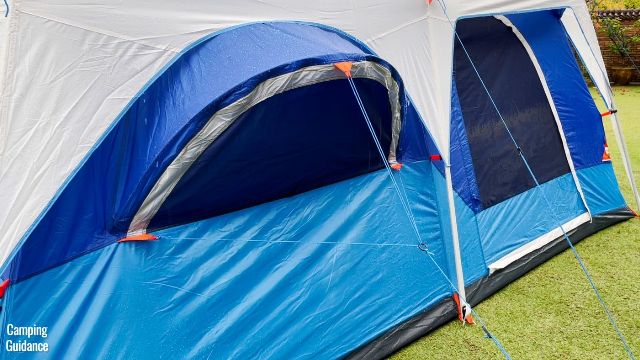
Apart from the roof, the 2 doors and one of the windows is extra-large, so there’s quite a bit of ventilation.
The other 3 windows are not very big though, each measuring on average about 45 by 23 inches.
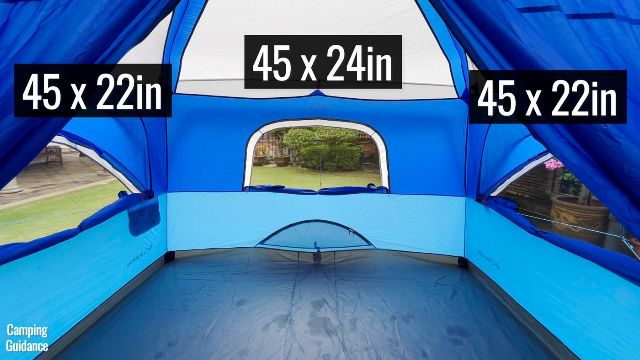
But 2 of these smaller windows (the extreme left and extreme right of the picture above) are tilted pull-out windows, so I was able to leave them open even in the rain. And not just light rain, but moderate rain as well.
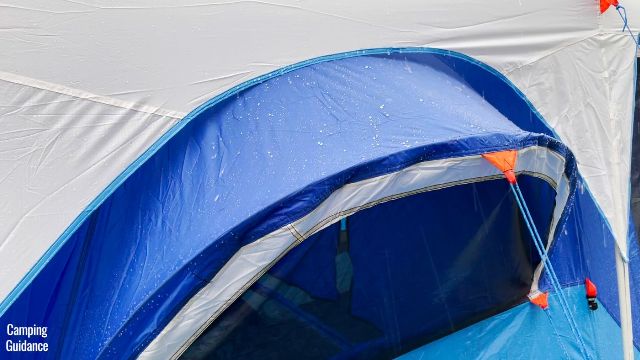
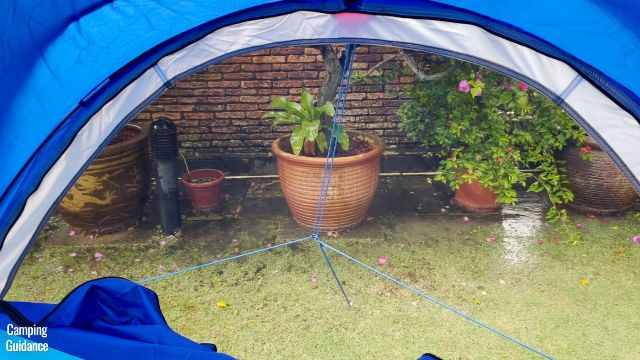
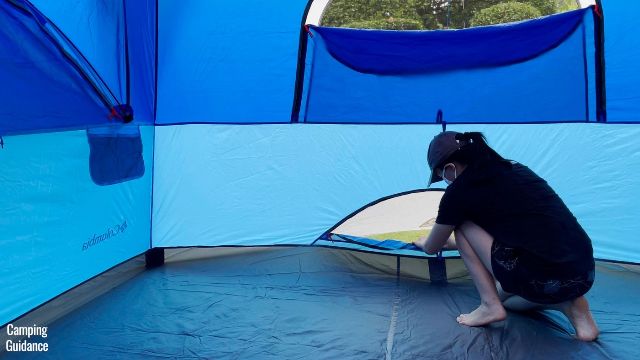
Vents
Also, there’s 1 ground vent in this Columbia tent, measuring about 40 by 12 inches.
So, there’s at least some ventilation while it’s raining.
Rainy Day Options
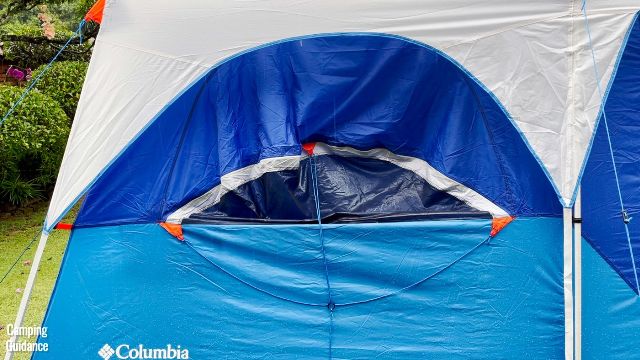
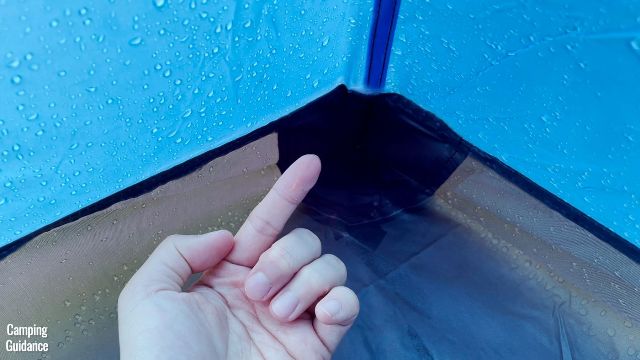
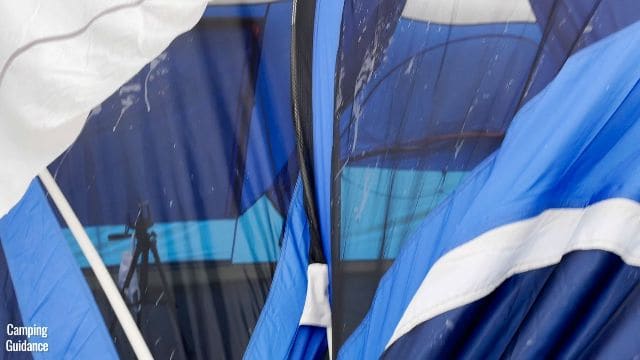
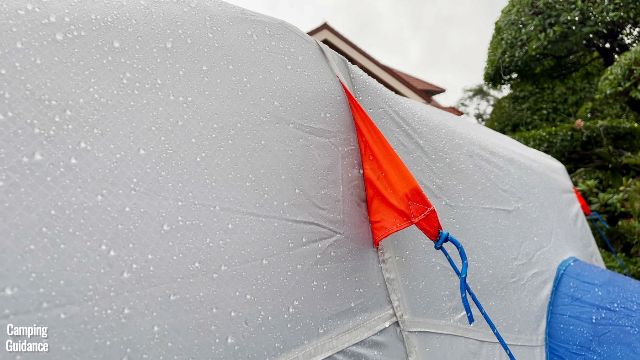
The other non-pull-out or tilted windows and doors have to be closed though, because otherwise, the rain would drip right into the tent.
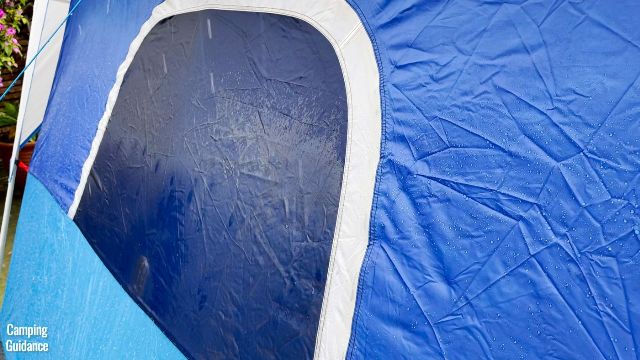
As you can see in the picture above, when it’s raining, quite a bit of rain will drip onto the mesh (the window mesh is completely soaked), so it’s best to keep the windows fully closed, especially in moderate to heavy rain.
This is because the rainfly only partially covers the Columbia 10-Person Tent (which is to prevent water from seeping in through the ceiling mesh).
Weather Protection
For weather resistance, I looked at rain and wind protection.

Rain Test
When I was using this Columbia 10-Person Tent, it was raining for hours every day, multiple days at a time, with the rainfall ranging from moderate to heavy.
After about an hour of moderate to heavy rainfall, there were no leaks in this Columbia tent at all, not through the door or any seams. (Very impressively, every single seam exposed to water was taped.) The fabric was also completely dry.
This Columbia 10-Person Cabin Tent also had small thoughtful details like a zipper pouch for the side door, as well as this extra fabric on the T-door to catch any water that leaks in, so I had no leaking issues with any of the 2 doors in this tent.
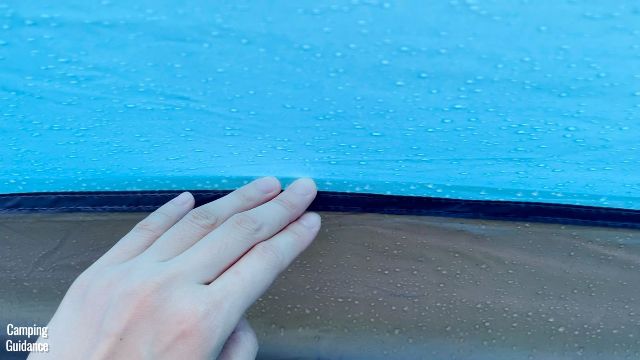
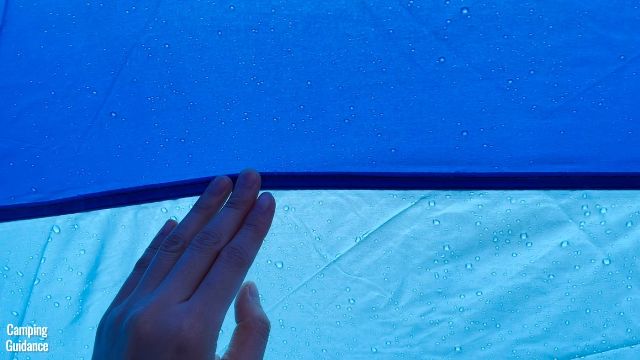
However, the corners of the tent started leaking after a few hours of moderate to heavy rain.
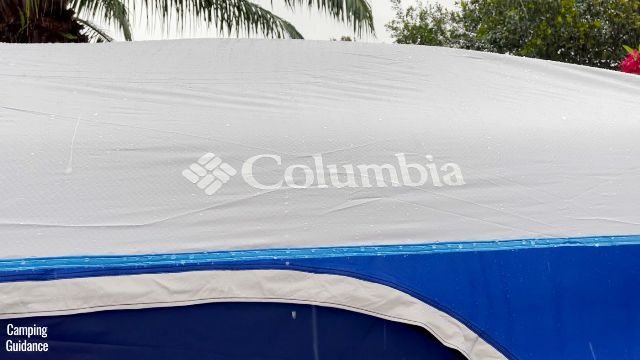
The material of the bathtub flooring and the fabric of the tent body was still completely dry though, which was impressive. (Even the lighter blue Columbia fabric that was more exposed to the rain was not wet at all.)
For more info on this, you can check out the full rain test video on my channel.
Wind Protection
This Columbia 10-Person Cabin Tent was able to stand up to light winds. But I don’t think it’ll do very well against strong wind, because this is a cabin tent with almost vertical sidewalls, so the shape isn’t aerodynamic at all.
The fiberglass poles also bent during a gust of stronger wind, but not permanently; thankfully, I was able to pull it back into shape.

The stakes provided are just your standard stakes, so if you expect stronger winds, you might need to change the stakes out.
Quality
For quality, I looked at the flooring, the main tent, stitching, zippers, and more.
Flooring
The flooring of this Columbia 10-Person Tent is made of 150D polyester, which is actually crunch-free, and feels much higher quality than my other tents of this size.

It has 2,000mm of water resistance, and the bathtub flooring is very useful, because even though the yard was partially flooded, and this Columbia tent was sitting in about an inch of water, not a lot of water leaked into the tent, except a bit through the corners only after many hours.

Tent and Rainfly
The main tent body and rainfly are made of 75D polyester with 800mm of water resistance, and it was enough to keep the tent fabric bone dry from the inside even after hours and hours of light to moderate rain.

Plus, all the seams on the tent body and the rainfly have been seam-taped really well.
Stitching
I found the stitching to be pretty good quality and consistent with no glaring holes or anything, unlike some of my other tents.
Zippers
The zippers are SBS zippers, and they worked fine, with no snagging or leaking issues.

Mesh
The mesh is no-see-um mesh, it’s great quality and feels really smooth and silky. If I’m not wrong, the storage pockets also feel equally soft and silky so maybe they’re no-see-um mesh too.
Poles
The 4 white and blue roof poles are made of fiberglass, which are much more flexible and more prone to bending. Also, I kind of damaged one of them while trying to put together the tent on my own, there’s a slight crack down the middle right here.
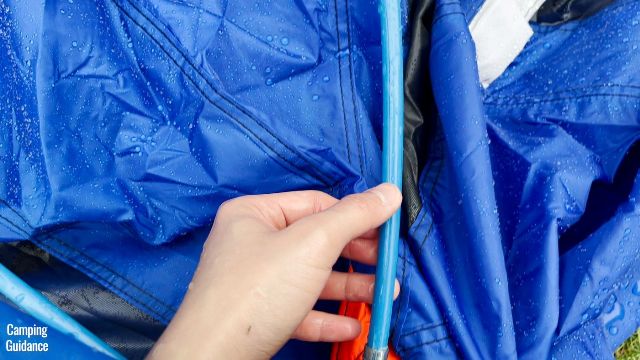
But it still works fine actually, though I highly recommend getting someone else to help you put this up.
The 2 side roof poles and 6 wall poles are made of much sturdier steel, and I like that the protruding pin at the end prevents dirt from actually getting into the pole.
Stakes
The 19 steel stakes that came with the tent are just your standard tent stakes.
Guylines
I had no issues with the guylines, though it would be nice if they were reflective at night. They don’t seem to be.
I really like the guylines of the pull-out windows here, which keeps it sturdy.
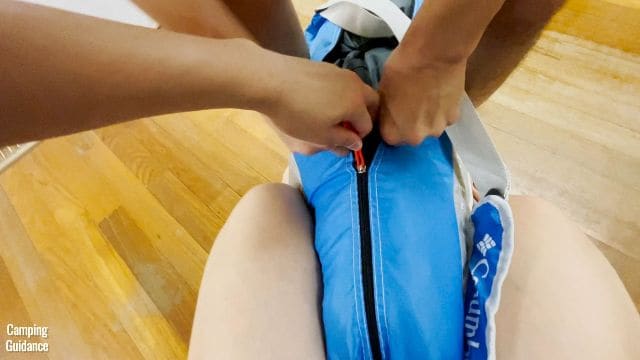
Carry Bag
I’m not sure what material the carry bag is made of, but it feels good quality, and it wasn’t that difficult getting the tent, poles and all other accessories back into the bag.
Portability
This Columbia 10-Person Tent has a packed size of 30 by 14 by 12 inches. For a size comparison, here’s what it looks like beside a Coleman 2-Person Sundome Tent, as well as a 32-ounce Nalgene bottle, and it weighs about 34.4 pounds for everything.

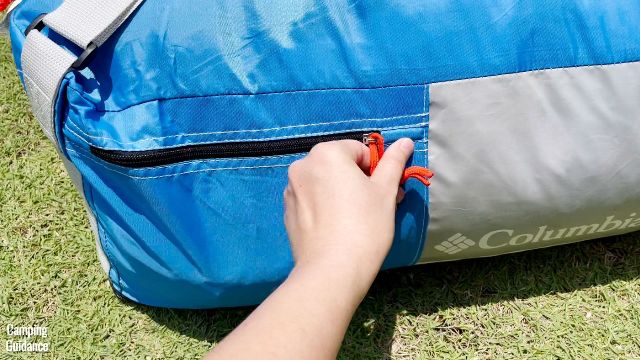
Oh, and this is the front pocket where you’ll find your set up instructions.
Pros and Cons
Pros
For pros, I found the Columbia 10-Person Tent to be quite feature-rich, with its awesome full-length divider, humongous T-door, 2 pull-out windows, and more.
This leads me to my second pro, which is that this Columbia Tent offers quite a bit of ventilation. During hot days, you can open all 4 windows, plus 3 mesh panels from the doors.
On rainy days, you still get ventilation from the 1 ground vent, 2 pull-out windows, and the gap between the ceiling mesh and the rainfly. I was able to leave the angled pull-out windows open in moderate to heavy rain, which was really great.

The next pro is that this Columbia Tent passed the 1-hour rain test with flying colors, with no leaks at all through any of the seams, and the fabric was still bone dry. This Columbia Tent is also one of my few tents that came with all its seams taped.
And lastly, the quality of this Columbia Tent is superb, with its silky no-see-um mesh, crunch free polyester flooring, SBS zippers with no snagging issues, and more.
Cons
As for cons, I think it’s biggest con is that it takes a little more time to set up than my other tents of the same size, because this Columbia Tent comes with additional features, like more roof poles, pole clips, guylines and pull-out windows.
Also, I don’t recommend setting this 10-person tent up alone, so you’d need at least 2 people to do so.
Another smaller con is that both doors are on the same side of the tent, and so are the pull-out windows. So, if you’re using the divider, one room won’t have doors, and the other won’t have pull-out windows.
And the last con is that it’s quite expensive.
Recommendation
It took me about a month of saving to afford this tent, but I must say that the quality is superb, and it did not let me down at all.
The Columbia Mammoth Creek Tent also my go-to 10-person tent for rainy weather, with an incredible amount of ventilation, good waterproofing, and attention to detail.
Bonus: Must Read!
How does this Columbia Mammoth Creek 10-Person Cabin Tent compare to other similar tents though?
Well, here’s a blog post where I bought, tested and compared 6 of the best 10-person tents.
And here’s another blog post where I went ahead to test the 7 best cabin tents.
Or, check out the Columbia Mammoth Creek Tent: