REI Co-Op Arete ASL 2 Tent Review (Bought & Tested!)
The REI Arete ASL 2 is REI’s most expensive 2-person tent. So, I bought it and tested it for weeks, to see whether it’s truly worth the price.
This page contains affiliate links, and that means that I may earn a commission if you buy something, at no extra cost to you. You can find my full disclosure policy here.
Quick Summary
If you’re looking for an inexpensive winter camping tent, the REI Arete ASL 2 is easily the best pick out there. You can use it in the off season (spring/fall) as well, but it is too hot for summer use.
RELATED: Best REI Tents
I’ll link to my YouTube review here when it’s done (TBA):
If you enjoyed this video, please consider subscribing to my YouTube channel here:
Check out the REI Arete ASL 2:
- Quick Summary
- 1. In the Box
- 2. Set Up & Pack Away
- 3. Peak Height
- 4. Pole Structure
- 5. Livable Space
- 6. Base Area
- 7. Pad Sizing
- 8. Vestibule
- 9. Window
- 10. Door
- 11. Storage
- 12. Seam Taping
- 13. Vents
- 14. Rainfly
- 15. Rain Tests
- 16. Adjustable Mesh
- 17. Materials
- 18. Portability
- 19. Pros, Cons, Recommendations
- 20. Bonus – MUST Read!
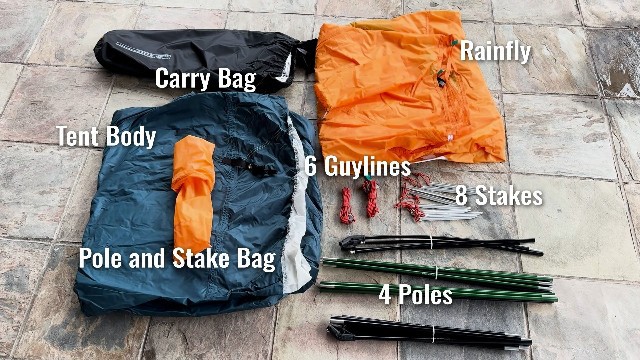
1. In the Box
I bought the REI Arete ASL 2 during REI’s anniversary sale, and out of the box, this is what I got:
- Carry bag
- Rainfly
- Tent body
- Pole & stake bags
- Guylines x 6
- Stakes x 8
- Poles x 4
- Pole repair splint
2. Set Up & Pack Away
This is the gist of the entire setup process:
- Slide the 2 green poles into the green pole sleeves.
- Secure the 2 black poles horizontally across tent.
- Secure rainfly with pole wraps and buckles.
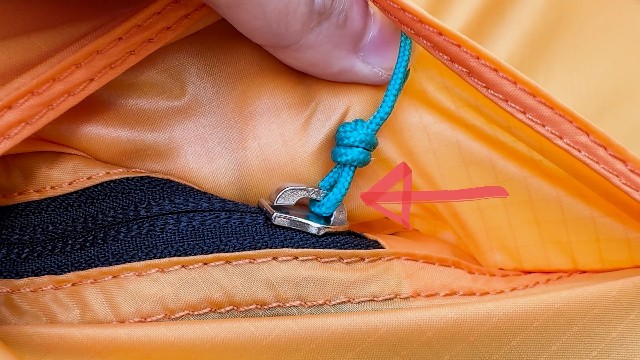
- Stake down the entire tent (tent body x 6, vestibule loops x 2, guylines x 6, guy-out points on rainfly x 7).
Pro-Tip: If you want to fully stake and guy everything out, we are missing 7 guylines and 13 stakes, so remember to buy extra ones if you need to.
Altogether, the entire setup takes about 10 minutes, while the pack away took about 8.5 minutes.
For more details, I have an instructional video with tips to help you set up your tent more easily:
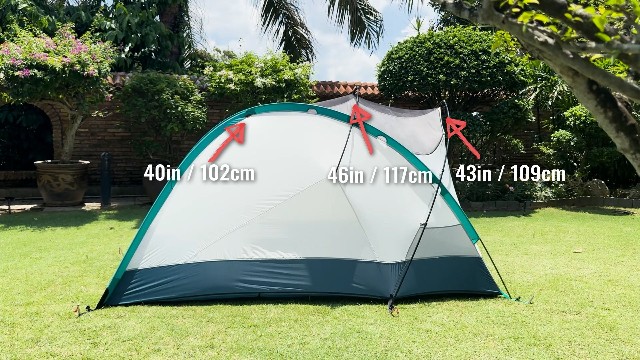
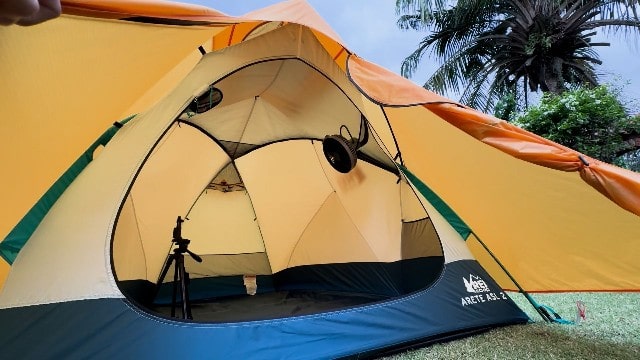
3. Peak Height
The peak height in the Arete comes in at about 46 inches.

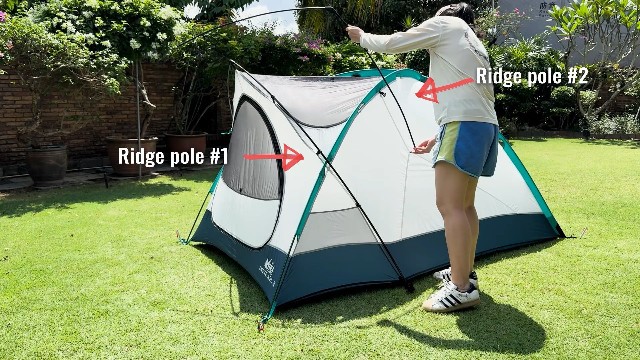
4. Pole Structure
The Arete comes with 4 poles:
- 2 main tent poles (green) criss-cross diagonally across the tent.
- 2 ridge poles (black) go horizontal over the green poles.
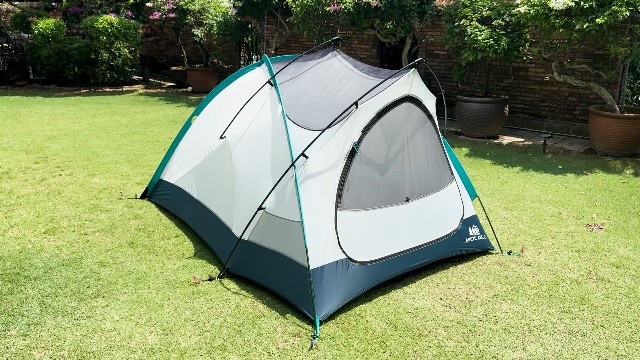
5. Livable Space
When I measured the height at the front wall, that came in at a whopping 43 inches. And nearer the back, where the green poles intersect, the height is about 40 inches.
6. Base Area
For the inner base area, here are all the dimensions:
- Length: 88 inches
- Foot width: 42.5 inches
- Shoulder width: 60 inches
- Head width: 55 inches
- Total base area: 32.6 sq. ft.
7. Pad Sizing
Here’s what my Exped MegaMat Duo looks like in the middle of the Arete:
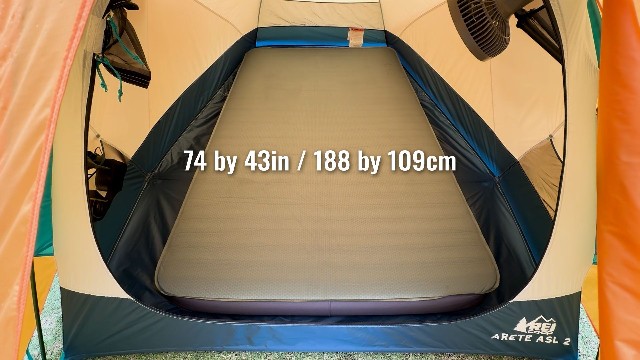
Pro-Tip: There’s 8 inches of space on either side near the head, but only 2 inches on either side near the foot, so anything even remotely bigger than the Exped won’t be able to fit.
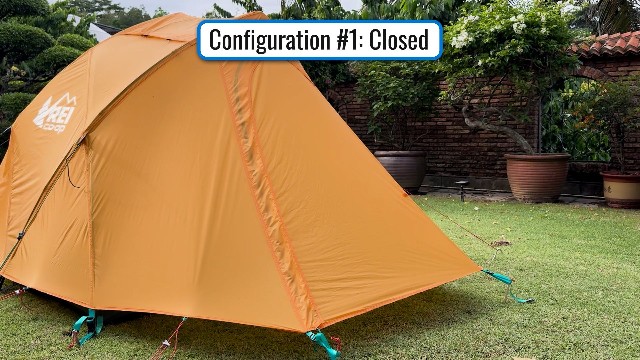
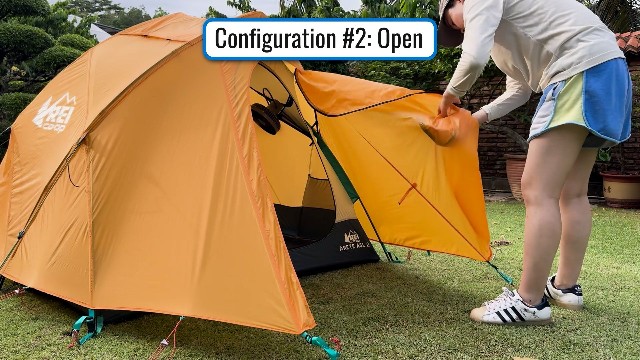
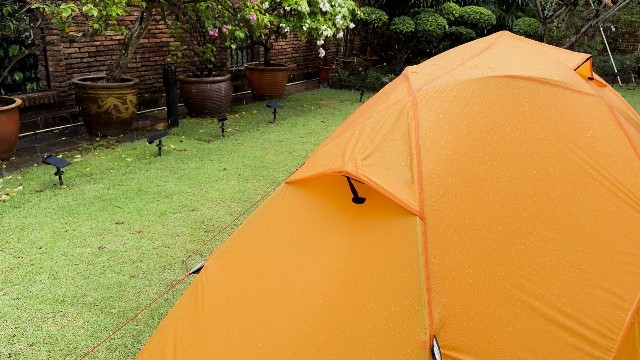
8. Vestibule
The Arete comes with only 1 vestibule at the front of the tent though, and here are the dimensions that you need to know:
- Shape: Trapezium
- Short length: 34 inches
- Longer length: 57 inches
- Width: 31.5 inches
- Base area of vestibule: 9.95 sq. ft.
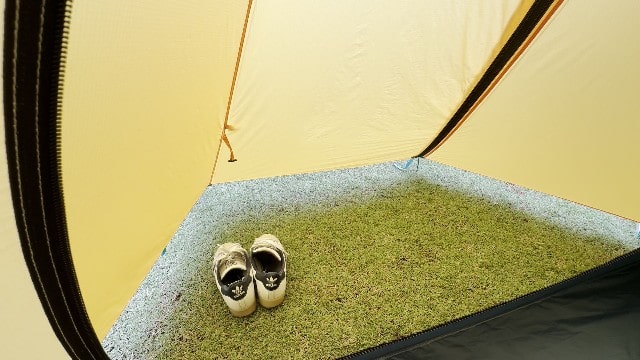
This vestibule comes with 2 webbing loops (these have buckles for easy tension adjustment), and the vestibule has only 2 configurations – opened and closed.
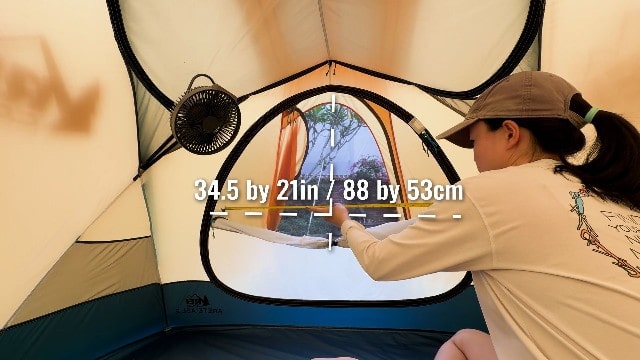
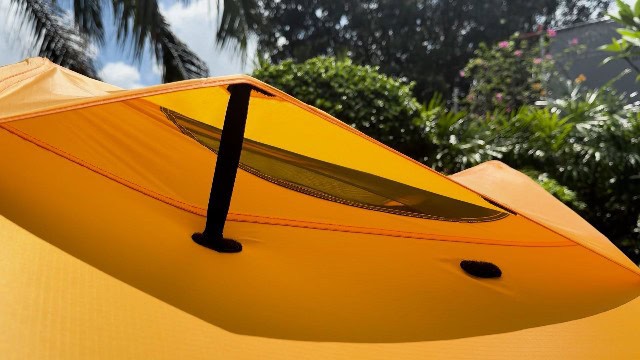
9. Window
The Arete has 1 window at the front of the tent, and here are all its details:
- Size: 34.5 x 21 inches
- Stowing: Toggle x 1
- Mesh: Micro
- Zippers: YKK x 2
10. Door
The window is actually part of the tent door, located at the head of the tent.
After unzipping it, you can easily tuck the door fabric away into a pocket beside the door:
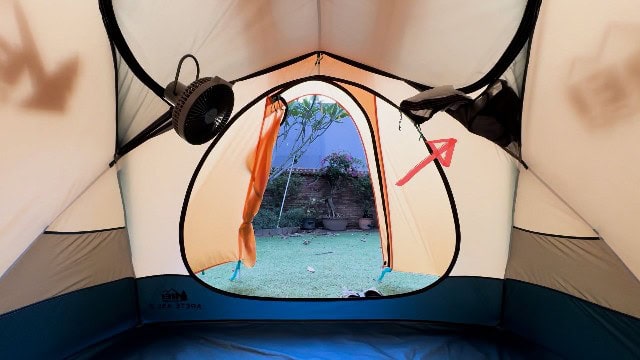
The door comes with 2 zippers, both are YKK, and very snag-free (same as the window and vestibules).
Pro-Tip: Unlike other single-door tents that have doors located on the length, the Arete has its door located at the width, and this reduces the annoyance of having to climb over someone else to get out of the tent.
11. Storage
For storage, the Arete has 6 pockets altogether – 4 pockets at the front, 1 super huge pocket at the back, and a small one at the top, with these dimensions:
- Front pockets x 4: 18 x 7in (x2), 12 x9in (x2)
- Back pocket x 1: 33 x 8in
- Top pocket x 1: 12 x 9in
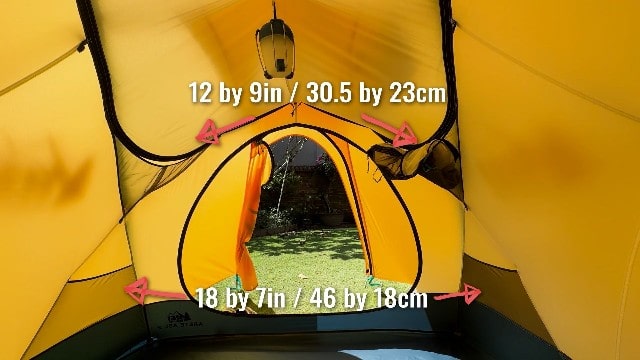
For loops to hang stuff from, there’s a total of 9 loops.
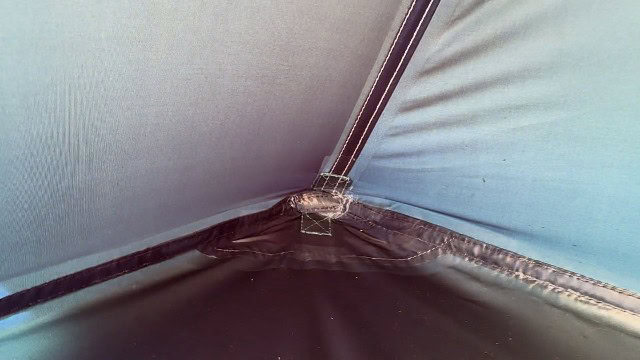
12. Seam Taping
For seam taping, all the seams covered by the rainfly (8 inches off the ground, and above) were not taped.
Those not covered by the rainfly were taped perfectly (corners, webbing loops, across-the-flooring seams).
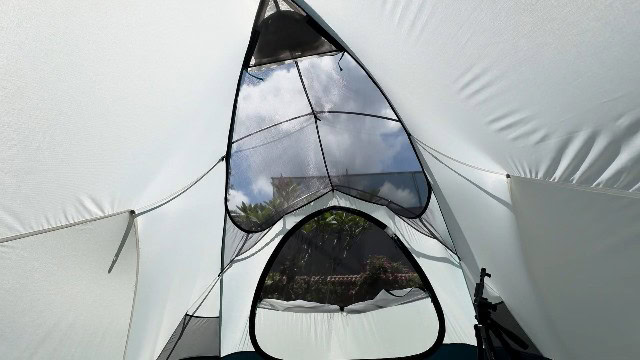
13. Vents
The Arete has 3 vents – 1 at the back, 2 at the top – and each can be held open with a Velcro kickstand.
However, these top vents cannot be opened or closed from the inside. This can pose a problem in horizontal rain, especially since the angle isn’t facing downwards.
Only the back vent faces downwards and can survive horizontal rain:
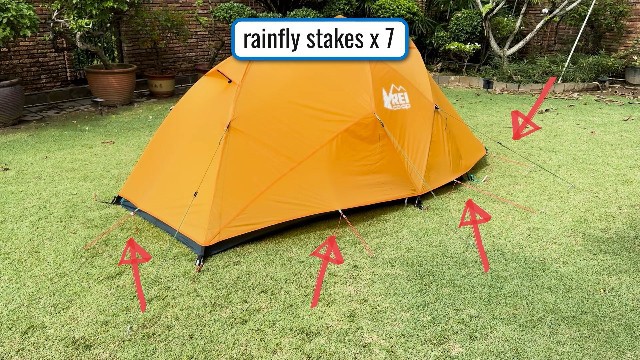
14. Rainfly
The Arete also has a full-coverage rainfly, which extends almost all the way down to the ground, leaving just a small gap at the bottom.
I really loved that this tent has 7 extra stake-out points at the bottom of the rainfly, so you can literally get every single side of the rainfly staked down.
15. Rain Tests
I put the Arete through many rain tests (including a 48-hour heavy rain test), and here were my results:
- 1 hour: No leaks
- 1.5 hours: Slight rainfly leakage
- 2 hours: Rainfly drenched
- 24 hours: Flooring (not covered by rainfly) drenched
- 48 hours: Seam taping starts to leak
- Vents: No leakage
For more rain test details, you can check out my YouTube video here:
16. Adjustable Mesh
The Arete has these mesh panels:
- Front window
- Top mesh
- Back triangle vent
You can unzip all these mesh panels for off-season camping (giving you about 15% mesh), or zip them all up for winter camping (or 0% mesh, to keep the heat in effectively).
17. Materials
Here are all the materials of the REI Arete ASL 2:
- Flooring: 70D nylon taffeta
- Rainfly: 40D ripstop nylon
- Tent body/canopy: 40D ripstop nylon
- Poles: DAC Pressfit (green tent body poles + shorter black pole), DAC Featherlite NSL (longer black pole)
- Mesh: Nylon micro mesh
- Guylines: Shockcord (with reflective strip)
- Stakes: DAC V-stakes
18. Portability
Here are the packed dimensions of the Arete ASL 2:
- Packed size: 22 x 8 x 5.5 inches
- Pole length: 22 inches (green poles), 19.5 inches (longer black pole)
As for weight, here’s a breakdown of all the components:
- Poles: 26.46oz
- Stakes: 3.32oz (for 8)
- Rainfly: 28.4oz
- Tent body: 36.3oz
- Carry bag: 1.51oz
- Total: 6.0lbs/96.0oz/2.72kg
- Minimum trail weight: 5.7lbs/91.1oz/2.59kg
19. Pros, Cons, Recommendations
Now, what are the pros and cons, and do I recommend the REI Arete ASL 2?
Pro #1: Lots of livable space
The first pro is easily the incredible livable space in the tent thanks to the:
- 4-pole structure
- Completely vertical front wall
- Peak height extending across the length of the tent
Pro #2: Amount of mesh is adjustable
Now, if you want to use this tent in winter, you can zip up all the mesh, and this will help keep all the heat inside the tent. Here’s how well the Arete does that:
| Tent | Seasons Rating | Outside Temp (°F) | Inside Temp (°F) |
|---|---|---|---|
| REI Arete ASL 2 | 3+ to 4 | 85.8 | 108.1 |
| Gazelle T4 | 3+ | 86.4 | 100.2 |
| Others | 3 | 86.0 | 95-98 |
Notice that the outside temperatures are similar, but the inside temperature in the Arete is the highest.
Pro-Tip: So, the REI Arete ASL 2 definitely keeps the heat in better than other tents, and I would definitely not recommend it for summer use.
Pro #3: Well protected against rain
The rainfly design is perfect, complete with 7 guy-out points to pull the rainfly away from the tent body at all sides.
Pro #4: High quality materials
The materials on this tent are also really high quality, complete with nylon ripstop and all-across DAC poles and stakes.
Pro #5: Value for money
And especially if you get this tent during one of REI’s sales, it’s really not too expensive for a tent that you can use not only in the off-season, but also in the winter.
Pro #6: Feature-rich
It also comes complete with a zippable window, loads of zippable mesh, loads of pockets, and huge ones at that, loads of loops, and more.
Con #1: Longer setup
However, more feature-rich tents tend to take longer to setup. The Arete takes 10 minutes, while other 2-person tents can take as little as 5 minutes.
Con #2: Missing 7 guylines and 13 stakes
Not only are you missing 7 guylines and 13 stakes, 4 of 6 of the provided guylines are ridiculously short.
Con #3: No footprint
And unlike other REI tents that come with footprints, the Arete doesn’t.
Overall Recommendation
But overall, the cons aren’t really super big issues, I’ve had this tent for almost a year now, and had no rainfly degradation issues.
So, bottom line, I thought the REI Arete ASL 2 was a fantastic and very impressive pick for a lightweight and inexpensive winter tent.
20. Bonus – MUST Read!
If you want to check more tents, I bought all the best REI tents out there.
Otherwise, check out the REI Arete ASL 2: