Budget backpacking tents · Review
Coleman PEAK1 2 Tent Review (Bought & Tested!)
I bought this tent with my own money and put it through 13 hands-on tests.
- Setup 7 min
- Peak 40.5in
- Inner area 30.9 sq ft
- Vestibule 15.88 sq ft

This page contains affiliate links, and that means that I may earn a commission if you buy something, at no extra cost to you. You can find my full disclosure policy here.
Test scorecard · scored against budget backpacking tents
I bought Coleman’s premium range of tents and found that the Coleman PEAK1 2 is much better than Coleman’s regular budget-friendly range (think: Sundome) but not quite as good as some of the other budget backpacking tents I’ve tested.
- Good waterproofing
- Much better than Coleman’s budget range (flooring, poles, stakes, warranty, footprint, etc.)
- Rainfly can be full-length
- Average compared to other brands
If you prefer watching to reading, check out my video here instead.
See the 13 tests
In the Box
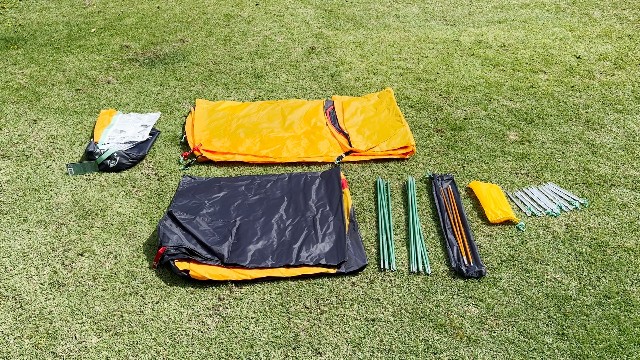
Out of the box, this is what I got:
- Tent body
- Footprint
- Rainfly, with pre-attached guylines
- Poles × 3 (2 long, 1 short)
- Stakes × 10
- Carry bag
- Instructions
Set Up & Pack Away
- Set-up time (1 person) 7 min
- Pack away 6.25 min
Very briefly, here’s how to set up the PEAK1:
- Lay down the tent body and footprint.
- Secure the 2 long poles into the 4 grommets in the tent body and footprint.
- Secure the 13 pole clips.
- Secure the ridge pole above the long poles with the 2 top grommets.
- Secure the color-coded rainfly.
- Stake the tent down (4 corners, 2 vestibules, 4 guylines).
Want the full step-by-step? Watch my PEAK1 2 set-up walkthrough on YouTube.
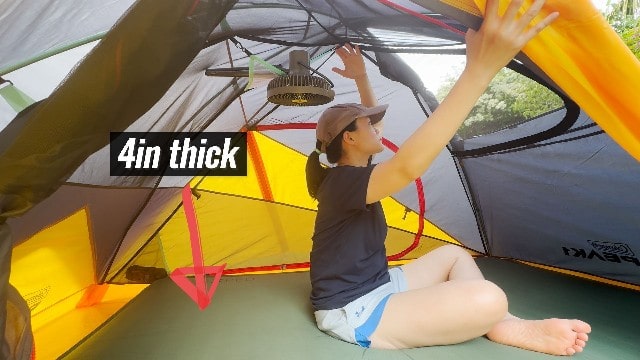
Peak Height
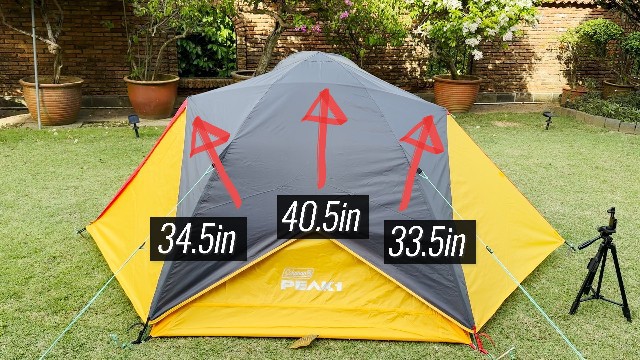
- Peak height 40.5in
Livable Space
- Extreme left width 34.5inthe extra ridge pole at the top carries the height across
- Extreme right width 33.5in
Base Area
- Floor 88 × 50.5in
- Inner base area 30.9 sq ft
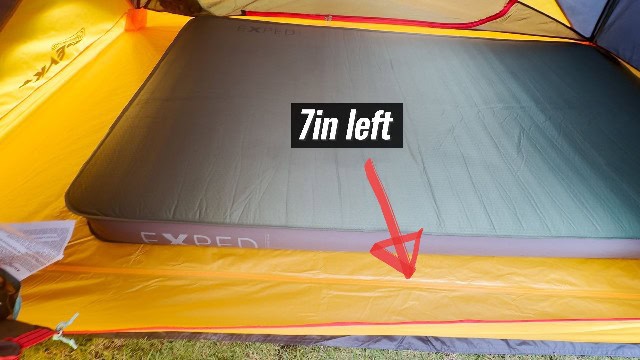
Wider 25-inch pads will be a very, very snug fit, all the way to the edges. Anything bigger won’t fit because the 50.5in width of the tent is the limitation.
Vestibules
- Vestibules 2 (26in wide, 88in long)
- Area 7.94 sq ft each, 15.88 sq ft for both
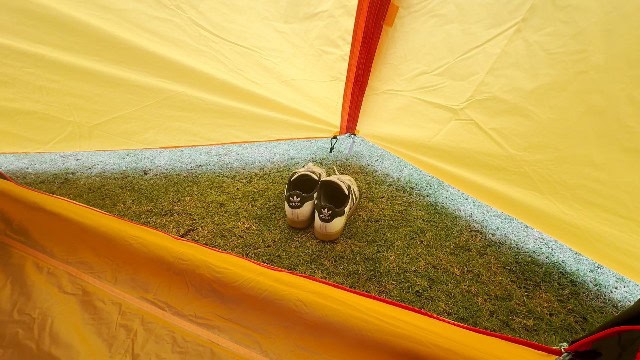
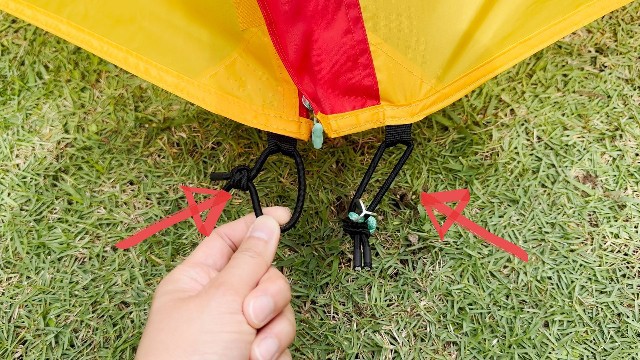
- Stake-downs 2 per vestibuleso I can keep either the right or left panel open
Doors
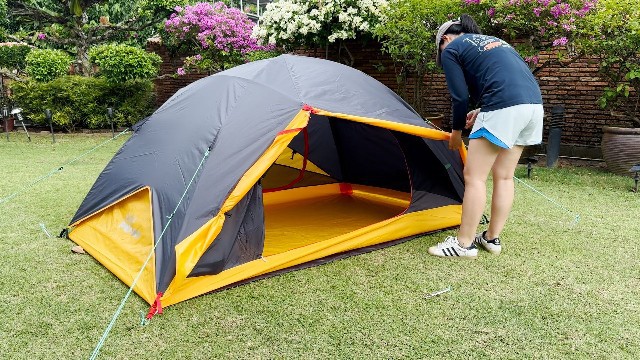
- Doors 2one under each vestibule
- Door size 45 × 28in
- Zippers 2 per doorsmall and unbranded, but not snaggy
- Held open by 1 toggle per door
Storage
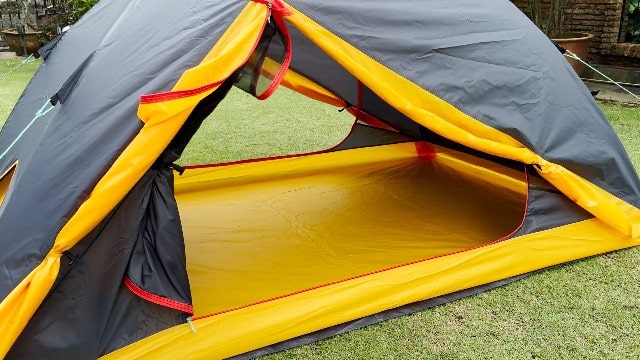
- Pockets 2 (triangle, 12 × 10in)
- Gear loft 1 (13 × 11in)
- Loops 3used to hang up the gear loft
Windows
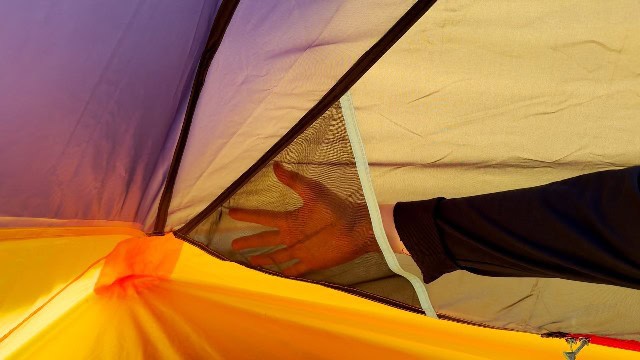
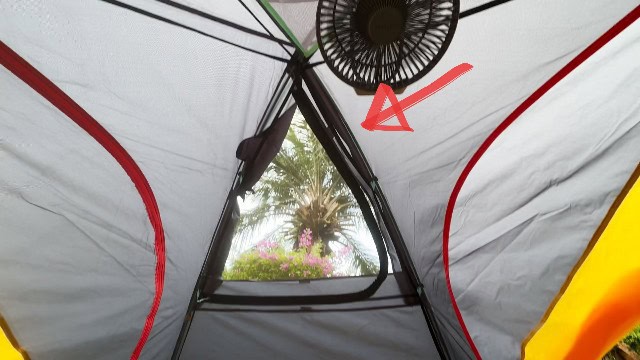
- Star-view window 1 (triangle, 24 × 22in)at the back of the tent
- Layers 2 (mesh + fabric)1 toggle and 1 zipper for each layer
Ventilation
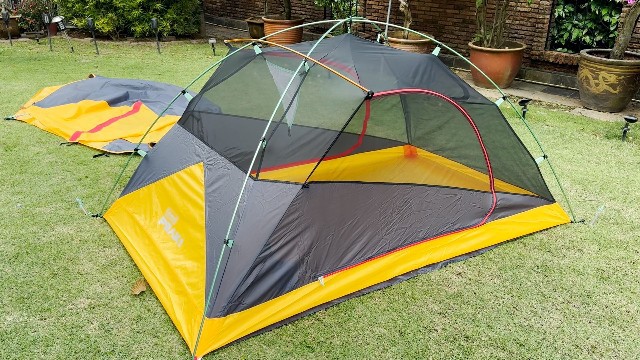
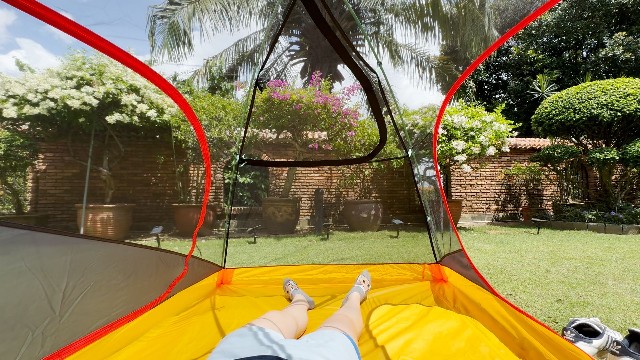
- Mesh ~50% of the tent body
- Fabric ~50%
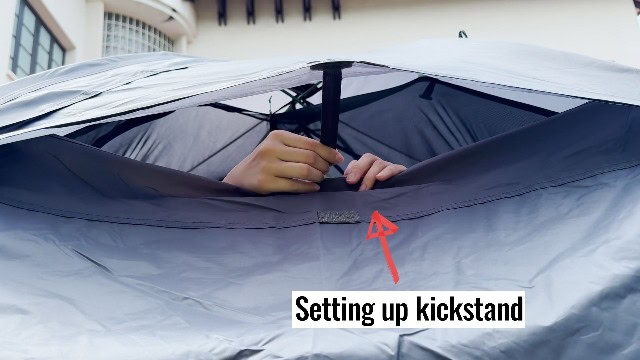
- Vents 1the shut star-view window becomes a rainfly vent, held open on a kickstand
Rain Protection
- 1 hour light rain No leaks
- 1 hour heavy rain No leaks
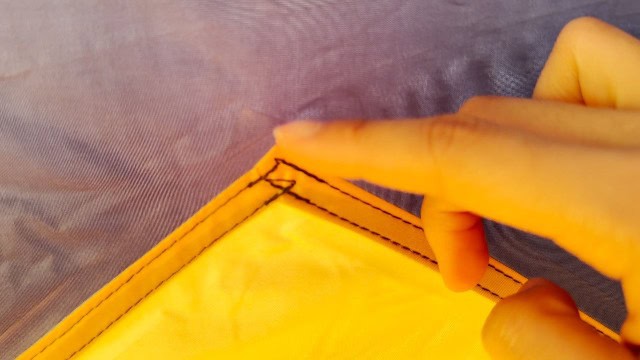
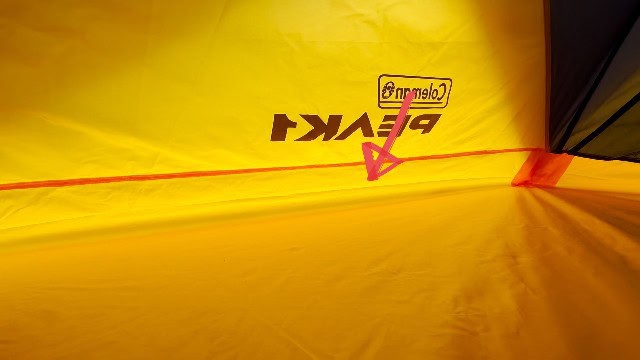
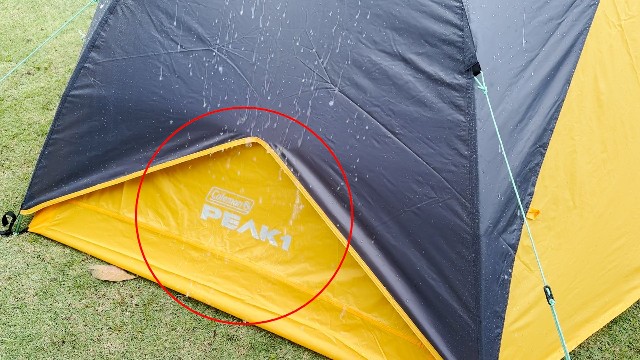
- Seam taping All rainfly and flooring seamsplus the gap in the tent body the rainfly doesn’t cover
- Tub-like floor Runs all around the tentseams in the corners and down the side, but none around the edges
Want to see the water hitting it? Watch my full PEAK1 2 rain test on YouTube.
Quality
- Flooring 68D polyester
- Footprint 68D polyester
- Rainfly 68D polyester
- Tent body / canopy 68D polyester
- Poles 7,000 aluminum
- Mesh Micro mesh
- Guylines Shockcord
- Stakes Y-stakes
Portability
- Packed size 22.5 × 9 × 6.5in
- Pole length 21.75in
- Total weight 5.93 lbs (94.9oz)
- Tent body 31.7oz
- Rainfly 29.9oz
- Poles 17.8oz
- Footprint 7.8oz
- Stakes (10) 5.2oz
- Carry bag 2.5oz
Pros, Cons, Recommendation
Now, what are the pros and cons of the Coleman PEAK1 2 and how does it compare to other Coleman tents, like their most popular Sundome?
Higher waterproof rating
| Tests | PEAK1 | Sundome |
|---|---|---|
| HH Rating | 2,000mm | 450-1,000mm |
| Rain Test | >1 hour | 15-30 minutes |
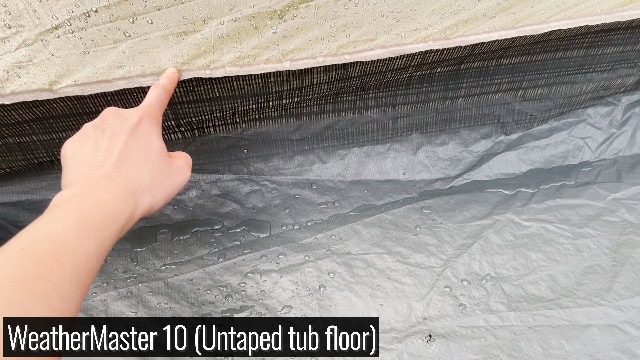
Better seam taping
The seam taping in the PEAK1 was also much better, while the rest of the budget Coleman tents don’t tend to have very many taped seams.
Better quality flooring
The flooring is better quality too: 68D polyester in the PEAK1, compared to polyethylene in the rest of the tents.
Comes with footprint
On top of better flooring, the PEAK1 also comes with a free footprint for added durability. Other budget Coleman tents do not have these.
Better quality poles
The poles are made of 7,000 series aluminum, instead of the fiberglass most Coleman tents use.
Better stakes
Even the stakes are higher quality, beefier Y-stakes, while the rest of the tents come with shepherd-hook stakes.
Better carry bag
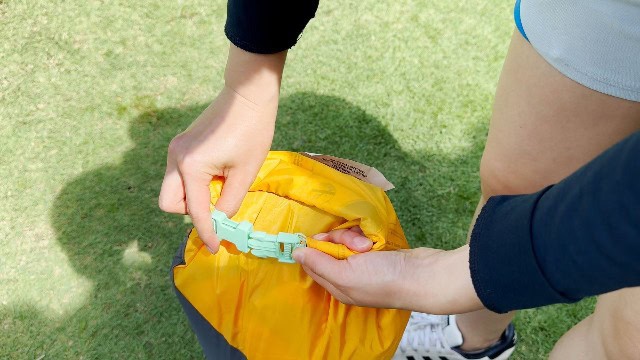
I also liked the carry bag; it’s a roll-top dry bag, so it compresses everything down nicely.
Much longer warranty
The warranty comes in at a whopping 5 years, much longer than the 1-year warranty for other Coleman tents.
Roomier
Compared to a similar-sized 2-person Sundome, the PEAK1 is much roomier thanks to the ridge pole on top. Most of Coleman’s smaller dome tents don’t have this ridge pole. It’s the same trick that makes the Nemo Aurora 2 the most spacious 2-person tent I’ve tested.
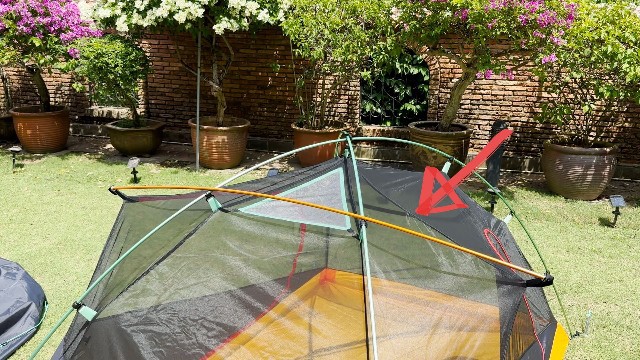
Much more mesh
There’s also a ton more mesh on the PEAK1 than the rest of the tents. Basically, almost everything here is better than Coleman’s budget range.
Not enough storage
The pockets and loops are still very small and don’t hold a lot of things.
Cheap zippers
The zippers are still small and fairly cheaply made.
Rainfly can be better
The PEAK1 doesn’t really have a full-coverage rainfly; there’s a weird triangle gap at the back. And at the front, the rainfly can’t be pulled away from the tent body, which isn’t great for ventilation.
Very long poles
And the poles pack down super long, so not exactly a backpacking tent.
Overall recommendation
But overall, if you swear by the Coleman brand, the Coleman PEAK1 2 is a perfectly functional tent, much better than the other budget options you may be used to.
Bonus: Must Read!
This PEAK1 may be better than Coleman’s regular budget-friendly range, but how does it compare to other tents? Check out my Best Budget Backpacking Tents article to find out.
Or, check out the Coleman PEAK1 2:
Every figure above is from my own testing. Measured by hand, bought with my own money.