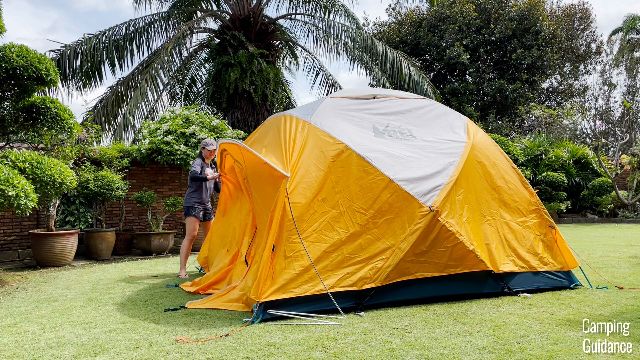
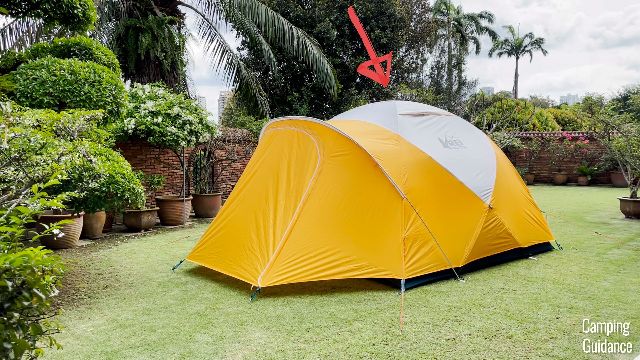
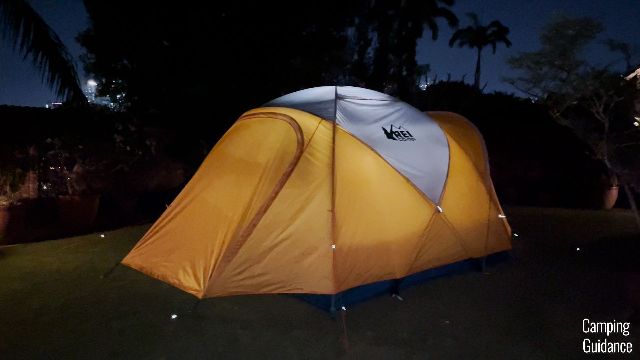
REI Co-op Base Camp 6 Tent Review (With 22 REAL Tests!)
This page contains affiliate links, and that means that I may earn a commission if you buy something, at no extra cost to you. You can find my full disclosure policy here.
Rating and Summary
The REI Base Camp 6 is an incredible tent for rain and colder weather (amongst many other pros, of course), thanks to its full length rainfly, 2 humongous vestibules, and 4 user-friendly vents. These are features that many other family camping tents don’t have.
However, I wouldn’t recommend using this tent in perfect weather (it’s a bit overkill), and I also found it a tad bit stuffy in the summer.
This is just the tip of the iceberg – I’ll make sure to go through every single ‘pro’ and ‘con’ with you in this blog post, and there’s a whole lot to talk about. Let’s dig in!
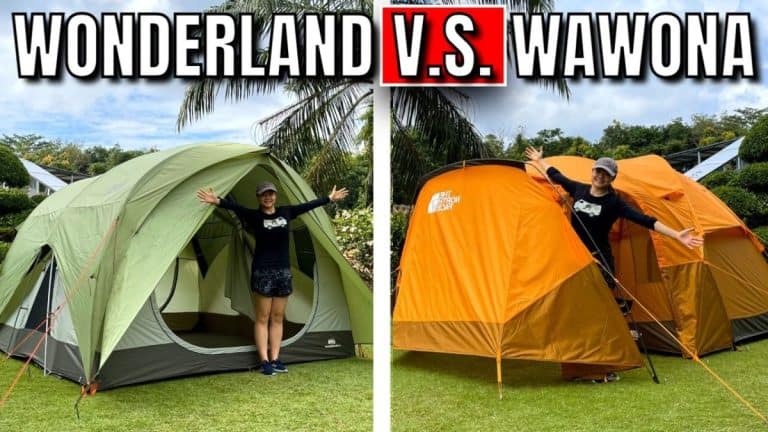
RELATED: (1) The Best 6-Person Tents, (2) Best Waterproof Tents, (3) Best Family Tents for Camping, (4) Base Camp V.S. Wonderland, (5) Base Camp V.S. Wawona
If you enjoyed this video, please consider subscribing to my channel here:
Check out the REI Base Camp 6:
- Rating and Summary
- Product Details
- Testing and Performance
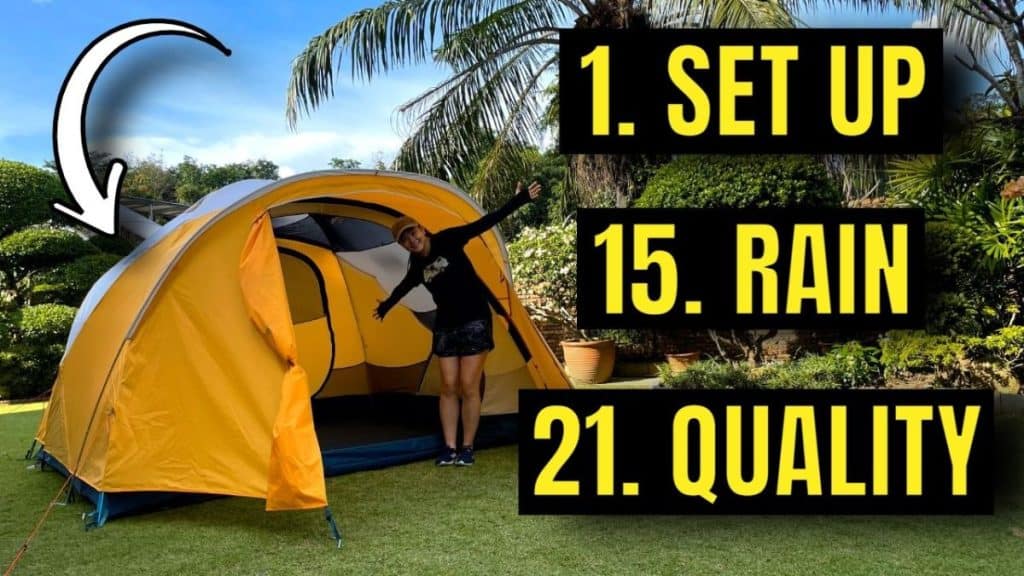
- 1. Set Up
- 2. Pack Away
- 3. Height
- 4. Base Area
- 5. Single Pad Sizing
- 6. Tent Shape
- 7. Queen Bed Sizing
- 8. Front Vestibule
- 9. Back Vestibule
- 10. Vestibule Doors
- 11. Tent Doors
- 12. Windows
- 13. Pockets
- 14. Loops
- 15. Heavy Rain Test
- 16. Heavy Rain Ventilation
- 17. Light Rain Test
- 18. Light Rain Ventilation
- 19. Hot Day Ventilation
- 20. Wind Protection
- 21. Quality
- 22. Portability
- Pros and Cons
- Recommendation
- Bonus: Must Read!
Product Details
Here’s what we’ll discuss here:
- Unboxing
- In the Box
- Specifications
Unboxing
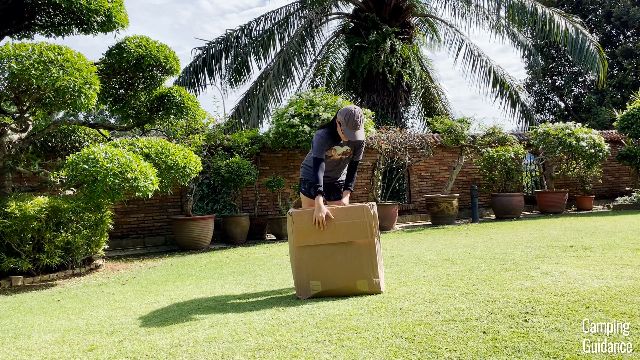
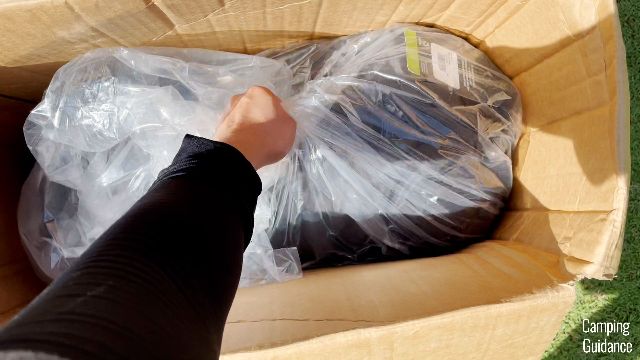
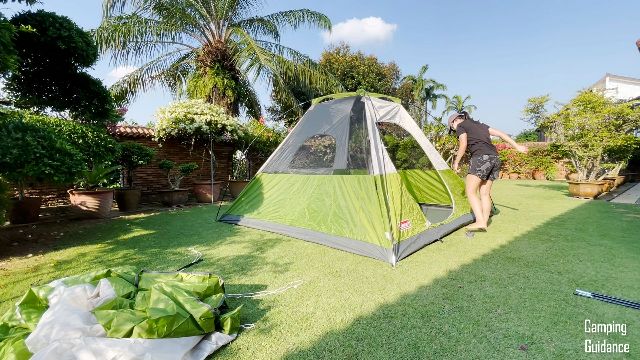
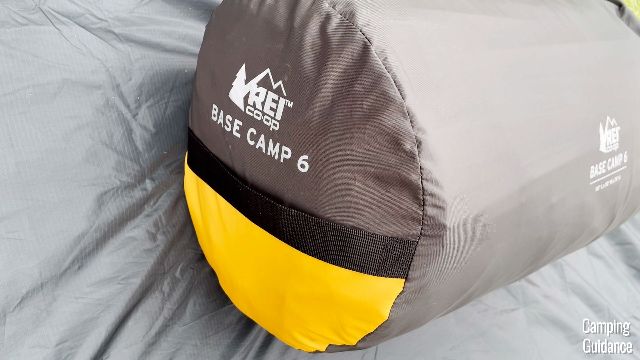
I bought this Base Camp Tent in a 6-person version, you can only get it from REI, so that’s where I got mine from.
The packaging wasn’t anything spectacular, just a plain old cardboard box:
In the Box
After unboxing the Base Camp, here’s everything that I found in the box.
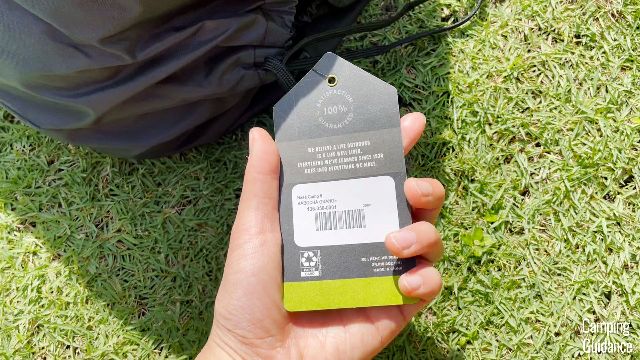
First up, I got a black carry bag, and when it’s brand new from REI, you’ll get this tiny product tag attached to the carry bag:
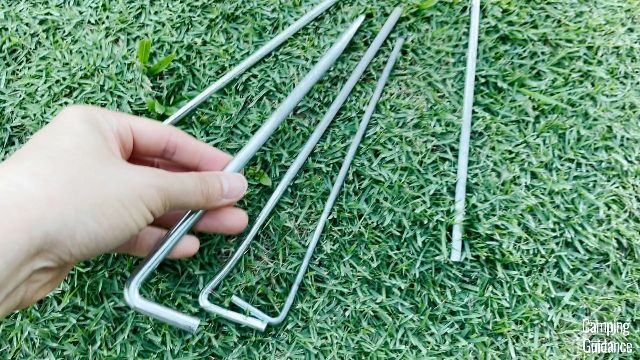
After taking everything else out, I also got the rainfly, the tent body, 5 poles in a separate carry bag, plus 12 stakes and 4 guylines in another smaller carry bag. You can also see the black carry bag in the picture below.
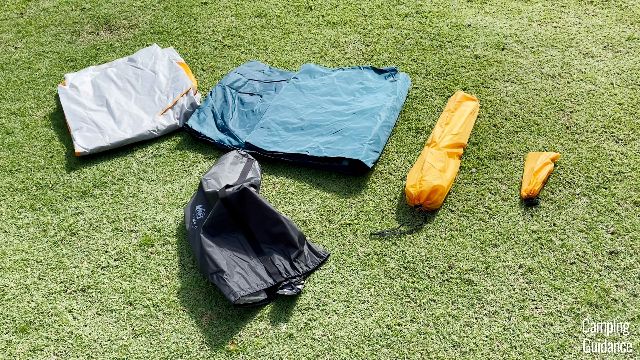
Here’s what the poles, stakes and guylines look like after unboxing them too.

And also, I found this pole repair splint on one of my poles, which is really nice to have just in case. It can be removed from the pole.

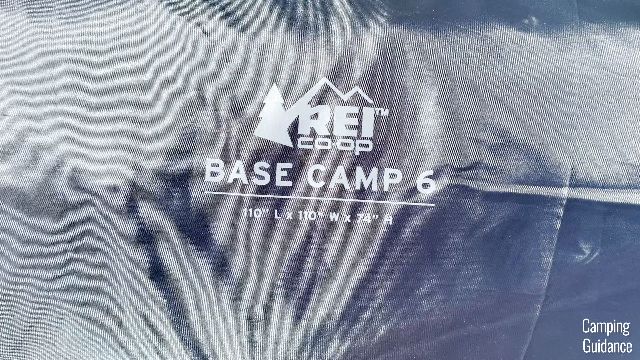
Specifications
Here’s all the data that you might need on the REI Base Camp 6:
Dimensions
- Peak height: 73 inches
- Length: 9 feet 1 inch
- Width: 9 feet 1 inch
- Base Area: 82.5 square feet
- Front vestibule area: 31.1 square feet
- Back vestibule area: 21.3 square feet
- Total vestibule area: 52.4 square feet
- Vestibule height: 62 inches
Materials
- Floor material: 150D polyester
- Bathtub flooring: No
- Tent body material: 75D polyester
- Rainfly material: 75D polyester
- Pole material: Aluminum
- Number of poles: 5
- Mesh: Micro-mesh (Unsure if it’s no-see-um, not specified)
- Zippers: YKK (doors), no-brand (windows)
Portability
- Packed size: 28 x 13 x 9.5 inches
- Weight: 20.6lbs.
Features
- Number of guylines provided: 4
- Number of guy-out points: 6
- Number of stakes: 12
- Number of doors: 2
- Number of windows: 2
- Number of vents: 4
- Number of pockets: 14
- Number of lantern loops: 20
- Number of gear lofts: 0
- Room divider: No
- Power port: No
- Black-out: No
I also did some testing on my own, and came up with this data:
- Set up timing (1 person): 17.5 minutes
- Take down timing (1 person): 15 minutes
- Number of single sleeping pads (inner tent): 6
- Number of queen-sized mattresses (inner tent): 1
- Number of camping chairs (front vestibule): 2
- Number of camping chairs (back vestibule): 0
Note: All of this data are my personal measurements, not REI’s. My measurements may differ slightly from REI’s marketed specs.
Check out the REI Base Camp 6:
Testing and Performance
I put my REI Base Camp 6 through these 22 different tests:
- Set up
- Pack away
- Height
- Base area
- Single pad sizing
- Tent shape
- Queen bed sizing
- Front vestibule size
- Back vestibule size
- Vestibule doors
- Tent doors
- Windows
- Pockets
- Loops
- Heavy rain test
- Heavy rain ventilation
- Light rain test
- Light rain ventilation
- Hot day ventilation
- Wind protection
- Quality
- Portability
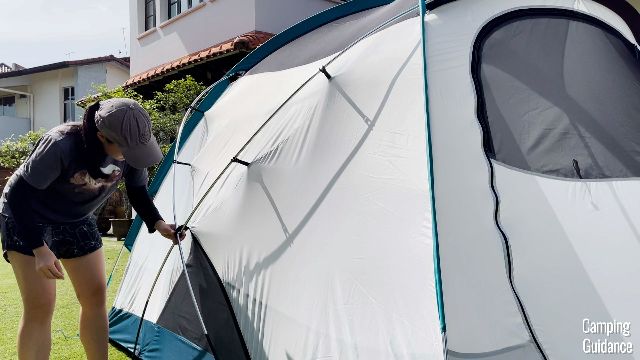
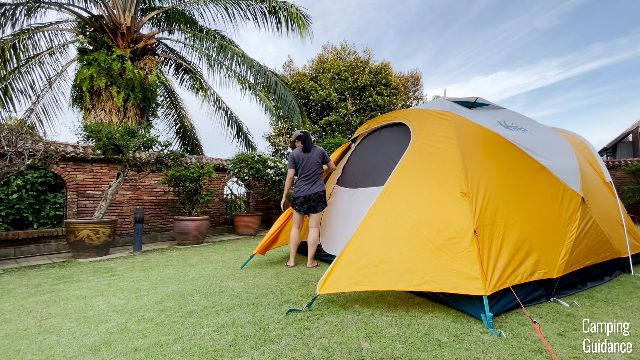
1. Set Up
Set Up Timing
The entire set-up of the REI Base Camp 6, including staking and guying out the tent, took me about 17.5 minutes. But just bear in mind that I’ve already set this up at least half a dozen times, so I’ve gotten enough practice in.
If you need a step-by-step guide on how to set up the Base Camp 6, I highly recommend that you watch my YouTube video here. It also includes tons of my own personal tips on how I set this up on my own when I’m only about 5’3” (160cm):
Pros of the Set Up
For now, here’s a few things that I liked about this tent’s set-up.
First, I love that the ends of all the poles are color-coded in the same color as the pole sleeve that they’re supposed to be inserted into. (Example: The 2 blue poles go into the 2 blue pole sleeves, and the 2 black poles go into the 2 black pole sleeves.)
On top of that, to secure these poles, you’ve got to push the tips of the poles into these grommets, and the webbing that the grommets are in are also color-coded according to the color of the poles (blue/black/white).
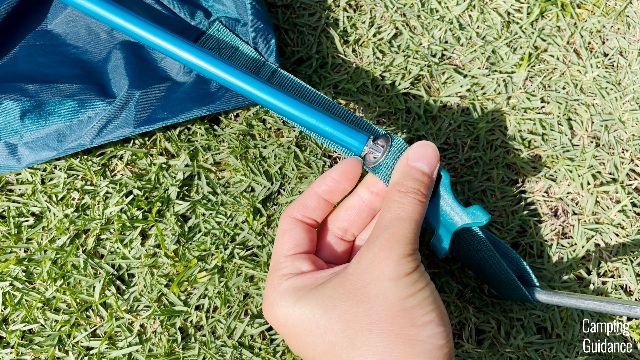
After you get the rainfly up above the tent, the buckles of the rainfly are also color-coded to the color of the webbing.
And also, when you’re getting the rainfly up, you don’t have to fret about where the front or the back of the rainfly is, you can actually put it on either way, and it’ll still work. This is because REI attached these extra rainfly webbings (white) and rainfly buckles (black) to make it more user-friendly.

Cons of the Set Up
But there are two small things that I didn’t quite like.
The first is that the pole sleeves are quite long, and the poles can get snagged on the sleeves quite a bit. During the set up, I found the blue pole sleeves especially annoying. The first pole was fine, and snagged only once, but my second pole snagged a whopping four times.
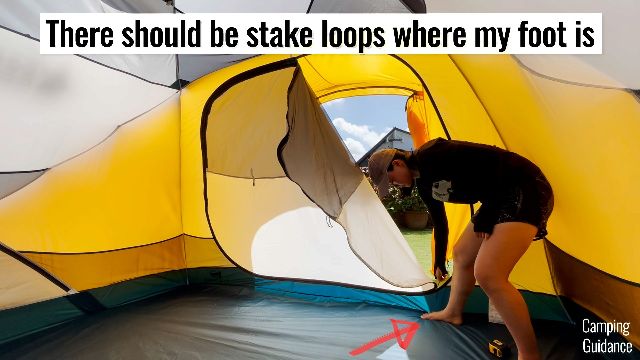
And second, REI didn’t give me enough stakes and guylines. There are 6 guy-out points, 3 at one side, and 3 at the other side. But, I got only 4 guylines.
And also, I needed 8 stakes to stake down the tent body, and another 4 to stake down the 2 vestibules, and I used up all 12 my stakes. So, I didn’t have any stakes left for the guylines, and I had to dig out my own stakes.
Just a minor thing here, but I always wonder why they don’t give enough when these things are so cheap to manufacture.
2. Pack Away
And now, let’s move on to the ease of take down and pack away.
Pack Away Timing
Again, I found the pole sleeve pretty annoying, this time it was the white pole sleeve. It snagged so many times that I lost count, and I had to walk back and forth to undo the many, many snags.
Thankfully, all the other pole sleeves were not too snaggy during the take down, and altogether, it took me about 15 minutes to get the entire Base Camp 6 down, fold it up, and finally, get it back into the carry bag, along with everything else.
Pro Tip: For the pack away, take note that I recommend packing everything up separately, instead of rolling everything together.
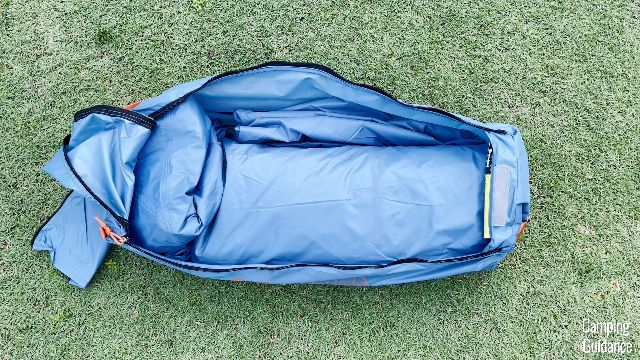
Carry Bag Design
That’s because the Base Camp’s carry bag kind of sucks, it’s really not very big at all, and it’s a side-loading carry bag.
This means that the opening of the bag is at the side, which made packing everything in a little bit of a struggle.
Notice in this picture below that I rolled all the different items up separately, and got them back into the carry bag:
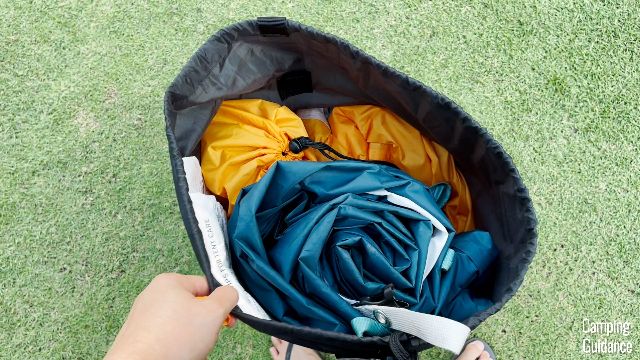
On the other hand, this is what happens if you roll everything up together and try to squeeze everything back in all at once:

I would very much prefer a top-loading carry bag, like my Eureka Copper Canyon LX 6 and even my Coleman Sundome 6, the opening is at the top and is therefore much bigger, making the pack up a little bit less of a struggle.
3. Height
Peak Height
The peak height inside this REI Base Camp 6 is about 73 inches, and of course, I’m not very tall (I’m 5’3/160cm), so I can stand completely upright under the peak height, no problem at all.
It’s not the tallest peak height I’ve seen though, so I can easily reach the top of the tent by just raising my arm up.
Lowest Height
Also, this is a dome-shaped tent, so just take note that the peak height is only at the center.
When I take 3 small steps away from the peak height, my head would touch the top of the tent. And the height where my head touches the sides of the tent is about 60 plus, maybe 61 inches. It’s right here:
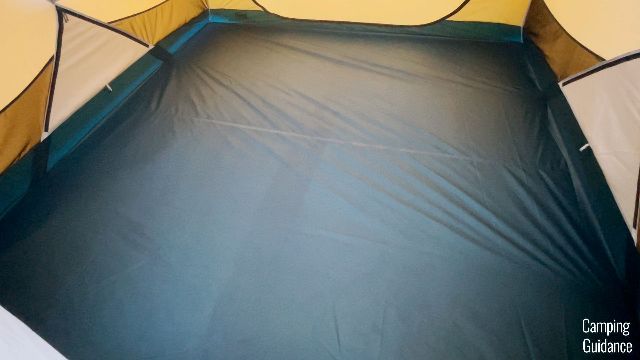
4. Base Area
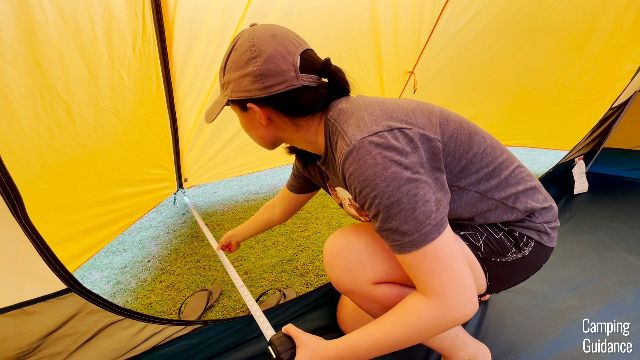
For the base area, I measured the length of this Base Camp 6 to be about 9 feet and 1 inch, and I measured the width to be also 9 feet and 1 inch.
This gave me a square base, and a total base area of about 82.5 square feet.
This is right about the marketed dimensions of 110 by 110 inches, so thumbs-up to the Base Camp for this.
5. Single Pad Sizing
On top of the base area, I also wanted to look at how many single pads can fit into this Base Camp 6. After I inflated some of my sleeping pads, this is what I got, and here’s what having 6 pads looks like:
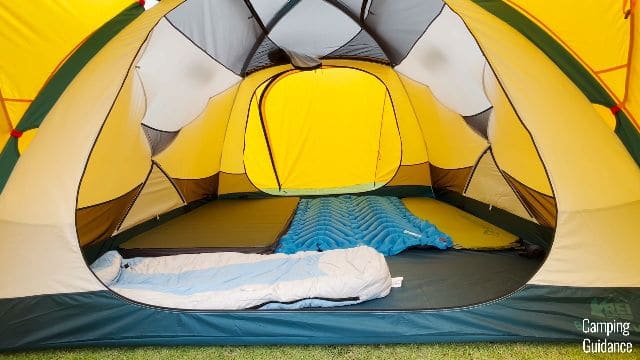
While the person sleeping nearest to the front door (on the Big Agnes sleeping bag) would get a little bit more space than the rest, and there’s even a tiny bit of space leftover for storing gear (at the foot of the Big Agnes sleeping bag), the rest would have to sleep shoulder to shoulder.
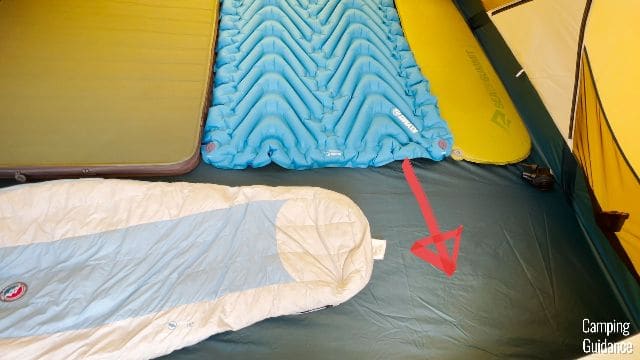
With 6 pads, needless to say, it’s a bit of a tight fit, especially if you hate sleeping by the walls, like I do.
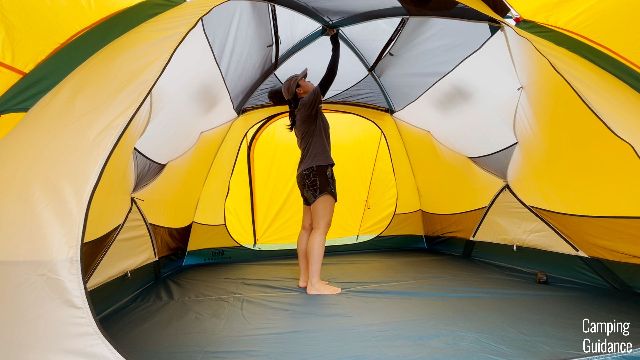
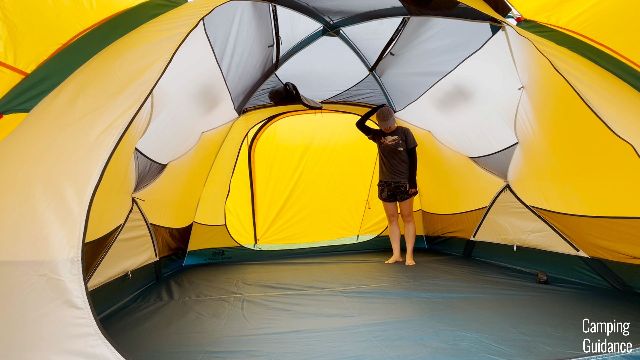
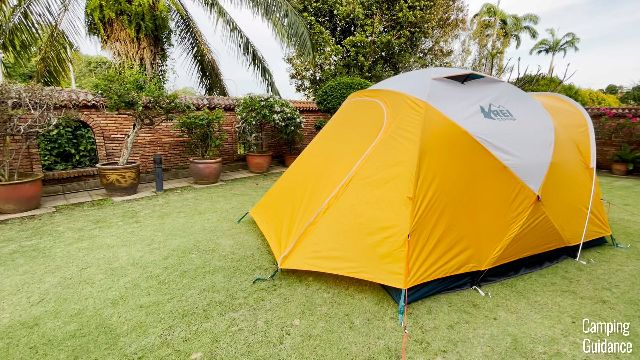
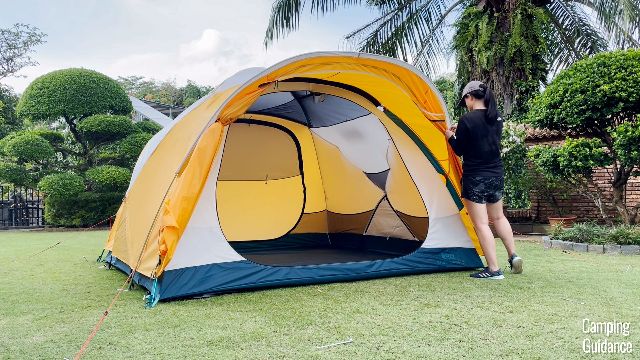
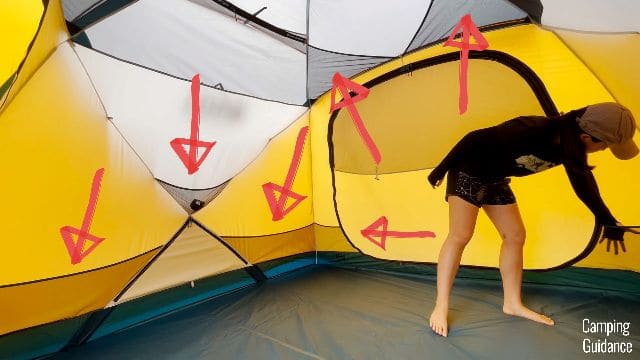
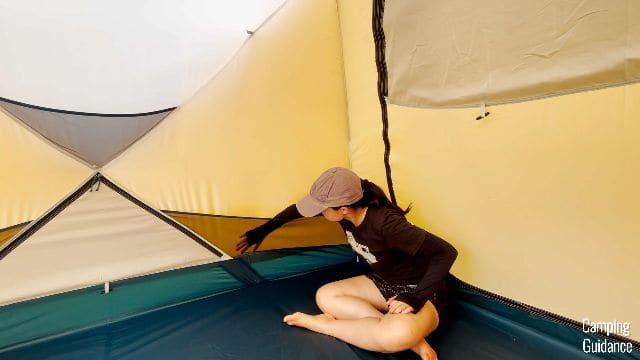
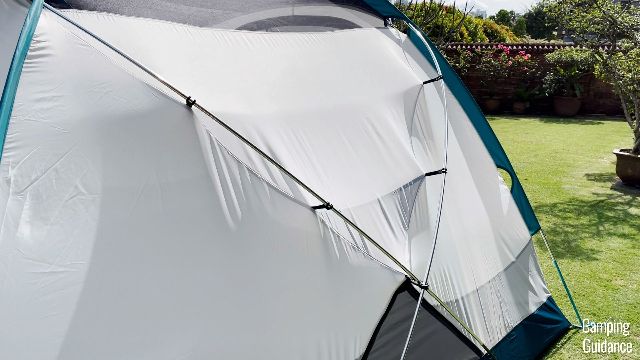
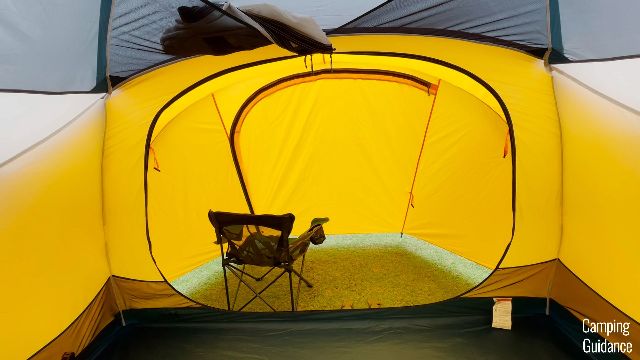
6. Tent Shape
But here’s one pretty cool thing I noticed about this Base Camp 6, which is the tent shape.
In any other regular dome-shaped tent, let’s take my Coleman Sundome 6 as an example, sleeping at the sides of the tent, for me at least, makes me feel incredibly claustrophobic, because usually, my head would graze against the wall of the tent when I sit up.
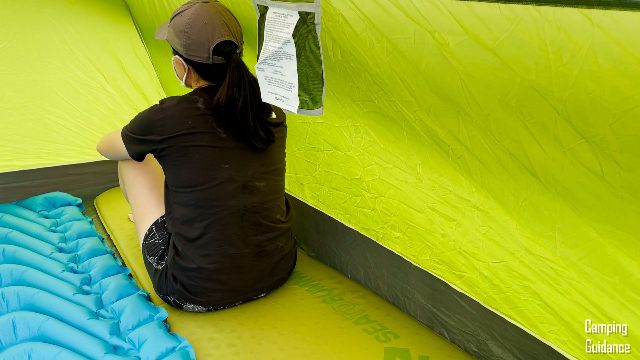
However, in my Base Camp 6, my arm doesn’t even touch the sides when I raise it up, and neither does my head when I sit up. There’s actually a few inches of headspace between my head and the wall:
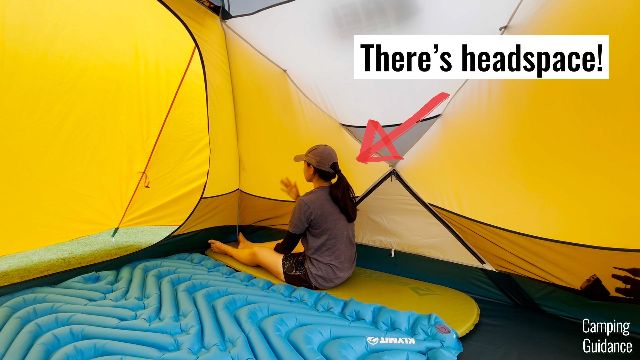
That’s because the 2 sides of this Base Camp is pulled outward by the 2 black poles on the outside.
If you watched my set up video above, there’s these 2 black poles that we need to set up, and then we’ve also got to secure and clip the pole clips and buckles of the tent body to the black poles.
These really pull the tent fabric outward, giving you much more livable space than regular dome-shaped tents. You can see in the picture below that both sides have this same design:
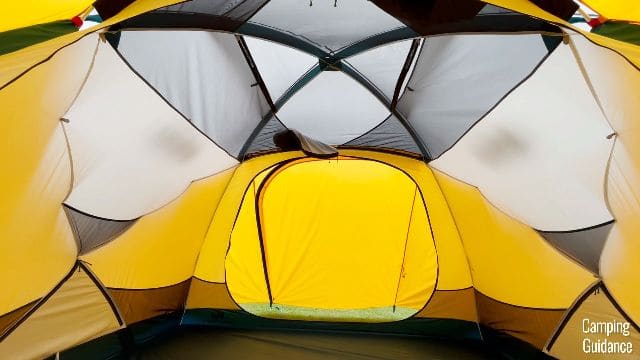
In fact, I found that I could actually walk around the tent quite a bit; it’s very impressive.
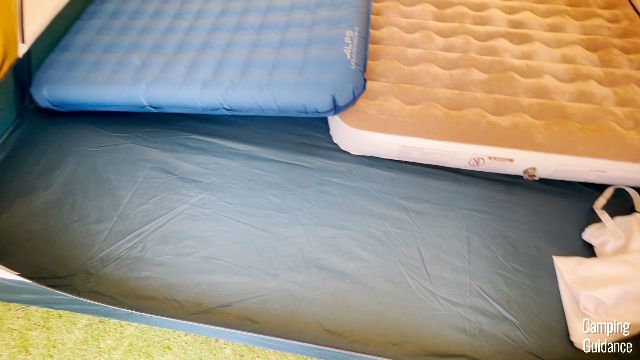
7. Queen Bed Sizing
Back to the mattress sizing, I inflated 2 of my queen beds inside this tent, and well, it looks like this Base Camp 6 can fit a maximum of only 1 queen bed, plus a twin bed by the side. There’s no way to fit 2 queen beds:
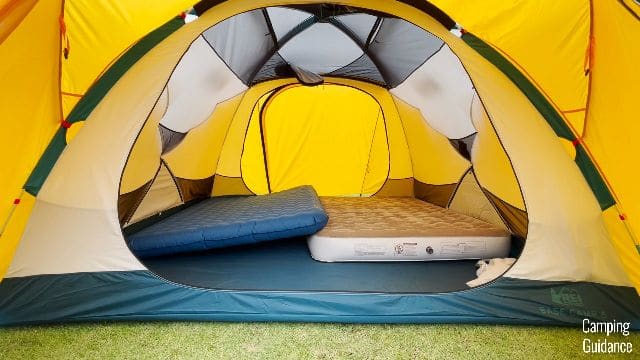
So, instead of 6 people squished into this tent, I recommend fitting a maximum of 3, maybe 4 people inside this tent.
On top of that, there’s also quite a bit of leftover room for storing gear inside the tent itself, which is always very nice to have.
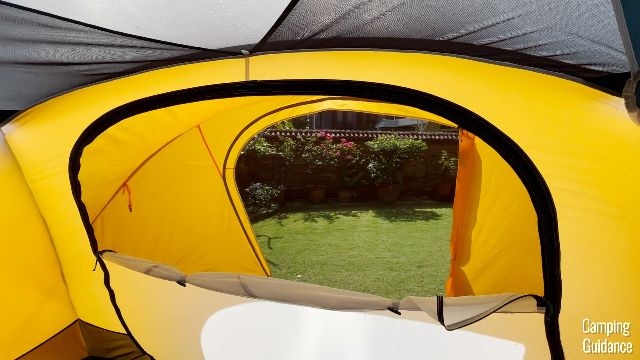
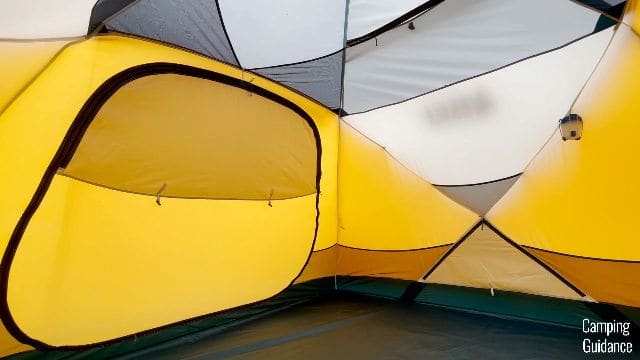
8. Front Vestibule
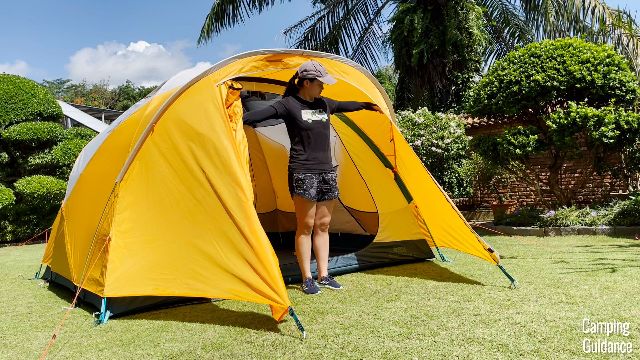
This REI Base Camp 6 comes with 2 pretty huge vestibules, 1 front vestibule and 1 back vestibule.
Front Vestibule Dimensions
The front vestibule has a shortest length of about 58 inches, if you stake it out snugly, while the longest length comes in at about 109 inches, which is the same size as the inner tent.
The width of this front vestibule is a good 54 inches, and after doing a little calculation, I found the front vestibule area to be about 31.1 square feet.
Front Vestibule Sizing
So, since this front vestibule is pretty big, I could easily fit one of my camping chairs into it, and this is the REI Camp X Chair (now called the REI Skyward Chair).
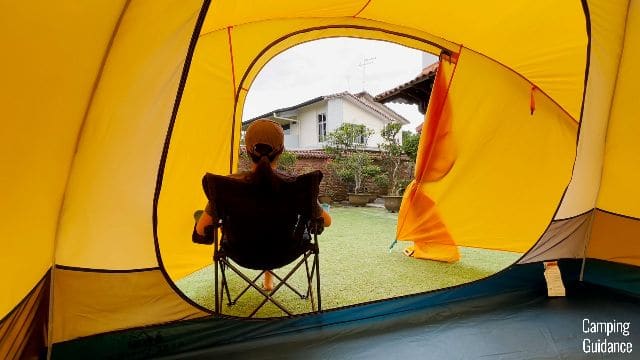
I found that I could easily have another camping chair beside it too.
9. Back Vestibule
Back Vestibule Sizing
On the other hand, when I brought my REI Chair to the back vestibule, it couldn’t even fit at all, and looks like this:
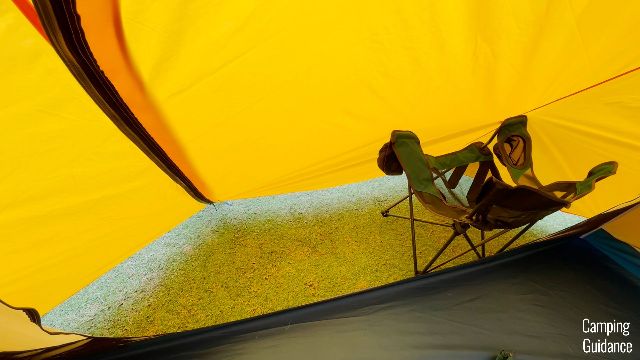
I don’t know if you can tell from the picture, but the legs of my chair were hanging off the ground, because the door to the vestibule was blocking the armrest of the chair.
So, if you’re wondering, yes, this back vestibule is a lot smaller, and here are the dimensions.
Back Vestibule Dimensions
The shortest length comes in at about 57 inches, and the longest length measures about 109 inches, which is about the same as the front vestibule.
But here’s the big difference. The width of the back vestibule is just 37 inches. This gave me a base area of just 21.3 square feet, which is two-thirds the size of the front vestibule.
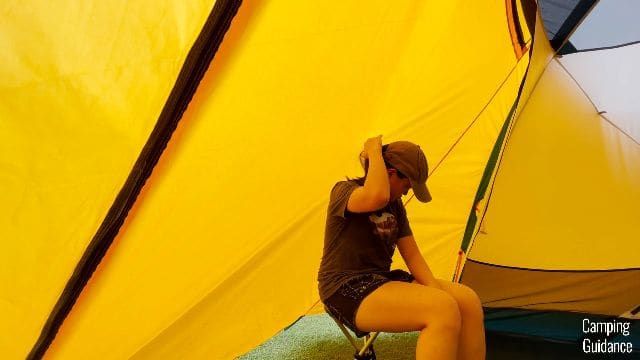
In fact, here’s me trying to fit the REI Trail Stool into the back vestibule. While it looks like it does fit, well, it doesn’t really, and let me show you why.

When I sit on the stool, my head and my back are pressing up against the fabric of the vestibule door. I can’t even sit upright, and it’s really uncomfortable sitting here hunched over the stool.
Vestibule Recommendation
Tip: So, my recommendation is to use the back vestibule for storing gear, and you can use the front vestibule instead for chilling and lounging.
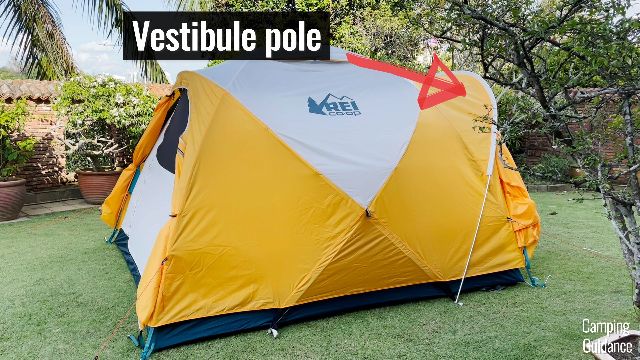
The front vestibule actually has quite a decent height, coming in at about 62 inches from the ground to the top of the vestibule.
The reason that the front vestibule is much bigger is because it has the overhanging white pole running from each width of the tent, which creates much more space in the vestibule.
You can see the overhang here:
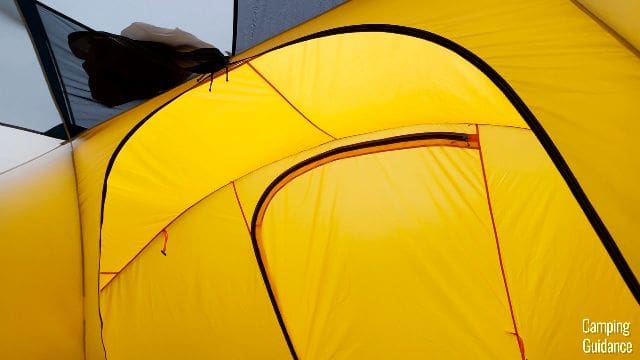
And here’s where the vestibule pole is:
On the other hand, the back vestibule slopes off immediately from the inner tent (it doesn’t have the vestibule pole), which really limits the livable space in the back vestibule, and explains why I can’t even sit on a stool in there.
Notice there’s no overhang for the back vestibule:
10. Vestibule Doors
Number and Features
The 2 vestibule doors are pretty big, and come with zippers that are YKK. You can see “YKK” engraved into the zipper here:
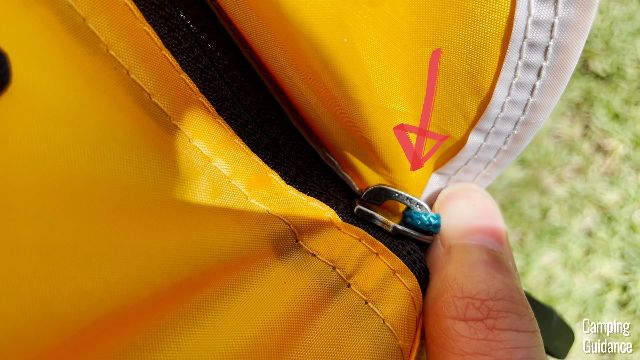
They’re pretty high quality, and I found both vestibule doors to be completely snag free.
After unzipping, each vestibule comes with one toggle by the side to hold the door fabric up to keep it open. You can do this while the vestibule is still staked down.
Vestibule Porch
On top of that, you can also remove the vestibule stakes completely, and tie everything back, if you don’t need to use the vestibules.
The front vestibule now becomes a front porch instead, so very versatile, and very cool.
Unfortunately, for the back vestibule though, there’s no vestibule pole, so you won’t get the same overhanging porch there. (5 pictures above.)
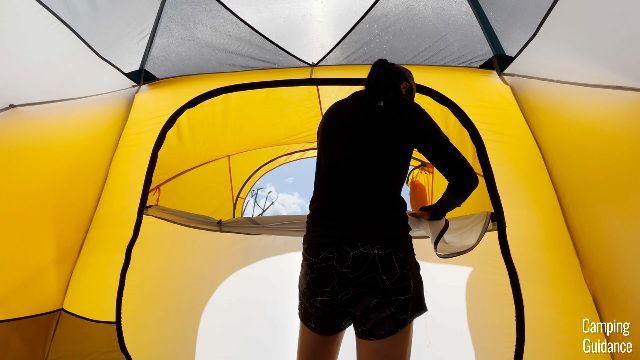
11. Tent Doors
Number of Doors
As for the inner tent, these, of course, also have doors, 1 at the front, and another at the back, and both are exactly the same.
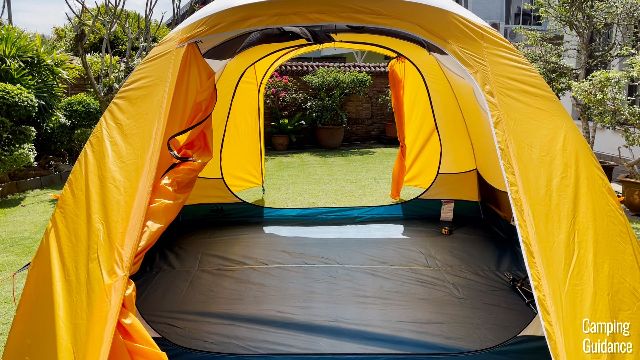
Door Dimensions
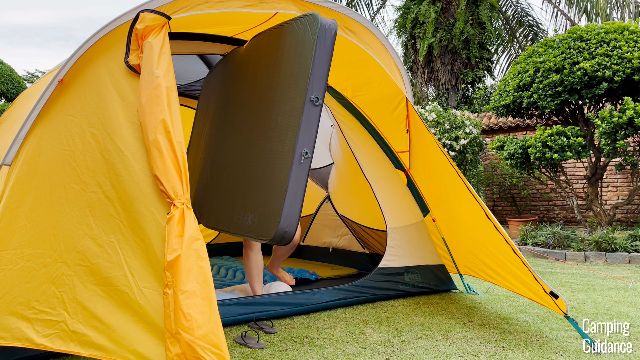
I found that each of these doors measures about 74 inches in length, by 59 inches in width, so I think they’re very big. In fact, I could even just open each door only halfway, and still have plenty of space to get in and out of the tent.
Each door also measures about 62.5 inches from the ground to the top of the door, which is about my height. So, I still have to tilt my head a little bit to get in and out of the tent.
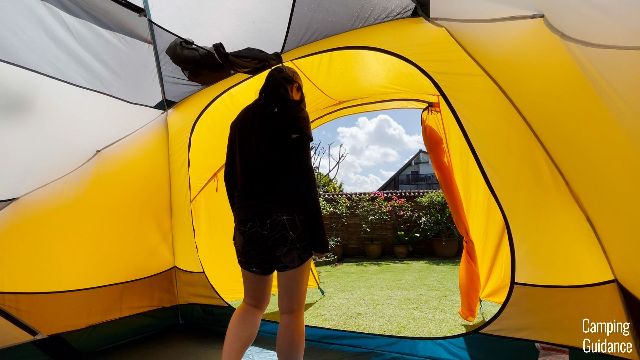
Door Features
I also really liked that I could unzip the door almost completely, leaving just this little bit of fabric attached to the tent at the top.
And when the door is open, I could stuff the door fabric into one of the pockets over the door, which is much more user-friendly than having toggles, like those that came with the vestibule doors.

Door Zippers
Each of the doors come with 2 YKK zippers each, and I found unzipping the doors to be completely snag-free.

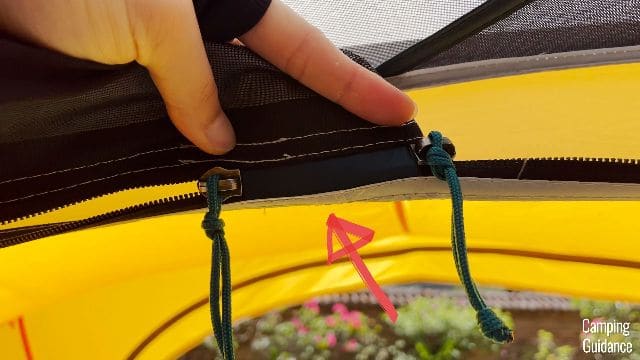
However, when I was zipping the doors up, I found that I sometimes had to use 2 hands to pull the zipper past this bend here (pictured below).
I think it would be great to have extra stake loops at the bottom of the tent, under the door, so that the zipper will be truly one-handed.
12. Windows
Number of Windows
On the 2 doors of this Base Camp 6, you’ll also find 2 windows, so 1 window on each door.
Window Dimensions
Each window measures about 5 feet in length by 2 feet in width, so they’re honestly not very big, and the mesh of each window spans only about half the size of each door.
There are no other windows in the Base Camp.
Window Zippers
I found the window zippers to be snag-free. However, I noticed that the window zippers aren’t branded; they don’t have the same YKK engraving on the zippers, unlike the doors and vestibules. In fact, there’s no branding at all.
My opinion: But I don’t think it’s a super big issue for me, because window zippers aren’t really stressed that much, it’s the door zippers that you need to worry about more. And thankfully, the door zippers on this Base Camp 6 are YKK.
Window Features
Each window also comes with 2 toggles for tying the window fabric up, like so:
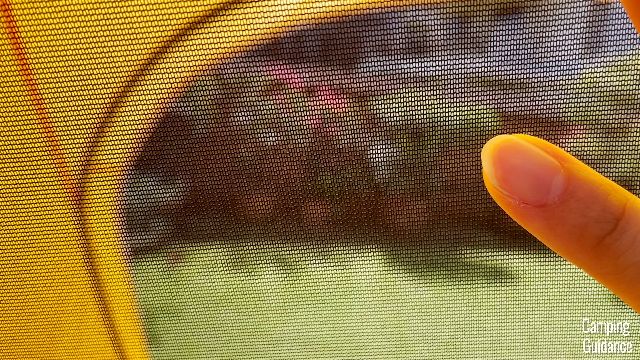
And when the window is open, there’s micro mesh (I think it’s no-see-um bug net, but that’s just my opinion; it’s not specified by REI) to stop any kinds of bugs from getting into your tent.
13. Pockets
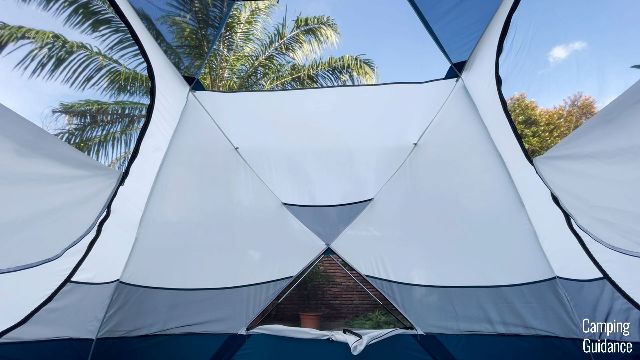
This REI Base Camp 6 has a whopping 14 pockets all around the tent.
Most of these pockets are pretty huge, and some of these pockets run all around the tent, except for where you have the doors and the vents.
In the picture below, you can see 2 pockets, and one door to the left, and one vent to the right.
I love that there’s not only pockets near the ground that you can reach without standing up, but there are also more pockets up top, right here:

14. Loops
And if you’re wondering about loops where you can hang your lanterns and stuff, there’s also a whole ton of them.
There’s 1 loop right at the top center of this Base Camp, and another 4 more loops around it.
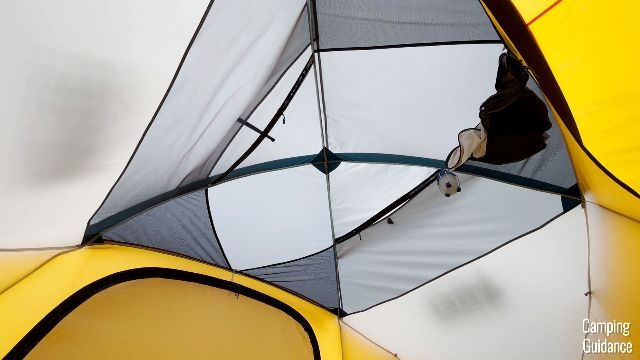
And that’s not all. There are even more loops along the sides of the tent. Just these 2 walls have a total of 6 loops:
The other 2 walls of the tent are the same as well (so 12 loops on these 2 walls).
Plus, the front porch has 3 more loops, giving us a mind-blowing 20 loops to hang tons of stuff from. So, another huge thumbs-up for the Base Camp 6.
15. Heavy Rain Test
How I Rain Tested my REI Base Camp 6
For my heavy rain test, I used this water hose on my Base Camp 6 for one full hour:

Rain Test Results
After the hour was up, I found that the entire tent was still dry, and there was not a single drop of water inside the tent.
In fact, every part of the tent was still dry. I checked the inner tent body, the mesh, the seams, the flooring, and even the rainfly, and all these things were still 100% dry.
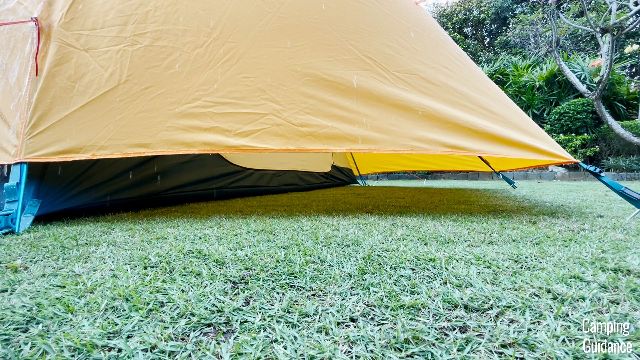
And the main reason that this tent stayed completely dry is because of the length of the rainfly. This rainfly provides almost full coverage protection from the rain, and it protects the inner tent really well.
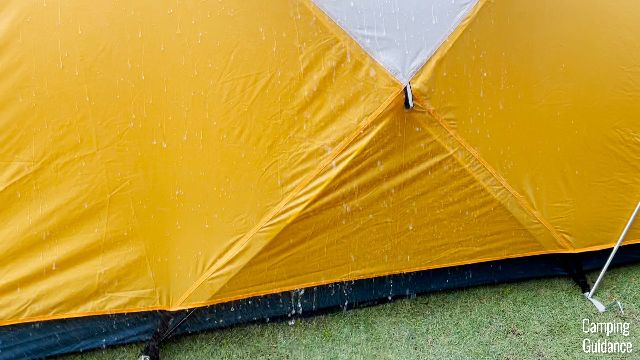
In fact, notice that the water drips off the rainfly and onto the ground directly, without touching the inner tent body too much. This is how a full rainfly works in the rain.
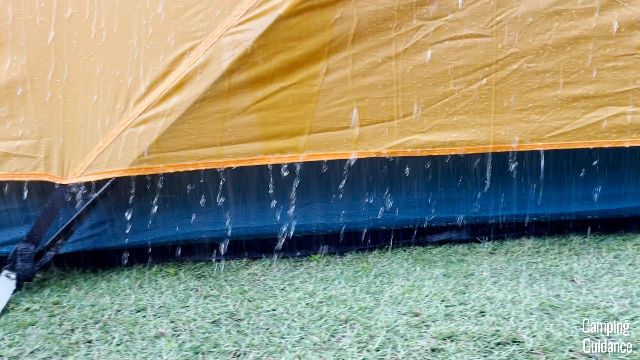
I’m pretty sure I could have continued this test for hours, and no water would get into the tent because of the full rainfly, which is very impressive.
Bonus Heavy Rain Test
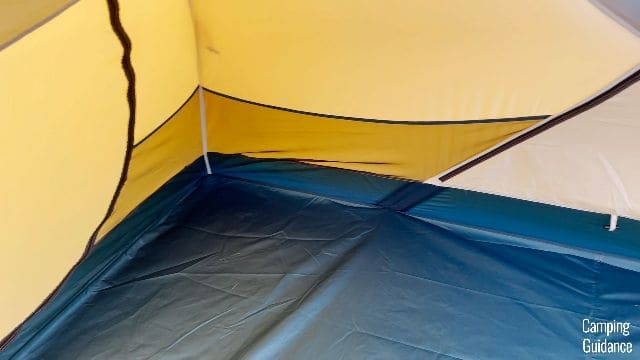
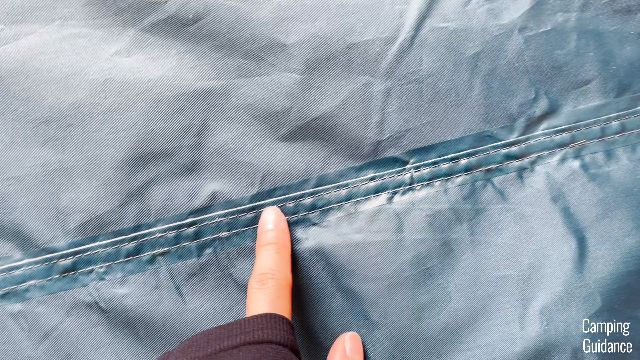
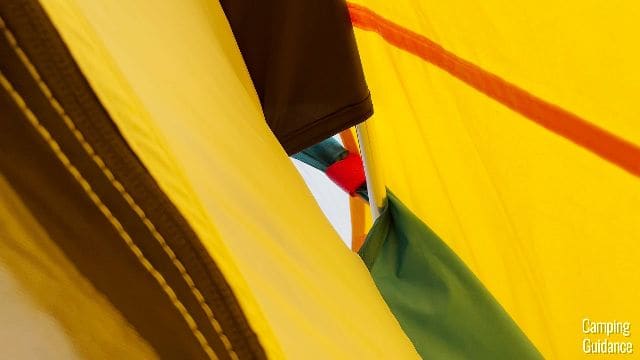
Then, I noticed this one thing. This looks like a tub floor, right? I thought it was too, at first. But it’s not.
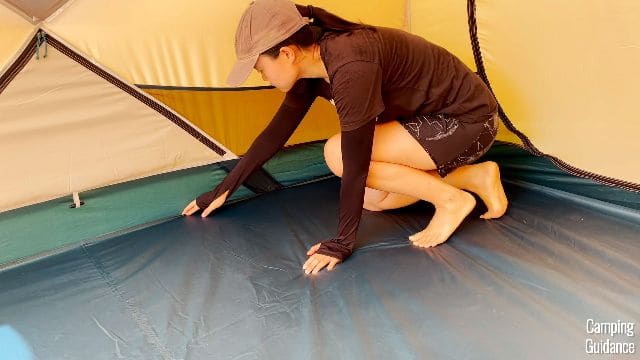
If you take a closer look, the bottom of the blue fabric here is actually made of inverted seams that are not taped. These run the length of the tent, and are only inverted, not taped.

I was curious about these seams, so I sprayed water directly onto the tent body, and not the rainfly, like so.
And I noticed that after 30 to 45 minutes or so, there was some leaking through these seams, right here at the corners.

Rain Test Recommendation
So, hopefully there isn’t, but if there’s light flooding where you are, the seams on the flooring need to be sealed for sure to prevent water from getting in.
For more visuals on these 2 heavy rain tests, I highly recommended watching my YouTube video here:
16. Heavy Rain Ventilation
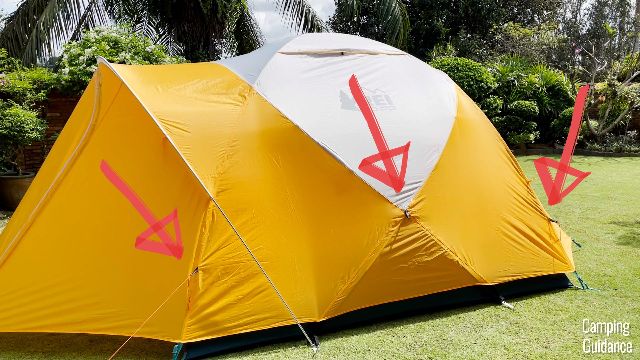
As for heavy rain ventilation, this Base Camp 6 has a total of 4 vents.
Roof Vents
2 of them are these roof vents. And during my heavy rain test, because of the direction of the water coming from the water hose, which is almost like a horizontal rain, I had to shut the vent at the top of the tent near the hose.
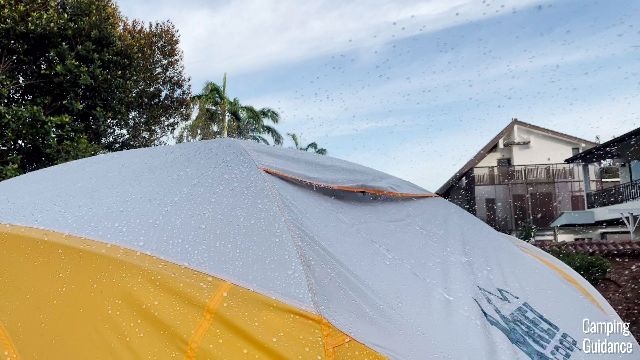
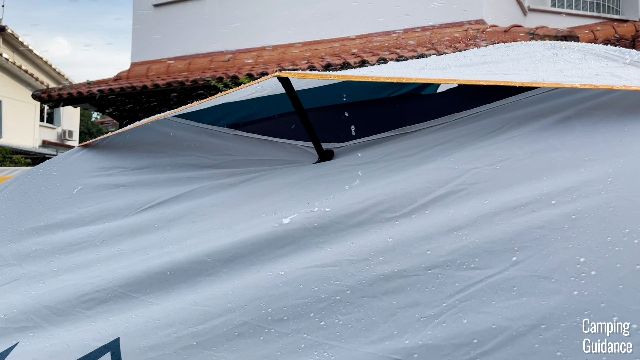
I really liked that I could open and shut these vents from the inside of the tent, which is really neat.
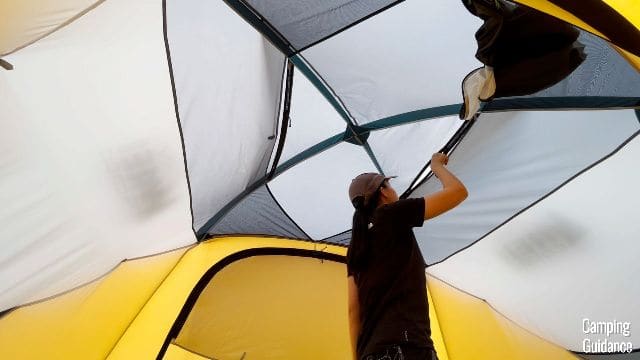
The Velcro on the rainfly along these vents isn’t very hardy though, and is rather thin, so in strong winds you might want to add extra clamps along here.
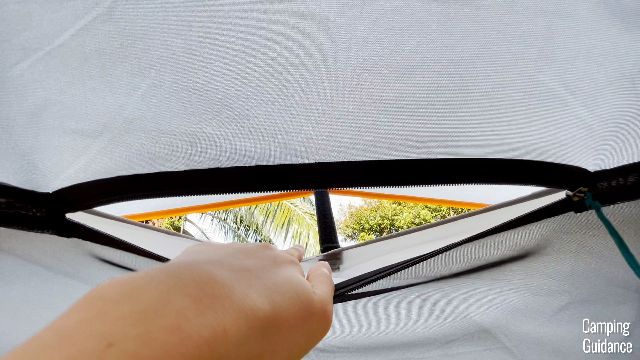
Floor Vents
The other 2 vents are floor vents, which I could leave open, because they’re completely protected by the rainfly.

Rainfly Ventilation
On top of these 4 vents, there’s even this small gap between the rainfly and the ground, which you will get a little bit of ventilation from.
17. Light Rain Test
And if you’re wondering how this REI Base Camp does in the light rain, to summarize, it was completely dry after hours of light rain.
18. Light Rain Ventilation
Plus, I found that I could leave all the vents of the Base Camp open in the light rain, and no water got into my tent through these vents.
19. Hot Day Ventilation
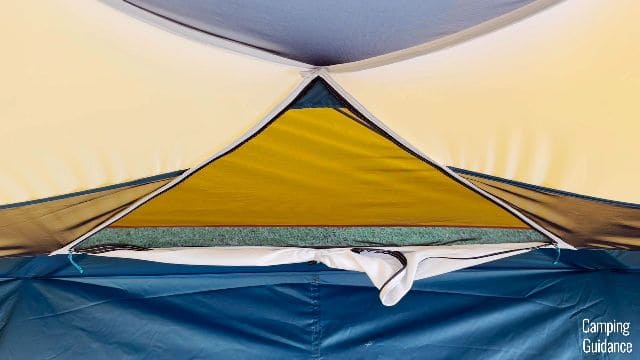
As for hot day ventilation, if you take the rainfly off on sunny days, you’ll get this small mesh roof, plus 4 relatively small windows around it.
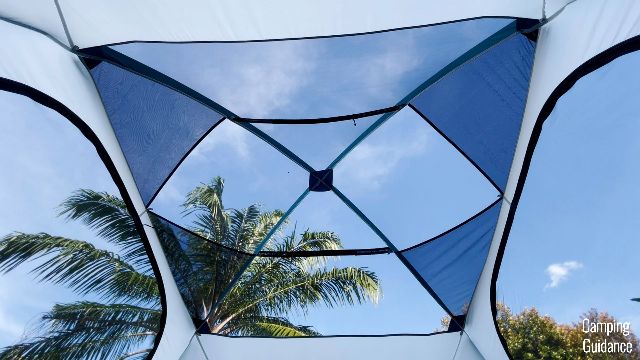
2 of the windows are on the door, and the other 2 windows are actually from the 2 floor vents. Well, it’s less of a window and more of a tiny mesh panel.
20. Wind Protection
To be honest, I don’t usually camp anywhere very windy, but here’s a little bit that I learned about this Base Camp 6.
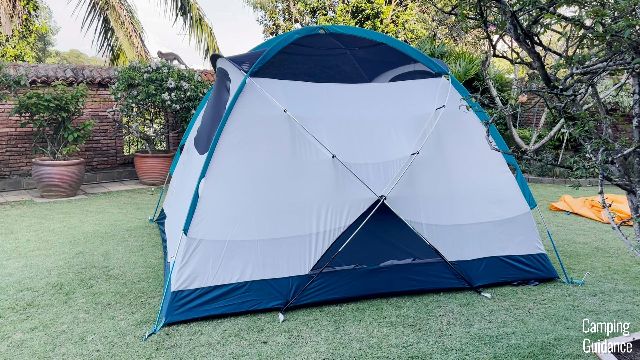
2-Pole Set Up
If you’ve ever had more budget-friendly dome tents like maybe the Coleman Sundome, this is what the pole structure looks like, just 2 poles criss-crossing from end to end.
With only these 2 poles, it’s not the sturdiest, and when the wind blows, you can actually see the entire tent moving a little (even in light wind).
4-Pole Set Up
However, this Base Camp has 2 additional poles to be set up, all 4 poles intersect with each other, and there are even pole clips and buckles to hold the fabric against the poles.

With these 4 intersecting poles, the tent doesn’t move at all in the light wind. I even tried to shake the tent myself and found that it felt really secure with all these 4 poles in place.
And that’s why the Base Camp 6 does pretty well in the wind, at least better than your average budget-friendly dome tent.
21. Quality
For quality, I looked at quite a few things, starting the materials used.
Flooring Quality
The flooring of the REI Base Camp is made of 150-denier polyester Oxford, and looks like this:
I find this to be sufficiently thick and good quality.
Tent Body Quality
On the other hand, the rest of the Base Camp is stated to be made of just polyester (without the denier rating).
But from the looks of it, for the tent body and rainfly, I think it looks like it’s around 75-denier polyester. Notice how the fabric is slightly translucent? That’s how I kind of eyeball it for the thickness.

Pole Quality
All the 5 poles of the Base Camp are made of aluminum, but I think it’s just regular aluminum, and not high quality DAC. (Pictured earlier in the ‘In the Box’ segment.)
Seam Quality
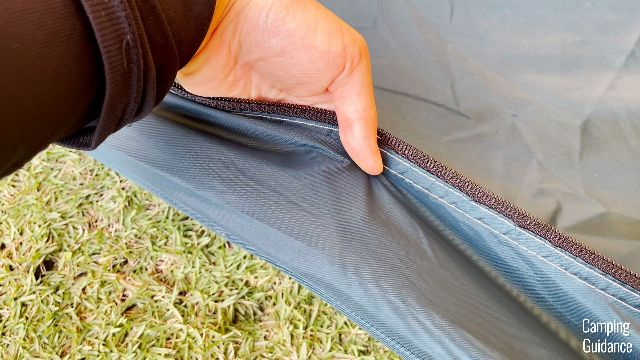
The seams are mostly good quality, double-stitched, and consistent, and I found only a couple of loose threads near the door. It’s not a big issue to me though, because it’s not like they cut into the zipper track and snagged the door.
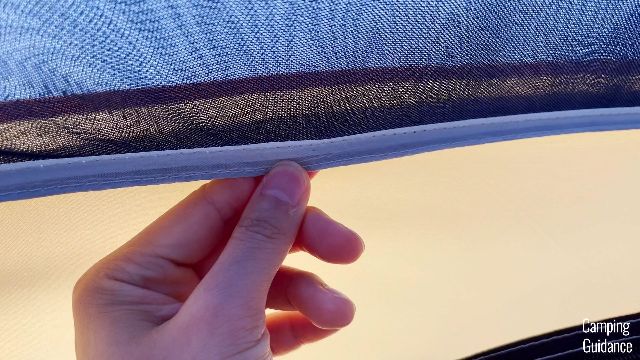
Seam Taping
And for seam taping, on the outside the tent, I checked the rainfly, and all the seams are taped. And for the inside of the tent, the flooring seams running the length of the tent have been nicely taped, and so were the corner seams.
The rest of the seams were not taped though, like for example, the door seams. But I think it’s because the rainfly length is so long that they didn’t need to be taped.
Pro Tip: Do watch out for the un-taped seams that I tested in the Bonus Rain Test in Section 15 though.
Zipper Quality
I also looked at the quality of the zippers, which are YKK, except for the window zippers (which are no-brand), but all of them were still pretty snag-free. (Pictured earlier in the ‘Windows’ and ‘Tent Doors’ segment.)
Mesh Quality
Plus, the mesh is micro mesh, I think it’s no-see-um, but this wasn’t specified by REI. (Pictured earlier in the ‘Windows’ segment.)
Reflective Quality
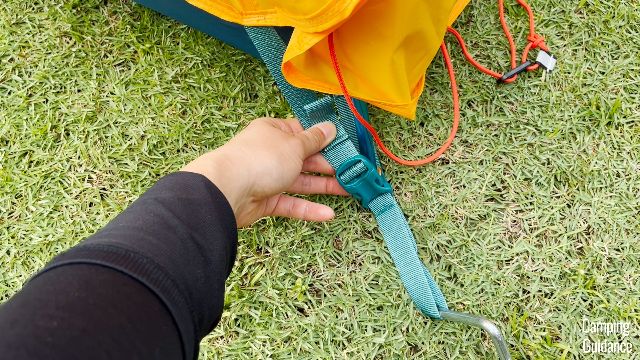
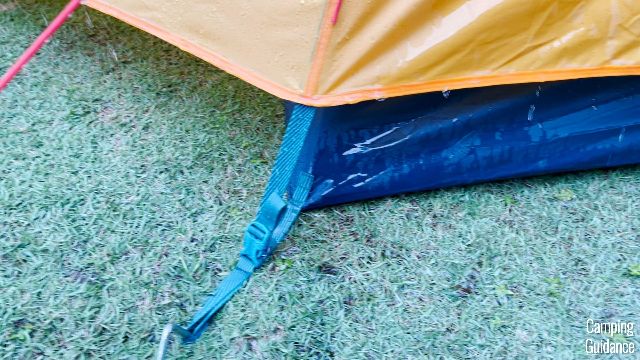
The 6 guy-out points around the Base Camp are black with silver reflective strips. On top of that, each guyline also comes with a reflective strip near the tensioner, plus each of the vestibule stake downs also come with reflective strips:
I found that it’s really nice being able to see the reflective points in the dark, and you can see at least 8 of them in the picture above.
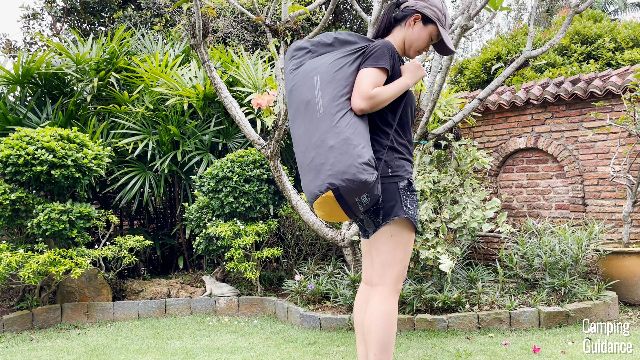
22. Portability
Packed Size
For portability, I measured the packed size of my Base Camp 6 to be about 28 by 13 by 9.5 inches.
Here’s what it looks like beside my Coleman 2-Person Sundome Tent, and also one of my 32-ounce Nalgene bottles.

Ease of Carry
And it also comes with a shoulder strap, which I could use for easy carry.
Weight
And this Base Camp 6 weighs about 20.6lbs. for everything.
Pros and Cons
Pros
1. Great weather protection
For pros, I think the best thing about this Base Camp 6 is the weather protection. It has a full coverage rainfly, which fits very nicely over the inner tent, and I checked – the rainfly doesn’t touch the inner tent walls at all, so I never had any condensation issues with this tent.
This Base Camp survived my heavy rain test incredibly well, and the 4 poles criss-crossing over each other makes for much better wind protection than just your standard dome tent.
2. Tons of color-coding
I also found the set up of this Base Camp 6 to be not too difficult for such a big, feature-rich tent, and it was surprisingly very user-friendly with plenty of color-coding. As long as you get the colors matched, you know that you’re setting it up right.
3. Two huge doors
I really loved the 2 huge doors on this Base Camp 6 as well. In fact, they’re easily four times my size, and I was able to take entire inflated sleeping pads in and out of the tent super easily.
4. Two spacious vestibules
And I also really appreciated the 2 vestibules, they’re pretty big in size, one can fit quite a bit of gear, and the other can easily fit 2 camping chairs. I really love this, so I don’t have to worry about the chair legs puncturing the flooring.
And when I was measuring the dimensions of both these vestibules, they were actually larger than the marketed REI dimensions, which is super rare when it comes to tents, because you usually get them smaller, not bigger, so a huge thumbs-up here for REI again.
5. Decent spaciousness
I also really liked that the peak height is a little over 6 feet, and I could even stand up on pretty thick air mattresses.

On top of that, the side walls were pulled outwards by the 2 extra black poles, making it feel much roomier.
I’m serious, if you own a budget-friendly dome-shaped tent like the Coleman Sundome, and then you upgrade to this Base Camp, you can actually really feel how much roomier it is.
6. Tons of storage
And there’s a mind-boggling number of storage options. Remember, this is a 6-person tent, but I got a whopping 14 pockets all around the tent, and 20 loops to hang tons of stuff.
But if you’re looking for other features like a power port, or room dividers, or gear lofts, sadly, I didn’t get them with this Base Camp 6.
Check out the REI Base Camp 6:
Cons
1. Carry bag can be improved
As for cons, I think the biggest and most glaring one is that the carry bag kind of sucks. The material and quality is fine, but the design sucks. It’s side-loading, not top-loading, and it’s not even zippered. Instead, it comes with a drawstring instead.
I just prefer a top-loading zippered bag. It’s also not very big, so sometimes it can be a struggle to get everything back in, so you might wanna change this out to another more user-friendly stuff sack or duffel bag.
2. Not enough stakes or guylines
Another smaller con is that REI didn’t provide enough stakes or guylines.
And while the stakes provided are heavier duty than the likes of Coleman stakes, like so, these aren’t the grippiest, so you might still wanna change this out if you’re expecting very strong winds as well.
3. Base area smaller than average
I also noticed that the inner tent base area of this Base Camp 6 is a little smaller than your average 6-person tent. This fits at most 1 queen bed, and definitely not 2, like other 6-person tents.
4. Less suitable for summer
And this isn’t exactly a con, but just take note that there isn’t a lot of mesh on this Base Camp 6, with just 4 not too big windows, and a rather tiny skylight, so it’s more of a 3+ season tent, rather than a 3-season tent you use in summer.
Check it out; there’s definitely much more fabric than mesh:
Especially with the rainfly on, it can get a little bit hot and stuffy during the summer, since the 4 vents in the tent aren’t very big.
Pro Tip: And if so, I recommend leaving the vestibules and doors open for plenty of cross-ventilation. Or if there lots of bugs, you can use the 2 windows instead of the 2 doors.
But like I said, this isn’t really a con because this Base Camp 6 is meant for use during not so perfect weather, and also in the off-season with colder temperatures.
Recommendation
If you’re planning to camp in only perfect weather, in summer, and you’re on a budget, I wouldn’t recommend splurging on this tent.
But, if you’re expecting heavy rains, strong winds, or less than perfect weather, I think this REI Co-op Base Camp 6 is a pretty good pick. The full rainfly is definitely an excellent quality that you won’t find in many family camping tents these days.
Bonus: Must Read!
How do I know this?
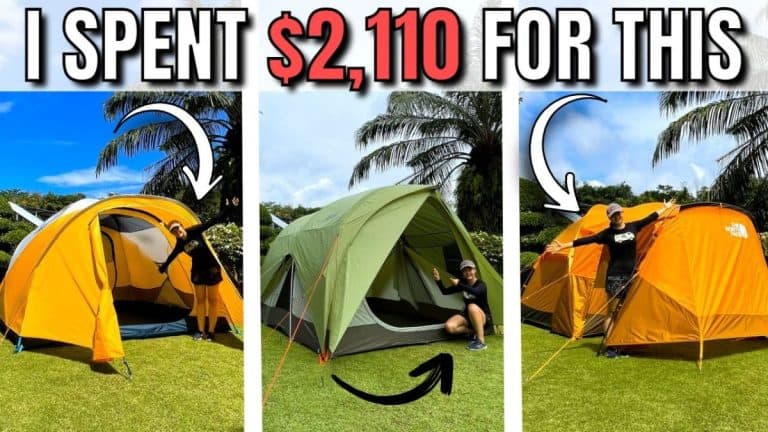
Well, I’ve bought and tested quite a few 6-person tents over the years, and I highly recommend that you check out this post where I spent over $2,000 buying and 6 months testing the best 6-person tents on the market.

I also featured the Base Camp 6 in these comparisons:
- The Most Waterproof Tents I’ve Tested
- The Best Family-Sized Tents I’ve Tested
- REI Base Camp V.S. REI Wonderland
- REI Base Camp V.S. The North Face Wawona
Or, check out the REI Base Camp 6: