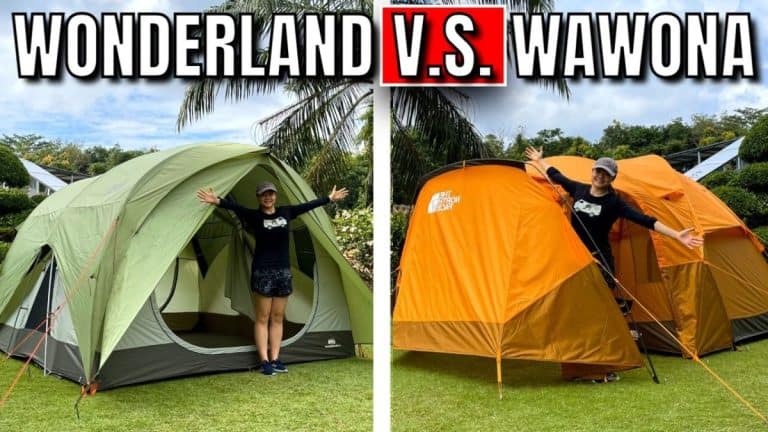
The North Face Wawona V.S. REI Base Camp (I Bought Both Tents!)
This page contains affiliate links, and that means that I may earn a commission if you buy something, at no extra cost to you. You can find my full disclosure policy here.
I have both The North Face Wawona 6 and the REI Base Camp 6, and in this article, I’ll go through all 18 key differences between these 2 tents. But first, here’s a quick summary:
The North Face Wawona 6 is one of the best 3-season summer camping tents in the market, while the REI Base Camp 6 is one of the best 3+ season shoulder season camping tents. The tent that is more suitable for you depends on which camping season you plan to use it in – summer or shoulder.

RELATED: Best 6-Person Tents
| Characteristics | Wawona 6 | Base Camp 6 |
|---|---|---|
| Set Up Timing | 20 minutes | 17.5 minutes |
| Length | 116 inches | 109 inches |
| Width | 94 inches | 109 inches |
| Base Area | 75.7 square feet | 82.5 square feet |
| Base Shape | Rectangle | Square |
| Queen Beds | Almost 2 | Only 1 |
| Door Zippers | SBS | YKK |
| Door Features | Door Toggles | Door Pockets |
| Pockets | 9 | 14 |
| Loops | 8 | 20 |
| Vents | 4 | 4 |
| Windows | 3 | 2 |
| Rainfly Length | Partial | Full |
| All Seams Taped | Yes | No |
| No. of Vestibules | 1 | 2 |
| Vestibule Area | 51.0 square feet | 52.4 square feet |
| Vestibule Height | 65-74 inches | 62 inches (Front) |
| Pole Material | DAC MX | Aluminum |
| No. of Guylines | 11 | 6 |
| Stuff Sack | Top-loading | Side-loading |
| Peak Height | 77 inches | 73 inches |
If you enjoyed this video, do consider subscribing to my YouTube channel:
Check out The North Face Wawona 6:
Or, check out the REI Base Camp 6:
Let’s first go through how the Base Camp did better than the Wawona.
1. Set Up
Base Camp 6
First, I found the Base Camp slightly easier to set up, and it took me only about 17.5 minutes, including staking and guying out the entire tent.
Wawona 6
On the other hand, the Wawona took me about 15% longer, coming in at about 20 minutes for the entire tent.
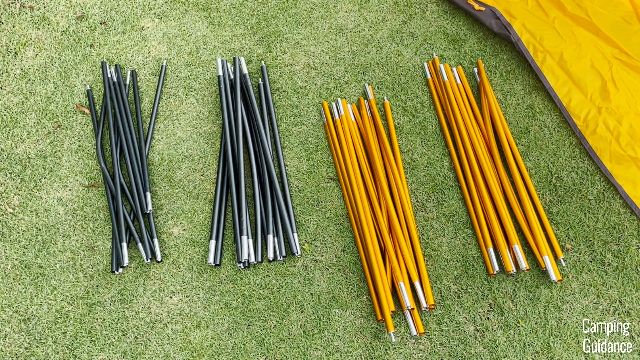
Color-Coding
Both the set ups weren’t too difficult, and I found them manageable as a single person.
I love how all the different poles are color-coded, all the pole sleeves are color-coded, and the color-coding even extends to the pole clips, the webbings and even the rainfly grommets or buckles, depending on which tent you’re setting up.
Rainfly
However, the Wawona took me slightly longer because of the rainfly. It has a lot of fabric and pole clips, which always catch either on the tent fabric or the poles.
So, setting up the rainfly on my own takes me 2 attempts, sometimes even 3 attempts at getting it up, which really slows down the set up process quite a bit.

On the other hand, for my Base Camp, it took me only 1 try to get the entire rainfly up on my own, no problem at all.
2. Base Area
Base Dimensions
The Base Camp has almost 10% more base area than the Wawona, coming in at about 82.5 square feet, while the Wawona had 75.7 square feet. And these are both 6-person tents.
Also, I found the Base Camp dimensions to be quite accurate, at most 1 inch off.
On the other hand, I measured the length of my Wawona 6 to be about 116 inches, and the width to be about 94 inches, which is, strangely, quite a few inches off. (It’s supposed to be 120 x 96 inches.)
So, I ended up getting a much smaller base area than I thought I would get.
Base Shape
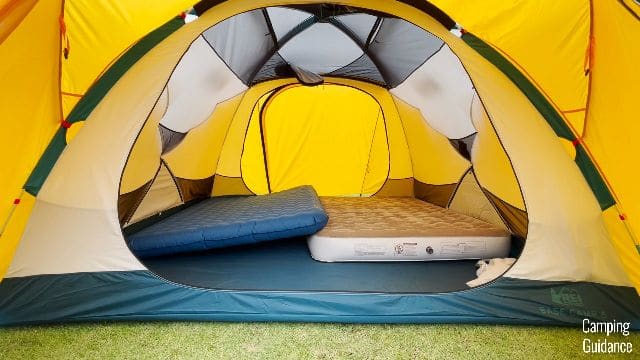
But the plus side for the Wawona here is that it has a rectangular base area, so I was able to fit 2 almost queen-sized beds inside the tent.
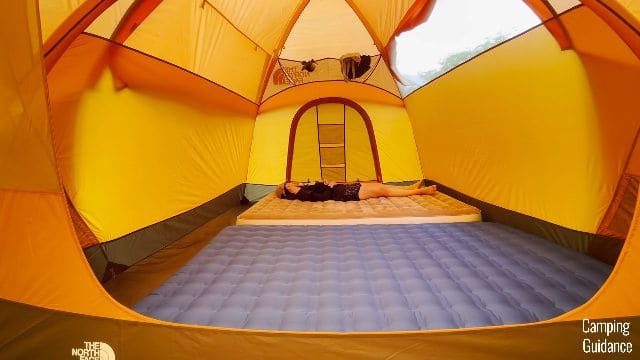
As for the Base Camp though, it has a square base area of about 109 by 109 inches, so I was able to fit a maximum of just 1 queen bed.
3. Doors
Base Camp 6
I really like that the Base Camp has 2 huge doors, each measuring about 74 inches in length, by 59 inches in width, and takes up almost the entire wall of the tent.
I also really liked that I could unzip the door almost completely, leaving just this little bit of fabric attached to the top of the tent.
And when the door is open, I could stuff the door fabric into one of the pockets over the door, which is much more user-friendly than having toggles, which is what I found on the Wawona.

Wawona 6
I timed myself and found that it takes 3 to 4 times more to tie the door up using toggles than just stuffing it into a door pocket.
- Stuffing into door pocket: 4 seconds
- Tying door up with toggles: 15 seconds

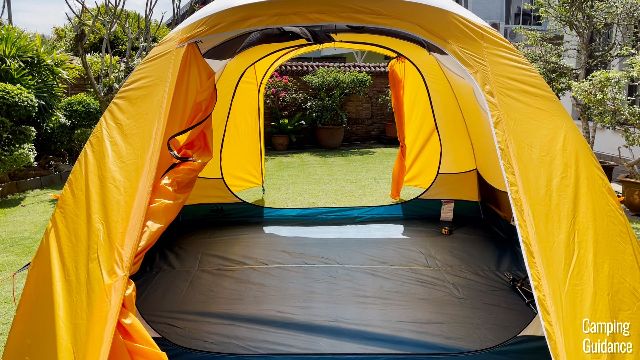
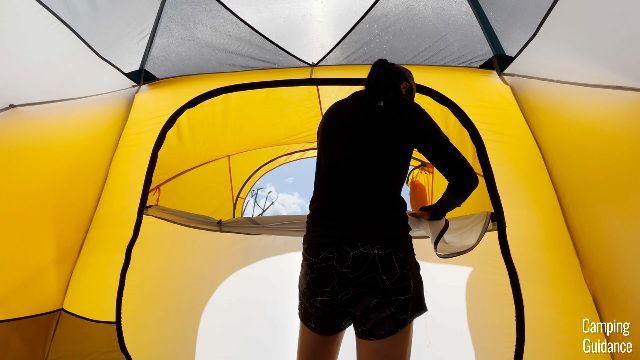
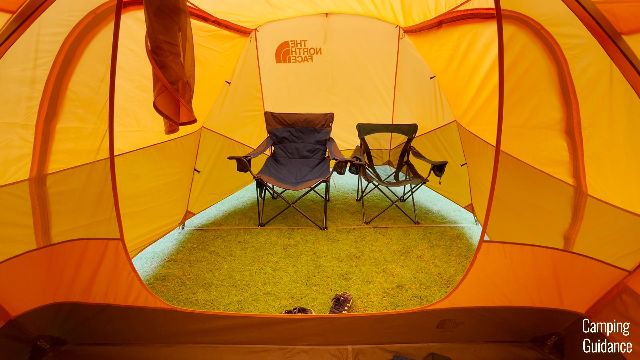
And the Wawona doesn’t even have 2 huge doors like the Base Camp. While the front door is amazing with no cons, the back door, on the other hand, is super small, and not as user-friendly.
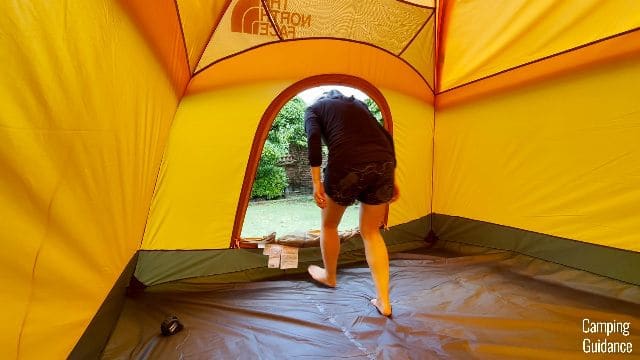
To keep this door open, you’ve got to unzip not just the door fabric, you’ve got to unzip the inner window fabric as well, then you’ve got to tie up the inner window fabric first, before you can tie up the door fabric.

4. Zipper Quality
And while we’re on the topic, the zipper quality in the Base Camp is slightly better than the Wawona.
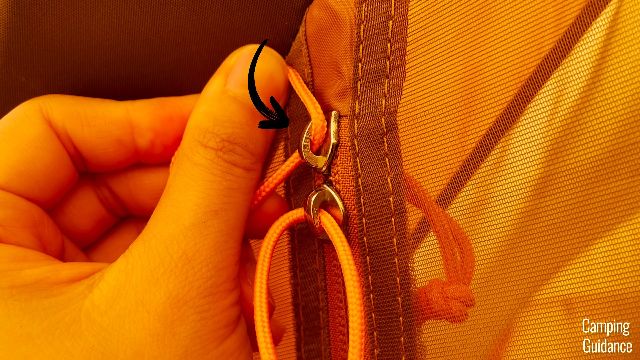
Door Zippers
Both of the Base Camp’s doors come with 2 YKK zippers each, while the Wawona’s zipper quality is only SBS, which is a grade lower than YKK.

Window Zippers
However, just take note that the Base Camp’s YKK zippers are found only on the doors of the tent, and not the windows. The windows have no-brand zippers instead.
But to me, that’s okay, because you don’t typically put a lot of strain on the windows, and it’s more important that the doors have branded zippers than the windows.
The zippers on the Wawona’s windows are SBS too, like the doors.
5. Storage
Base Camp 6
Another awesome pro that the Base Camp has over the Wawona is the amount of storage. It has a whopping 14 pockets all around the tent.
Most of these pockets are pretty huge, and some of these pockets run all around the tent. REI definitely made use of all the space in the tent to place pockets.
On top of that, the Base Camp also has a whopping 20 loops around the tent. There’s 1 loop right at the top center of this Base Camp, and another 4 more loops around it.
There are even more loops along the sides of the tent. Just these 2 walls have a total of 6 loops, like so, and the other 2 walls of the tent are the same as well.
Plus, the front porch has 3 more loops, next to the white vestibule pole.
Wawona 6
On the other hand, the Wawona has just 9 pockets and 8 loops, so 17 altogether, which is literally half of the Base Camp’s 34 pockets and loops.
6. Vents
Both the Base Camp and the Wawona have 4 vents each.
Wawona 6
The Wawona has 2 window vents, and it also has 2 smaller vents nearer the front of the tent.
Base Camp 6
The Base Camp has 2 roof vents, and the other 2 are floor vents, so also 4 vents.
User-Friendliness
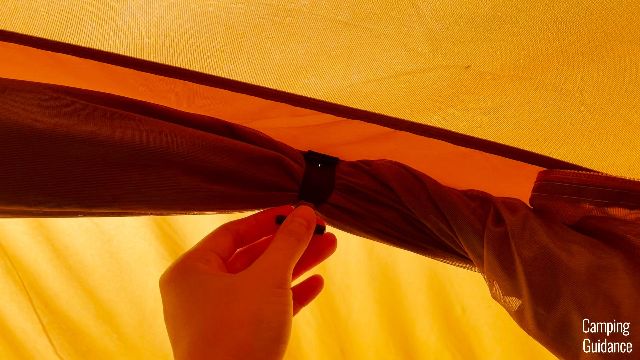
But the main important difference is that I could open and shut all of the Base Camp’s vents from the inside of the tent.
So, when I got horizontal rain from my rain test, I could shut easily the vent at the top of the tent from the inside.
On the other hand, I couldn’t do so for the Wawona, they’re all accessible only from the outside, which will be a pain in horizontal rain.
7. Windows
Base Camp 6
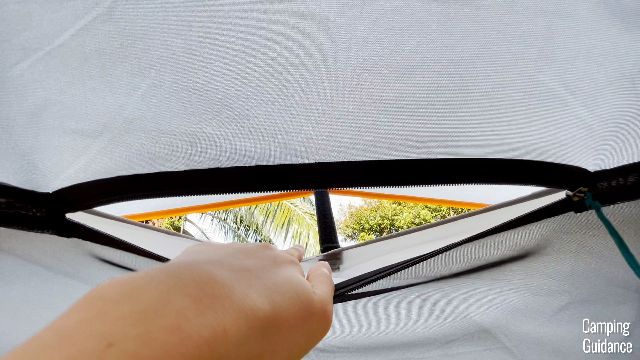
The same goes for the windows of the Base Camp. I had 2 windows in this tent, 1 window on each door, and I could open and shut the windows from the inside of the tent, which you’d think is pretty standard practice, right?
Wawona 6
But here’s the weird bit. 2 of the windows in the Wawona cannot be opened or closed from the inside.
So, whenever I wanted to open/close these windows, I had to go out of the tent, and open them, like so. I’m really not sure why they did it this way, but it was a little annoying.
I’d recommend just using the loop at the bottom of each window to guy out the Wawona’s windows. That way, I still got some ventilation on hot days, plus rainy days as well, and I didn’t have to run outside to shut the windows when it started raining.

There’s actually another back window, for a total of 3 windows in the Wawona, and luckily, I could open and shut the back window from the inside of the tent.
8. Full Rainfly
Another significant difference between the Base Camp and the Wawona is the length of the rainfly.
Base Camp 6
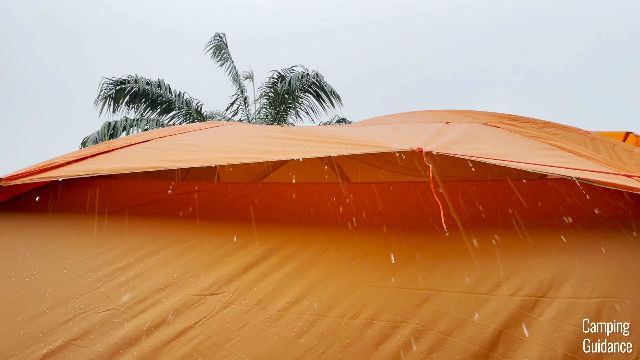
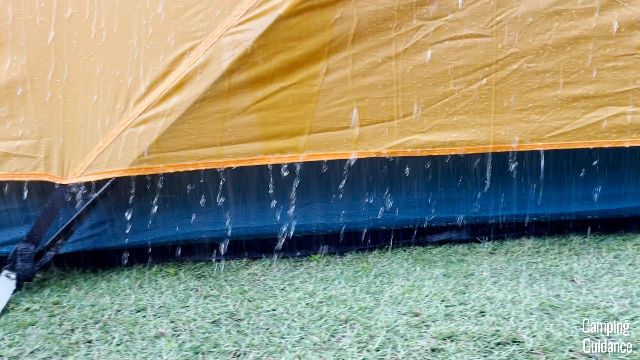
The Base Camp has a really nice full-length rainfly, which extends almost all the way down to the ground. In fact, this was the main reason the Base Camp did so well in my 1-hour heavy rain test.

The rainfly provided almost full coverage protection from the rain, and it protected the inner tent really well.
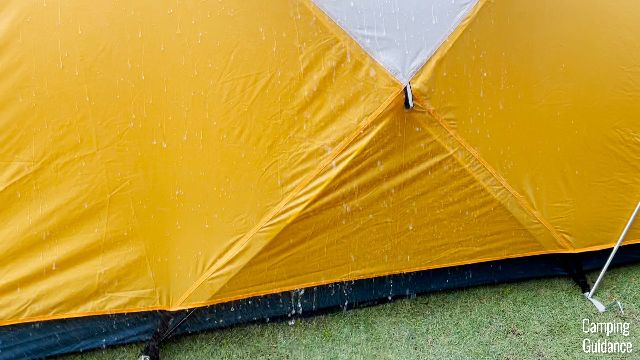
Notice that the water drips off the rainfly and onto the ground directly, without touching the inner tent body too much.
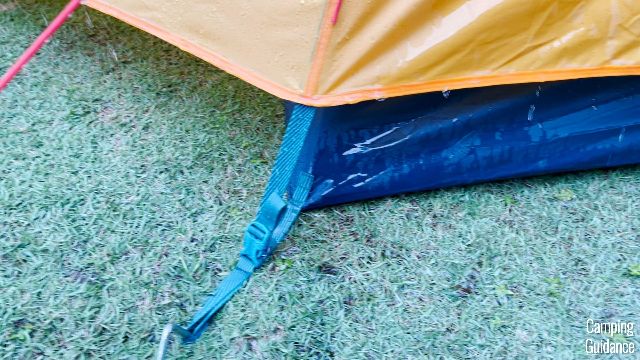
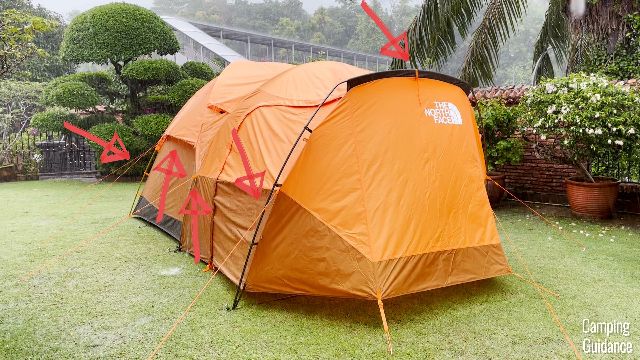
Wawona 6
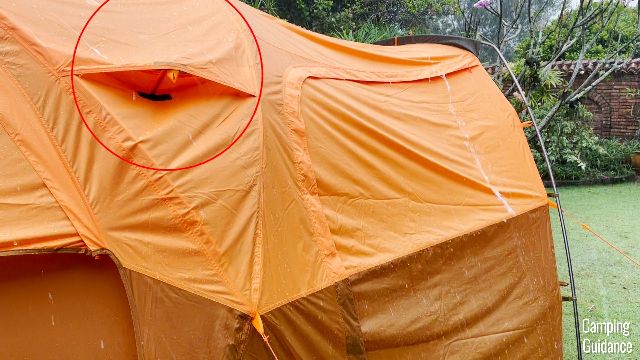
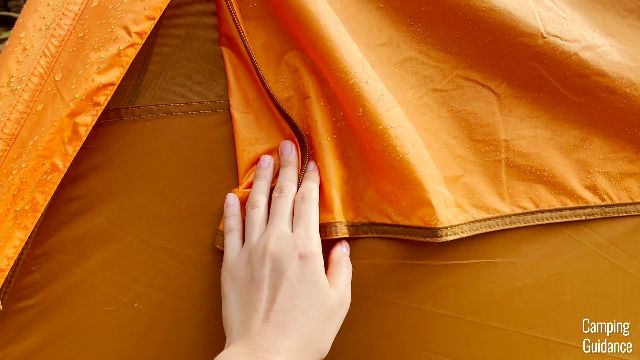
The Wawona, on the other hand, has only a partial rainfly. It doesn’t extend all the way down to the ground.
In fact, the rainfly doesn’t even overlap the window mesh very much, probably only 4 to 5 inches or so, like in the picture below, so this might be an issue in horizontal rain (which I, thankfully, didn’t experience).
9. Cold Weather Usage
Recommendation #1: Overall, I’d pick the REI Base Camp 6 over The North Face Wawona 6 if I’m planning to camp in the shoulder season with colder temperatures.
There are 3 main reasons why.
First, there isn’t a whole ton of mesh on this Base Camp, it’s definitely more fabric than mesh, so it helps to keep the heat in.
Second, on top of not having a lot of mesh, it also has the full rainfly, so very nicely double-walled, and this keeps the heat in even more.
And third, there are 4 vents in the tent, but they aren’t very big, and you can open and shut them anytime (from the inside of the tent, at that!) to keep the heat in as well.

So, the Base Camp is a really good choice for shoulder-season camping, though I found it a little bit hot and stuffy in the summer.
Check out the REI Base Camp 6:
10. Summer Usage
Recommendation #2: While the Base Camp is more of a 3+ season tent, which I wouldn’t exactly recommend for hot summer days, because I found it a little bit stuffy, The North Face Wawona 6 is more of a 3-season tent, for camping mainly in summer.
Check out The North Face Wawona 6:
Now, we’re gonna go through the different ways that the Wawona trumps the Base Camp.
11. Hot Day Ventilation
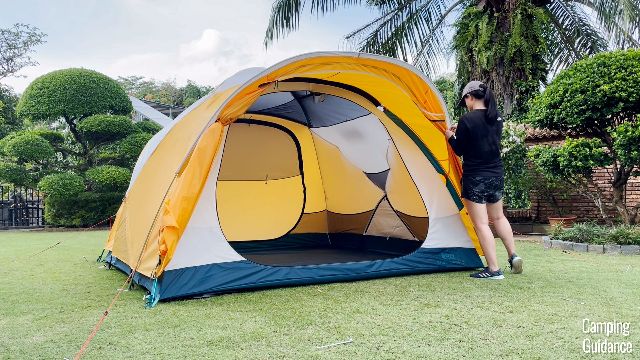
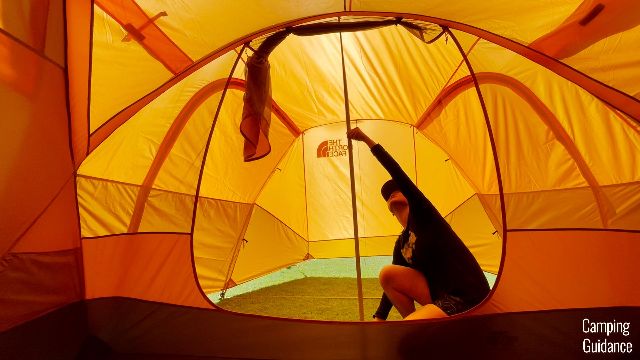
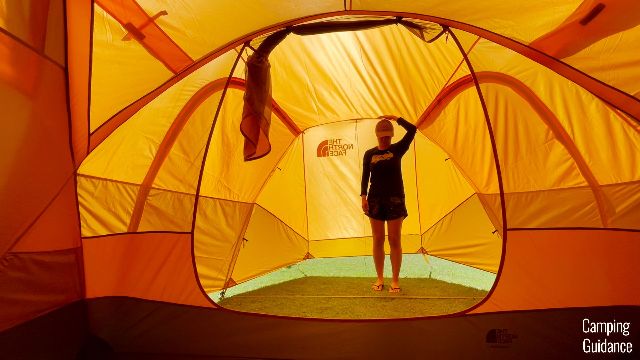
Wawona 6
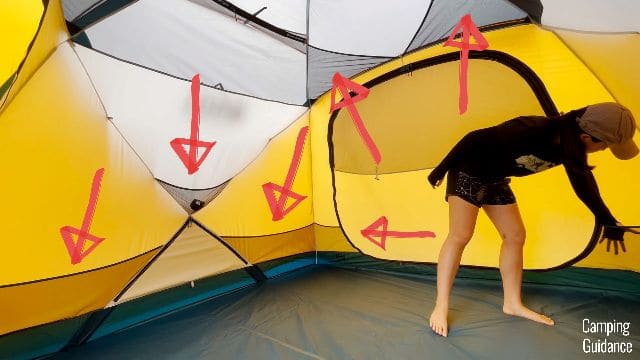
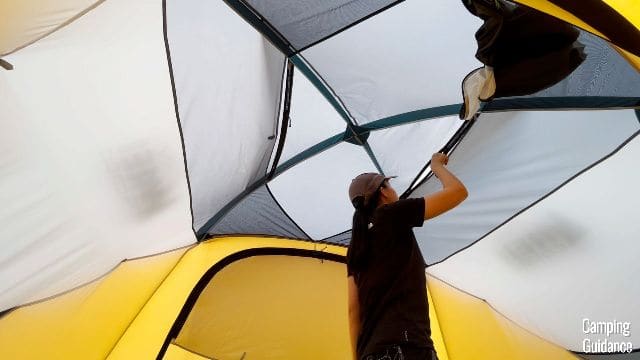
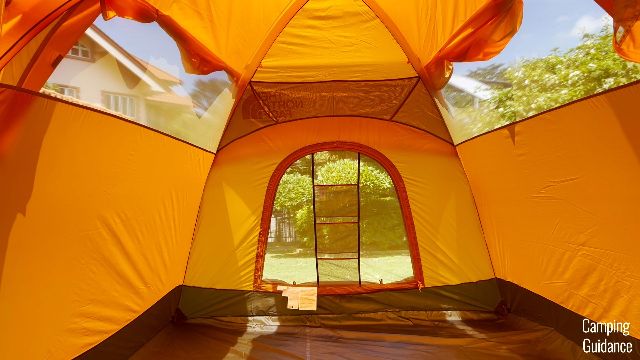
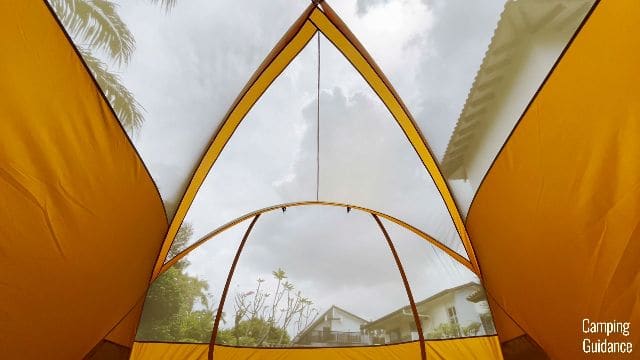
When it comes to hot day ventilation, the Wawona has a ton of it. First, the front wall of the tent, a good three-quarters of it, is made of mesh for tons of ventilation.

On top of that, the 4 walls of the tent all have mesh panels that join together at the top, giving you a nice mesh ceiling, and you can even open the back window for more ventilation.
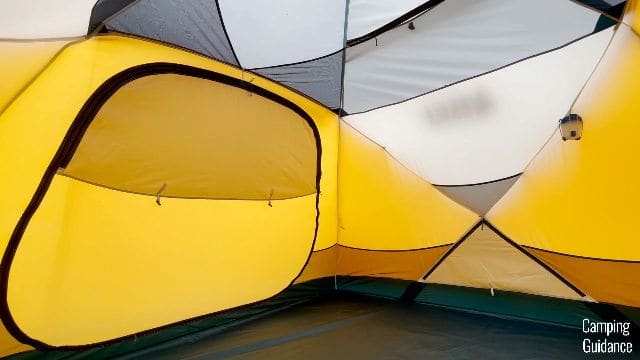
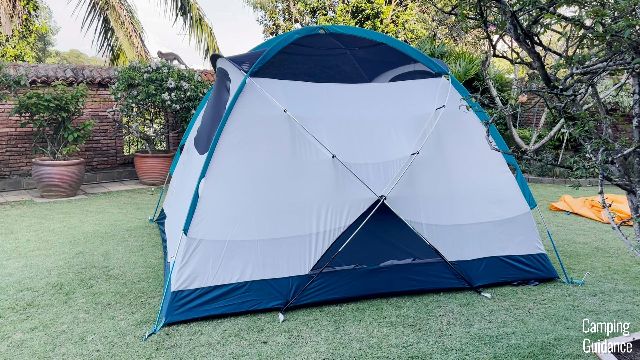
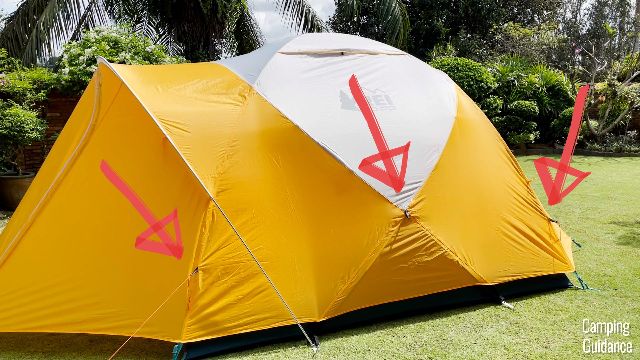
Base Camp 6
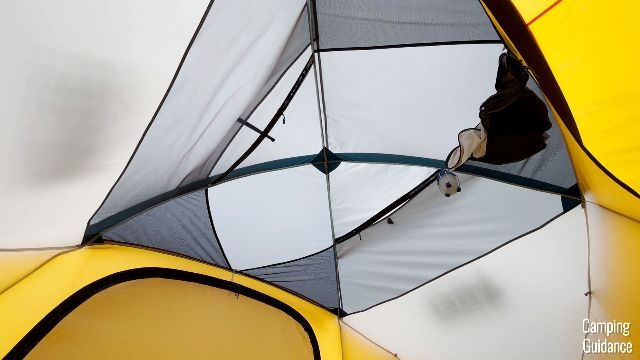
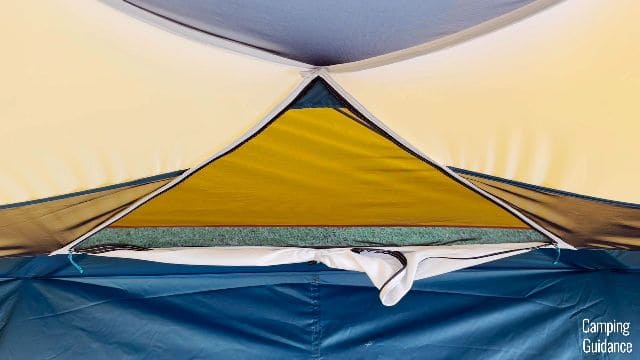
On the other hand, the Base Camp has just a rather tiny skylight, plus 2 not even half-door windows, and also 2 triangle mesh panels at the bottom of the tent.
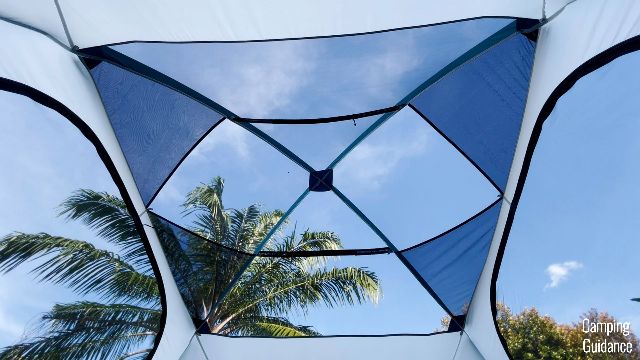
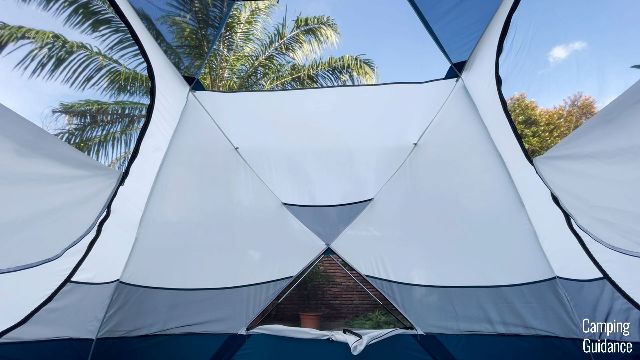
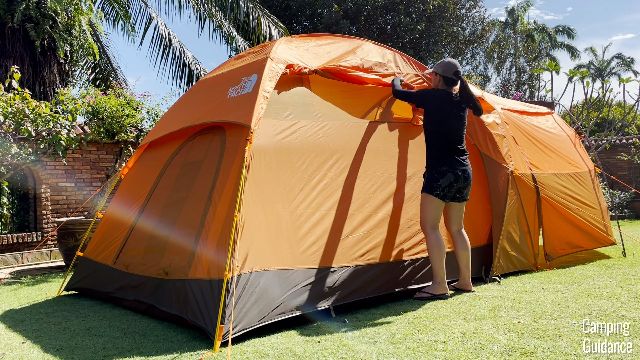
Here’s what the Base Camp looks like from the outside (pictured below), and when you compare it to the Wawona (4 pictures above), I think you can tell that there’s not a whole lot of mesh.
12. Rain Protection
The Wawona isn’t great at just hot day ventilation, it’s also great at rain protection, for 2 main reasons.
Wawona 6
First, I put my Wawona through days of thunderstorms, the heaviest rain I’ve seen all year.
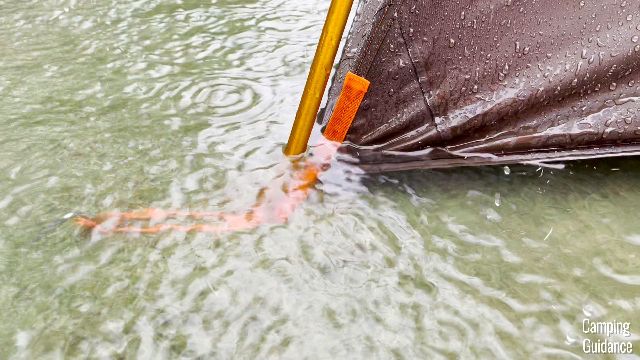
It was so bad that my entire yard was completely flooded, the entire bottom of the Wawona was sitting in inches of water, and this tent still passed with absolutely flying colors, with not a single leak inside the tent.
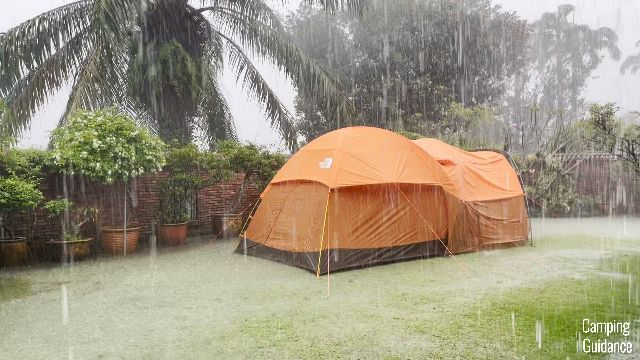
And second, you don’t have to seal a single seam yourself, in the Wawona. Even when my Wawona was sitting in 2 inches of water, especially this corner here, no water leaked into the tent at all, because the seam taping by The North Face was just so thorough.
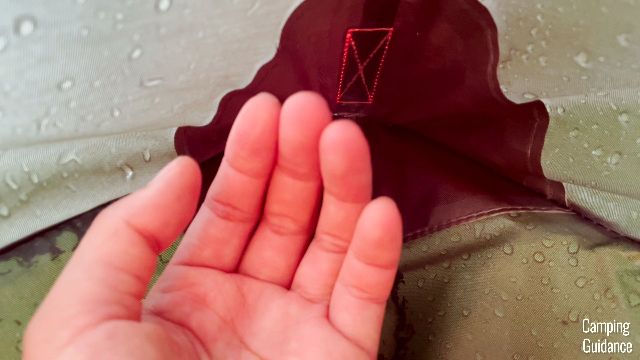
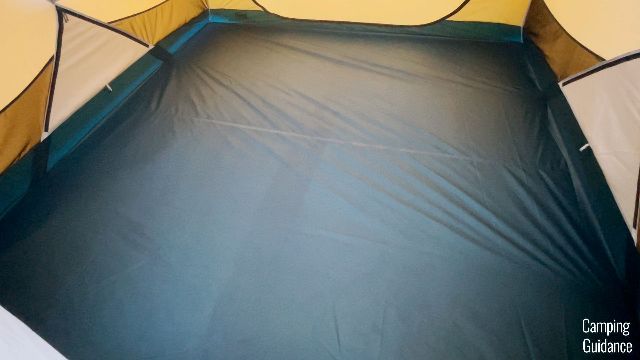
Base Camp 6
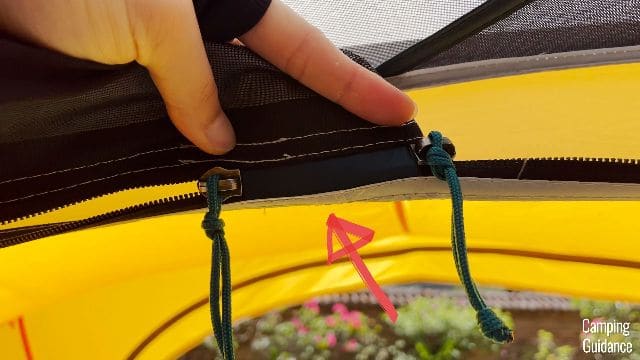
On the other hand, for the Base Camp, if you take a closer look at the flooring, the blue fabric here is actually made of inverted seams that are not taped.

I was curious about these seams, so I sprayed water directly onto the tent body, and not the rainfly, like so.
And I noticed that after an hour or so, there was some leaking through these seams, right here at the corners.

So, if this Base Camp had gone through the same flooding heavy rain test as the Wawona, it probably would have leaked.
13. Vestibules
Actually, another reason why the Wawona is better for rainy days is because it has the biggest, most awesome vestibule ever, which is super useful for storing wet gear that you may have.
Wawona 6
I had plenty of livable space inside the Wawona’s vestibule. The tallest height measures about 74 inches, and the shortest height at the other end is about 65 inches.
This is still taller than my height, so, I found that I could stand upright throughout the entire vestibule.
In fact, I could fit 2 camping chairs and still have plenty of leftover space for a big camping table. The total square footage for the vestibule comes in at 51.0 square feet.
Base Camp 6
This is definitely not the case with my Base Camp. While the front vestibule is pretty big (31.1 square feet), and I could easily fit 2 REI camping chairs in it, the back vestibule (21.3 square feet) couldn’t even fit one camping chair.
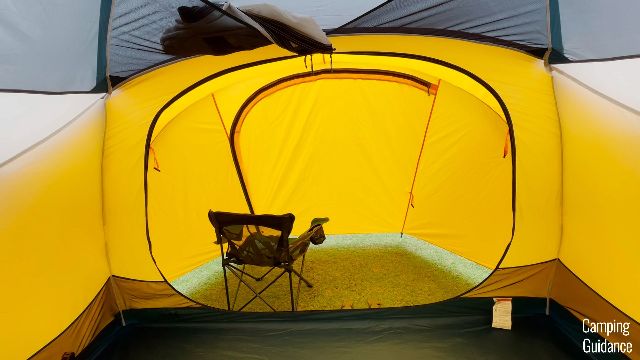
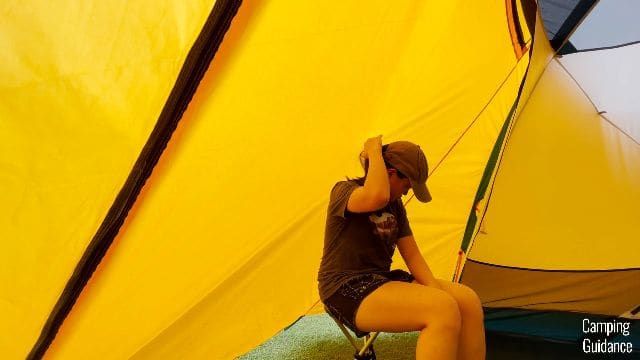
In fact, when I tried to fit just an REI stool into the vestibule, I couldn’t even sit upright. As you can see, my head and my back are pressing up against the fabric of the vestibule door here.
So, for livability inside the vestibule, the Wawona wins hands down. This is in spite of the Base Camp’s vestibule total square footage being slightly larger (52.4 square feet) than the Wawona (51.0 square feet).
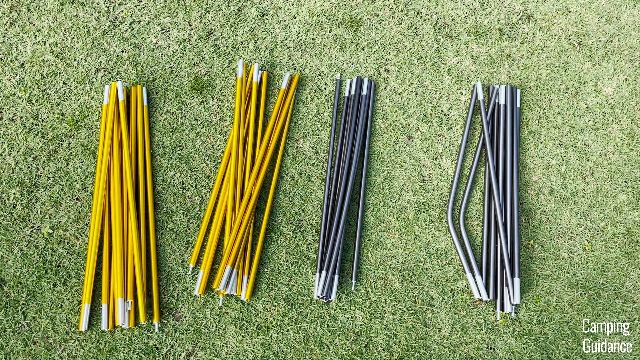
14. Pole Quality
Now, while I found both the Wawona and Base Camp pretty on par for quality, there’s one major difference – the quality of the poles.
Wawona 6
Easily the better quality poles are the Wawona’s, which is DAC MX, top-of-the-line type of aluminum poles.
These poles not only snap together super easily, but they’re also a lot stronger than regular aluminum poles.
In the weeks that I spent testing my Wawona 6, through crazy rains and some winds, none of my poles bent at all, even in the slightest.
Base Camp 6
On the other hand, the Base Camp has just regular aluminum poles, not DAC MX. So, these are not as strong, a little bit softer, and more likely to bend after some extended use.
For example, not my Base Camp, but for my Wonderland 6, with also just regular aluminum poles, I found that a few of my poles bent quite a bit after some use.

15. Wind Protection
The stronger poles of the Wawona also means that wind protection is better. I was able to test my Wawona 6 through 10-15 mile per hour winds, and it held up like a champ.
A friend of mine also used his Wawona 6 (the previous version) through 50 mile per hour winds, and here’s the state of the poles after.
Honestly, still not too bad, and not even as bent as my Wonderland regular aluminum poles, which didn’t even go through a strong wind test.
So, I think the Wawona trumps the Base Camp here.
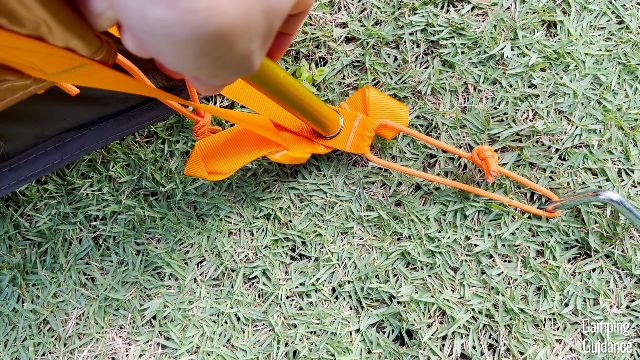
16. Number of Guylines
Wawona 6
Also, when I was testing my Wawona, it really helped that I had almost the entire tent guyed out, and it has 11 guy-out points for 11 guylines.
Base Camp 6
On the other hand, the Base Camp has only 6 guy-out points for 6 guylines, which is about half the Wawona, so not as good for wind protection.
There are 3 guylines on each side of the tent.
17. Packing Away
And here are some other smaller differences between the Base Camp and Wawona.
Wawona 6
Honestly, I found the Wawona much easier to pack away than the Base Camp. I never had any issues with my Wawona 6, and the entire process takes just 14 minutes.
It’s so user-friendly because the carry bag is really nice, it’s top-loading and the opening of the bag is super big, so you can easily get everything in.
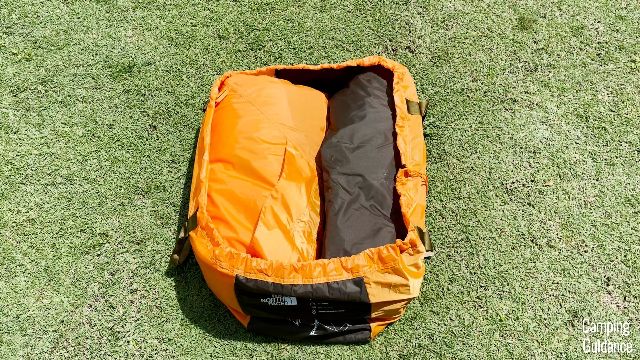
Base Camp 6
On the other hand, the Base Camp has a super annoying stuff sack. It’s really not very big at all, and it’s a side-loading stuff sack.
This made packing everything in a little bit of a struggle, especially if you roll everything together and try to squeeze everything in all at once.

18. Peak Height
Wawona 6
Also, the Wawona has a slightly higher peak height, coming in at 77 inches.
Base Camp 6
On the other hand, the Base Camp has just 73 inches of peak height.
Conclusion
Overall, while there are some minor differences between the Base Camp and the Wawona, I think it’s important to take note of only the important major differences between the two, which are these:
First, while the REI Base Camp 6 is more of a 3+ season tent for shoulder season camping, The North Face Wawona 6 is more of a 3-season tent for summer camping.
And second, the pole quality in the Wawona 6 is better than in the Base Camp 6, making it more ideal for adverse weather (heavy rains and strong winds).
I explained this in more detail in Sections 9 and 10 above, so do scroll up to check that out in case you missed it the first time.
Bonus: Must Read!
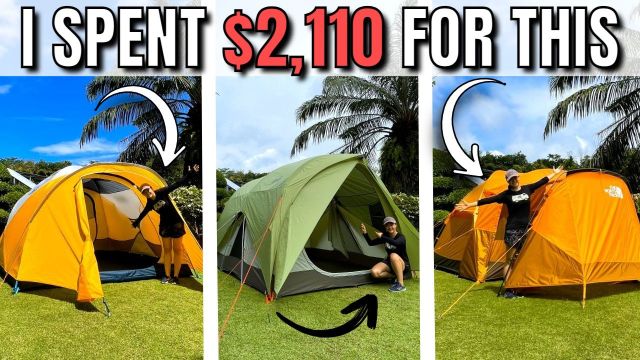
For a more in-depth look at how the Wawona and Base Camp compare not just to each other, but to other 6-person tents in the market, check out this article right here where I spent more than $2,000 and 6 months testing seven different tents.
Or, check out The North Face Wawona 6:
Or, check out the REI Base Camp 6: