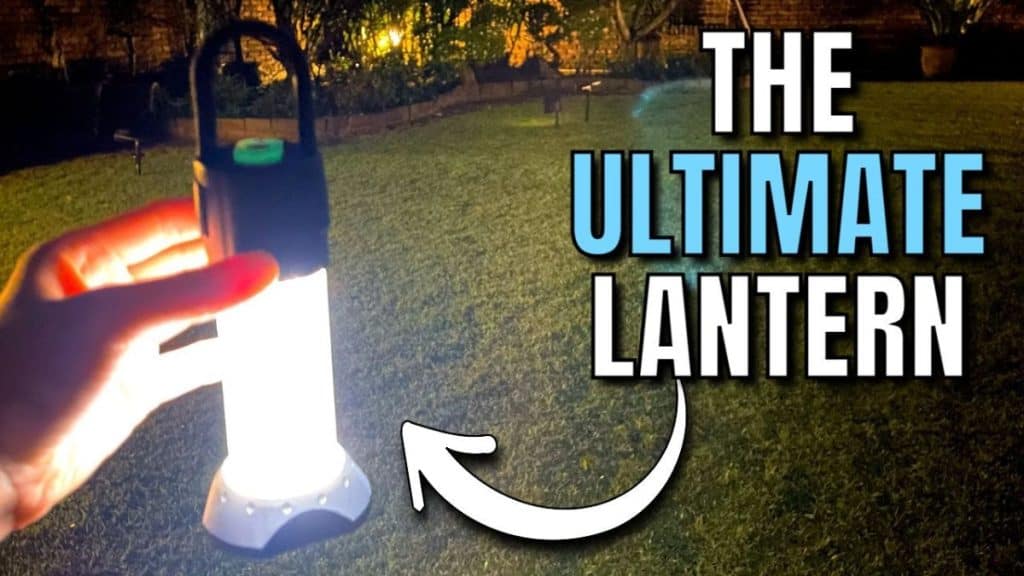
Ledlenser ML6 Lantern Review (Bought & Tested!)
This is my review of the Ledlenser ML6 Lantern. I bought the standard version, not the ML6 Warm or the ML Connect.
I put it through 20 different tests, all of which you’ll find below in this post.
This page contains affiliate links, and that means that I may earn a commission if you buy something, at no extra cost to you. You can find my full disclosure policy here.
Quick Summary
Overall, the Ledlenser ML6 Lantern is a fantastic workhorse that I really enjoyed testing, and I have no doubt that I will continue to love using it.
Power-packed with everything you could possibly want, with very few cons to it, it’s one of the best camping lanterns I’ve ever seen. This lantern is 100% ideal for camping trips.
RELATED: Best Rechargeable LED Lanterns
If you enjoyed this video, please consider subscribing to my YouTube channel here:
Check out the Ledlenser ML6:
- Quick Summary
- 1. In the Box
- 2. Battery
- 3. Hooks
- 4. USB Input
- 5. Charging Time
- 6. USB Output
- 7. 3-in-1 Button
- 8. Battery Indicator Lights
- 9. Light Modes
- 10. Lumen Output/Brightness
- 11. Run Times
- 12. Shine Distance
- 13. Glowing Ring
- 14. Light Quality
- 15. Lock Mode
- 16. Magnetic Base
- 17. IP Rating and Waterproofing
- 18. Drop Testing
- 19. Warranty
- 20. Portability
- 21. Pros, Cons, Recommendations
- 22. Bonus – MUST Read!
1. In the Box
I bought my Ledlenser ML6 brand new from Amazon, and here’s what it looks like without unboxing it yet:
And here’s everything you get out of the box:
Lantern itself
Charging wire
Warranty info
Carry case
Separate lantern base
Removable battery

2. Battery
The bottom of the Ledlenser ML6 lantern is removable, and that reveals the rechargeable battery compartment.
Here’s also what the rechargeable lithium-ion battery by Ledlenser looks like:

3. Hooks
The Ledlenser ML6 lantern has 2 hooks. One is a rubber hook at the top, which is also removable.
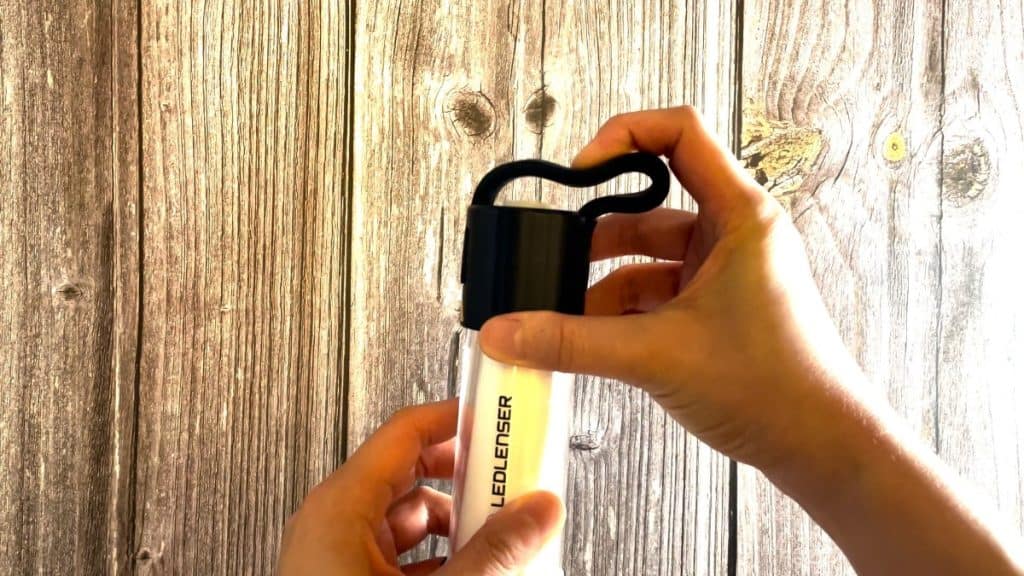
This hook is a little bit on the bigger side though, so it may not fit into your tent’s lantern loop.
Thankfully, there’s another alternative – the metal hook at the bottom of the removable base.

This is the more convenient hanging hook type in lanterns, it’s just a thin metal wire, and it can go into any of the circle loops, like you can see above.
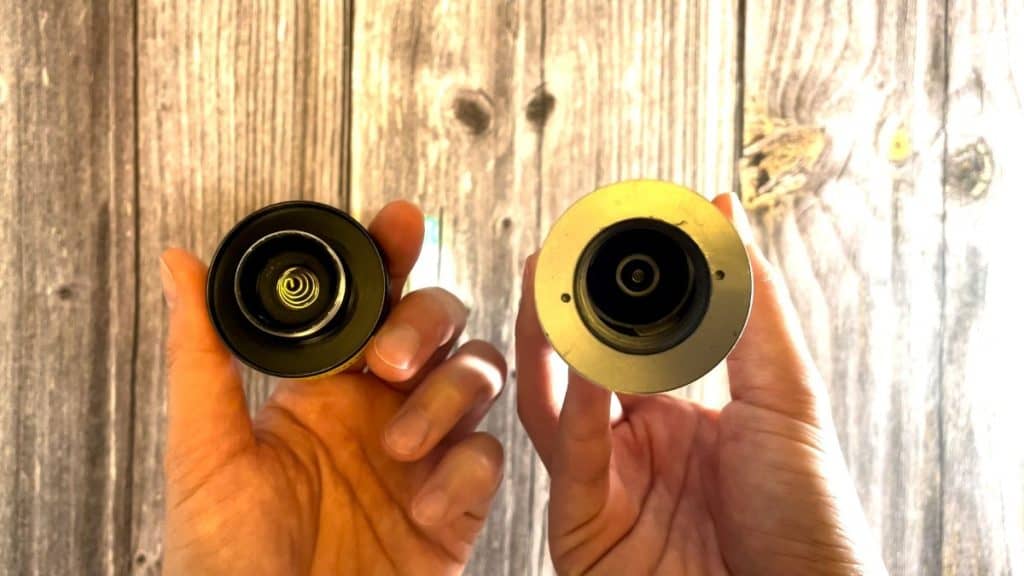
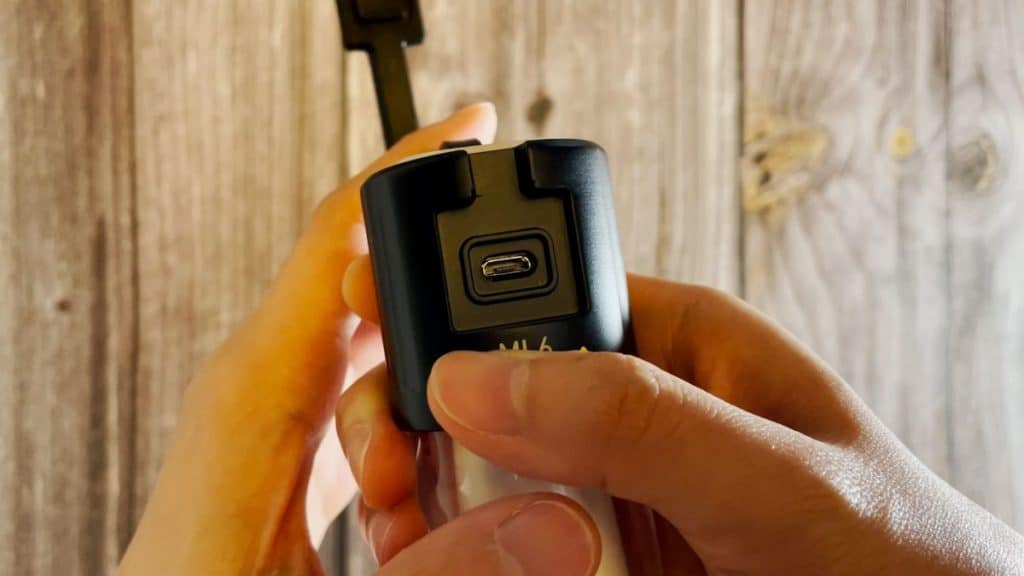
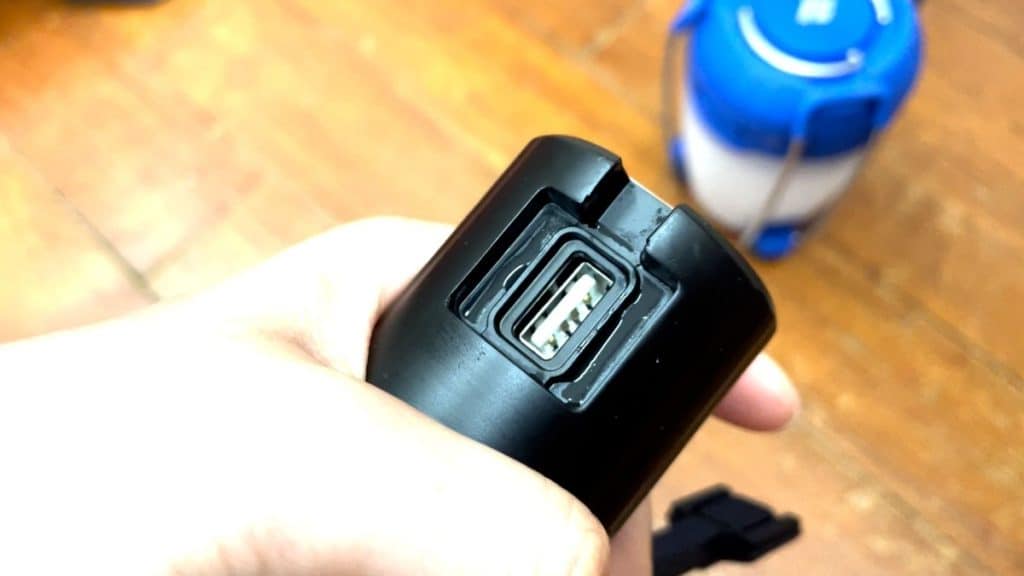
4. USB Input
When you remove the top rubber hook, you’ll find 2 plugs – one is a micro-USB input, and the charging cable is provided by Ledlenser.
5. Charging Time
The battery is completely flat when you try to turn the ML6 on, it flashes, and then it just goes dead.
My Ledlenser ML6 took about 4 to 4.5 hours to fully recharge.
Note: This lantern can only be charged via USB, if you’re looking for a great lantern that can be charged via solar energy, check out my LuminAID PackLite Titan review.
6. USB Output
The other plug is the USB output, which allows the ML6 to function as a power bank and charge your electronics.

The ML6 has a power bank capacity of 3,000mAh, I’ve used it to charge my iPhone 12, with the details here:
Total charge: 59% (from 14% to 73%)
Time taken: About 1 hour 35 minutes
Remaining charge in lantern: 76.5 hours of low light
I used the low light brightness to preserve as much battery as possible.
7. 3-in-1 Button
There’s a single button in the ML6, which looks like it’s just 1 button, but you can press it in three places – the middle, the plus, and the minus.
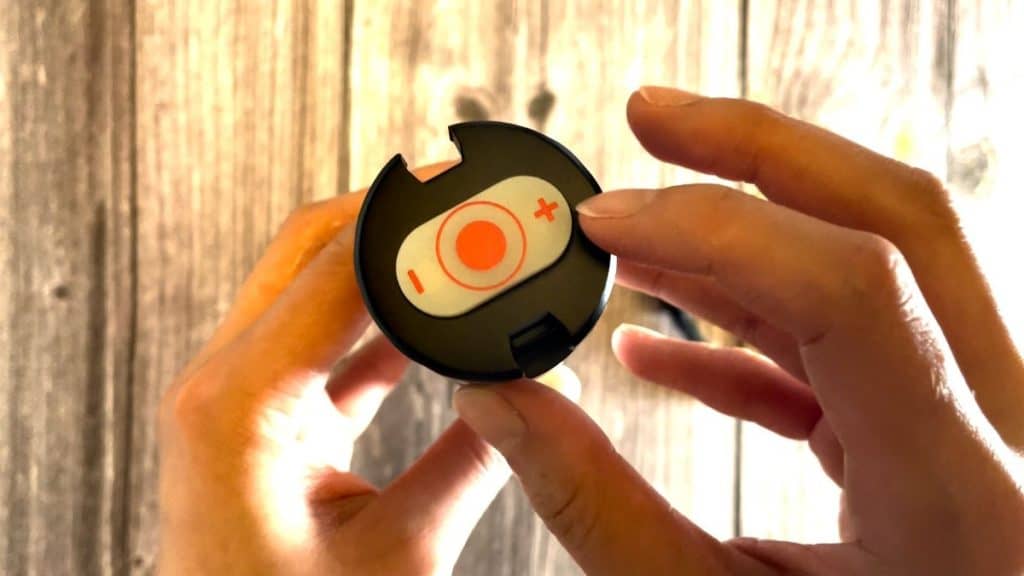
8. Battery Indicator Lights
The Ledlenser ML6’s 3-in-1 button functions also as battery indicator lights.
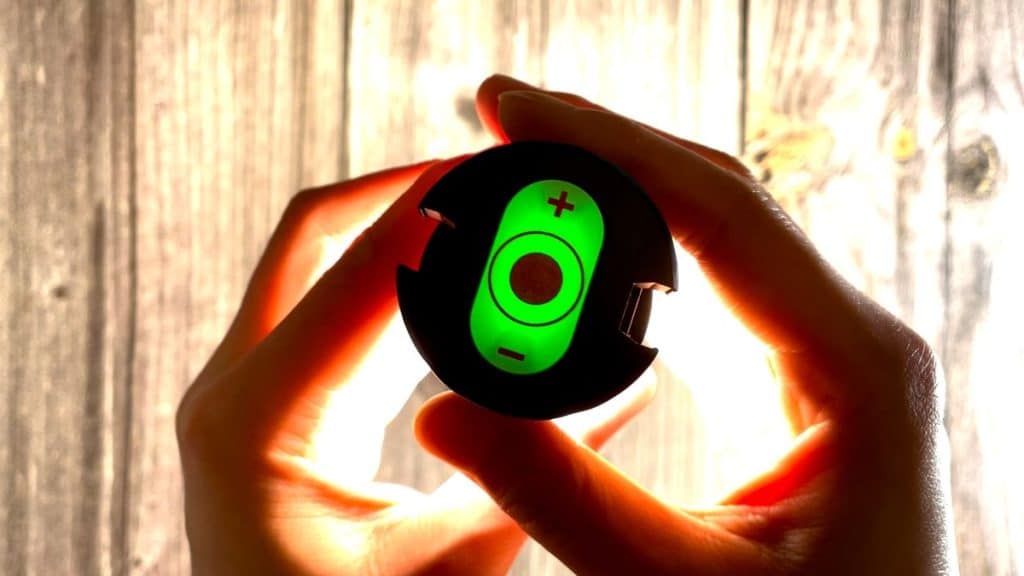
Green: Full charge (about 70-100%)
Yellow: 50-70% charge remaining
Red: 25% charge remaining
The percentages above are what I calculated from my personal tests, and may differ slightly from what the Ledlenser brand markets.
To access the lights, hold the “on” button for slightly over a second.
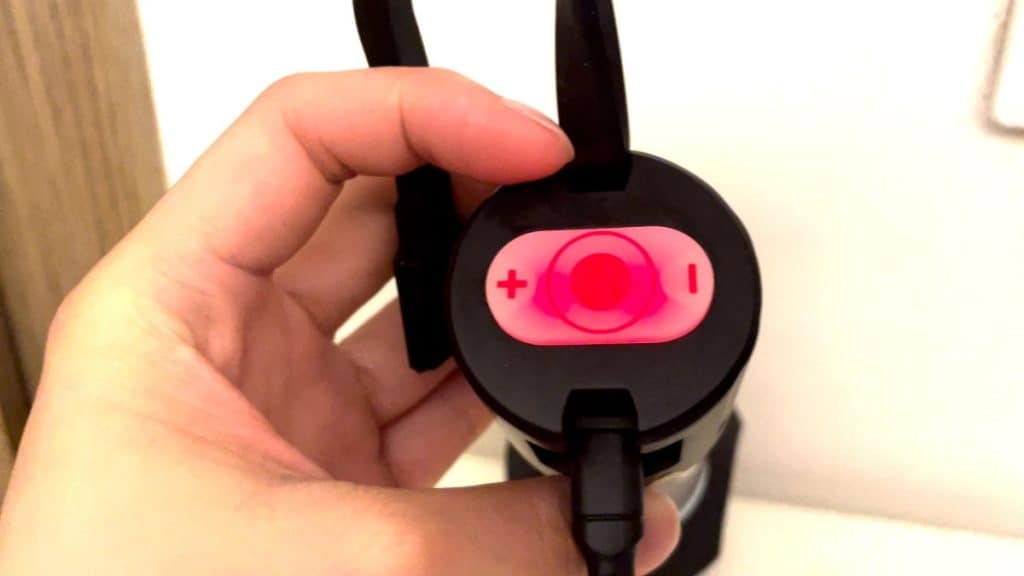
When charging, the indicator lights remain red the entire time, and turn to green only when fully charged.
9. Light Modes
Here are all the light modes/settings that come with the Ledlenser ML6:
White (adjustable from dim to bright brightness)
Red (adjustable from dim to bright brightness)
White Blink
Red Blink
Boost Mode (extra bright white/red light for 1 minute)
Strobe White/Red
Breathe White/Red
SOS White/Red
There’s also a memory setting, so the lantern will remember the last mode you had on.
10. Lumen Output/Brightness
I also used a lux meter to test how accurate the lumen output or the brightness is, and here are my results:
Dim: 0 lumens
Bright: 497 lumens
Boost: 720 lumens
Overall, the min and max output is very similar to the marketed specs.
11. Run Times
I tested the run times by turning the lanterns on and running them on all their different lighting modes. Here are my results:
Dim: 269 hours
Bright: 4 hours
Boost: 1 minute
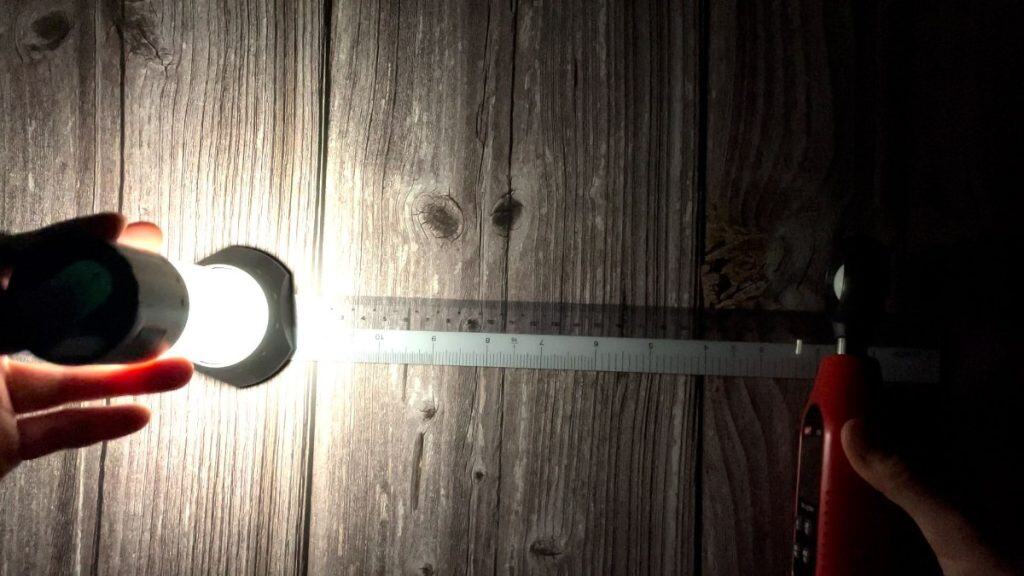
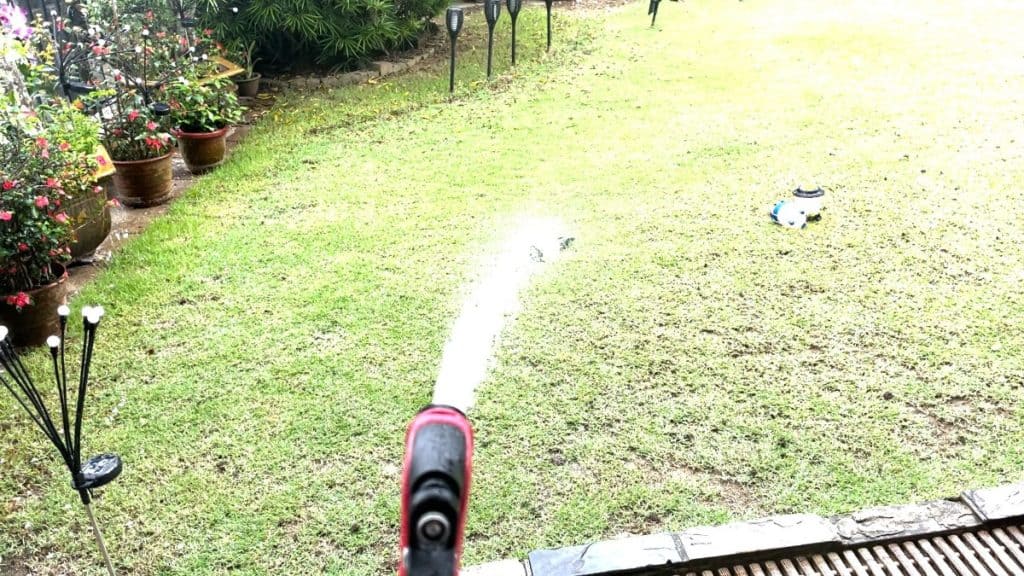
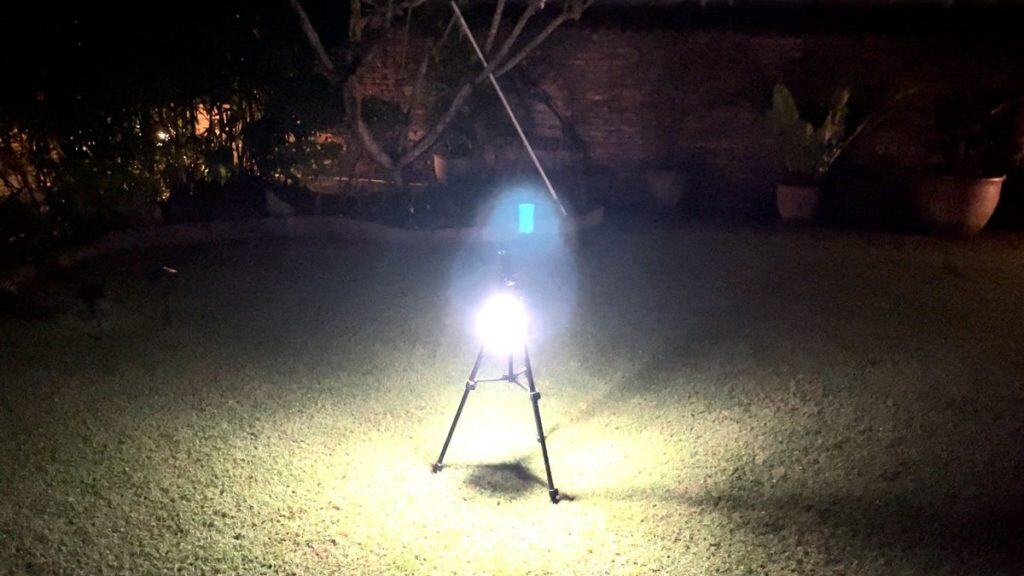
12. Shine Distance
I used the same lux meter (in the lumen output test) to test for the shine distance/range as well, and found that the Bright mode had a shine distance of 7.8 feet or 93 inches (that’s about 2.36 meters).
This is equivalent to the size of a 12-person tent.
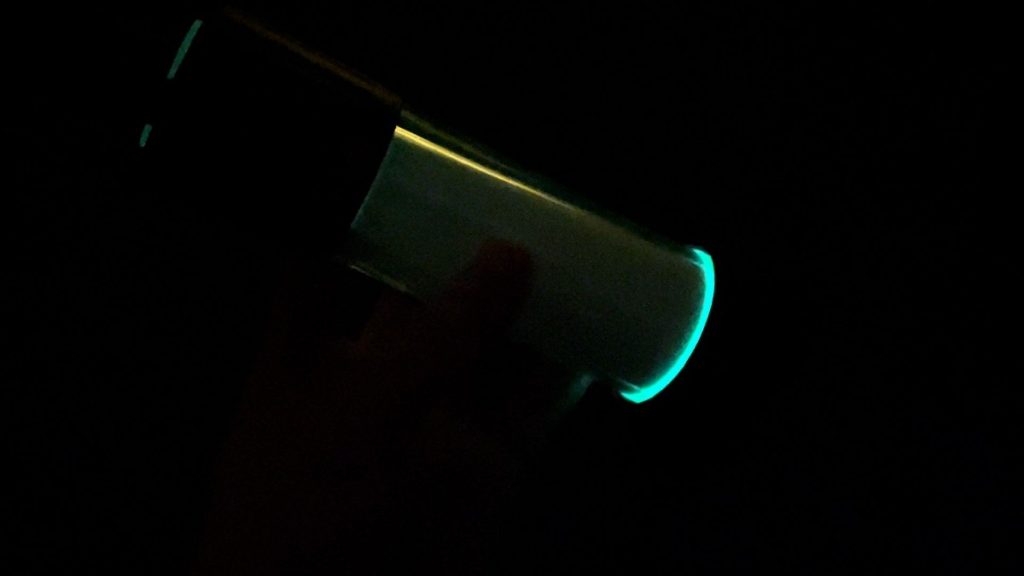
13. Glowing Ring
Even if the Ledlenser ML6 isn’t turned on, there’s a glow-in-the-dark ring at the bottom, which lights up the optic structure of the lantern, helping you to find it in the dark.
14. Light Quality
The Ledlenser ML6 features micro-prism technology, which I found to be very high quality.
The LEDs are at the top of the lantern, ensuring it never shines directly into your eyes, and the optic structure reflects the light outwards like a prism.
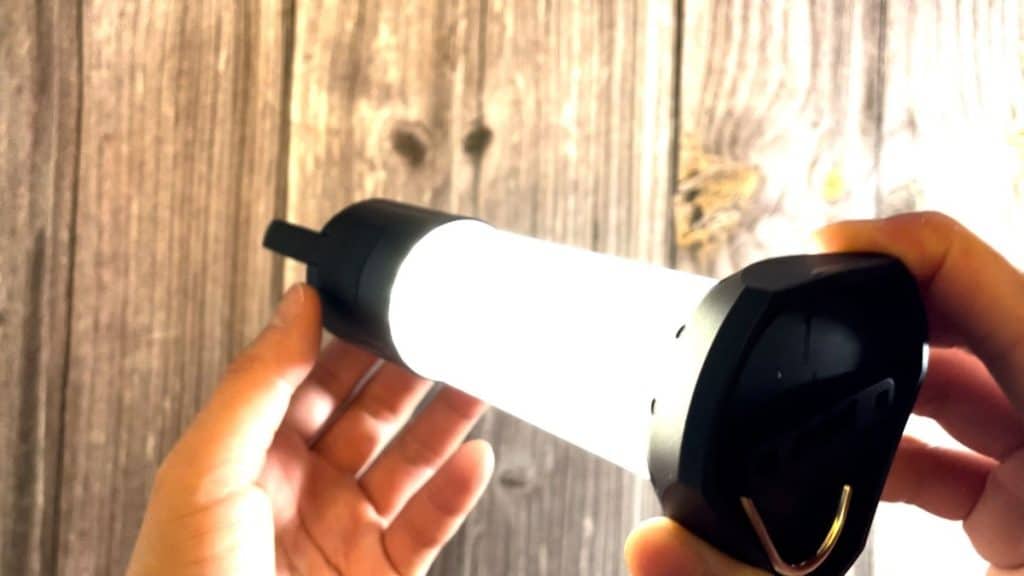
This glare-reducing lens is ingenious.
15. Lock Mode
To lock the lantern so you can get it around in transport, press and hold both the plus and minus buttons at the same time, for more than a second. After that, the lantern will blink three times really quickly and that means it’s locked.
Do the same thing to unlock it.
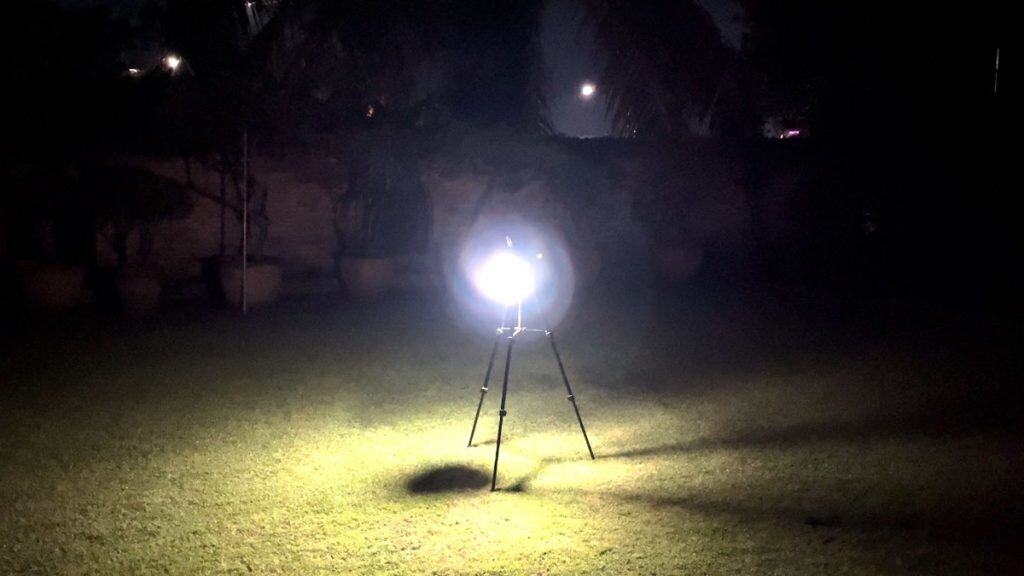
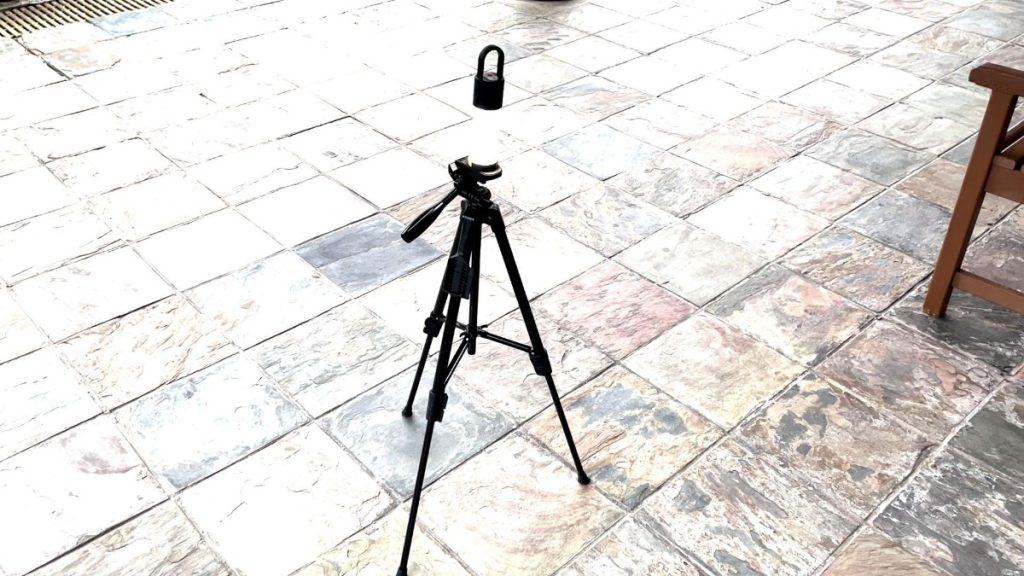
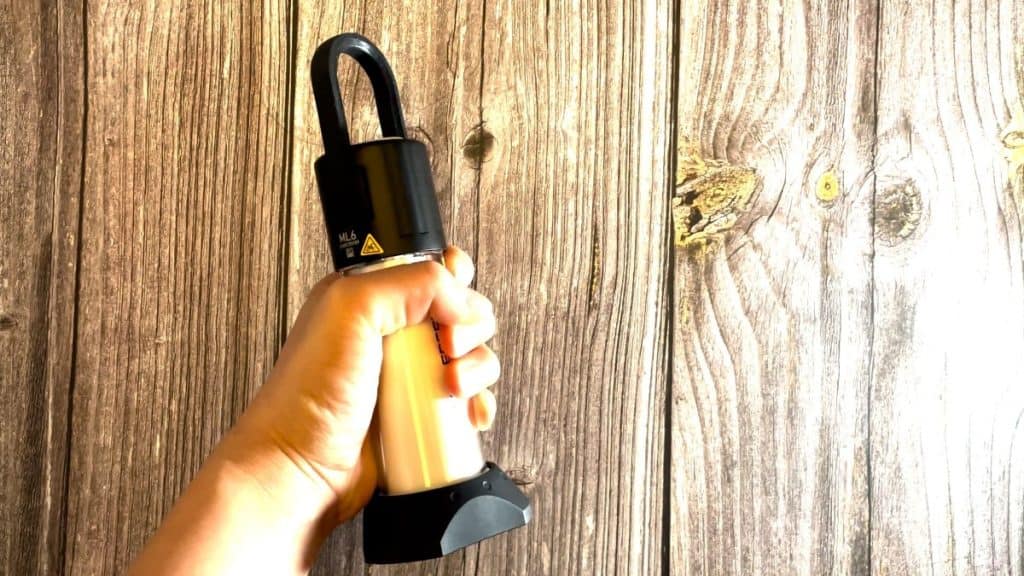
16. Magnetic Base
The magnetic base is super strong, allow it to stick to metal surfaces (like cars) with ease.
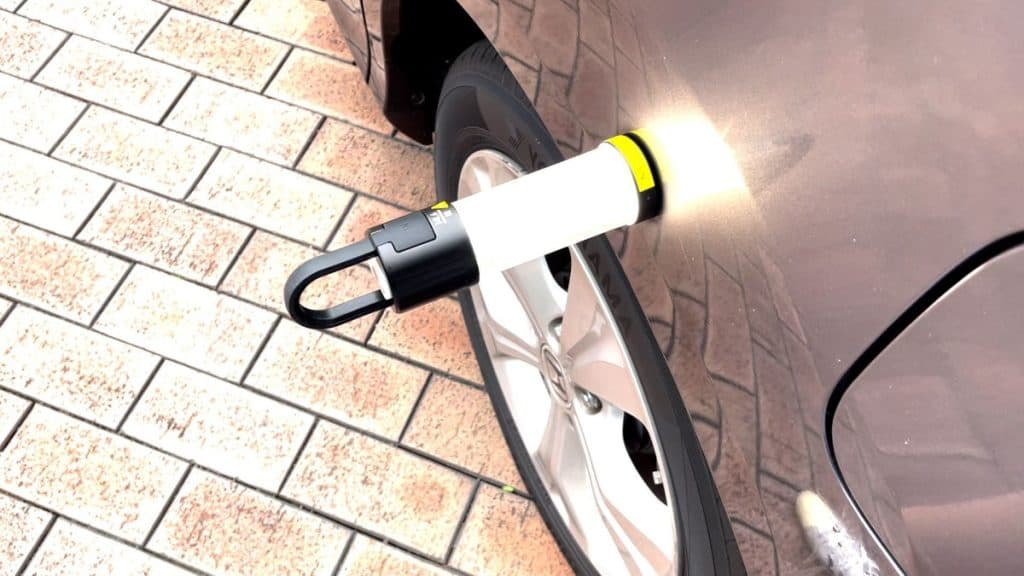
I found that it could hang sideways, or even upside down.
In the middle of the base, there’s also a standard tripod thread, so you can mount it on any tripod that you have to get it off the ground.
17. IP Rating and Waterproofing
The Ledlenser ML6 has an IP66 rating, which means it’s sufficiently protected against 10 minutes of powerful water jets, but isn’t high enough to be completely immersed in water.
I really did test it out using my water hose, and found that a little bit of water got around the ports, but it still worked perfectly fine.
18. Drop Testing
As for impact resistance, I dropped it from about hand height, and it was still working great. The light didn’t go off, there were no scratches at all, and no issues at all.
19. Warranty
This ML6 also comes with a whopping 7-year warranty, which is the longest warranty I’ve ever seen in a lantern, and that shows you how long Ledlenser is willing to back their product.
20. Portability
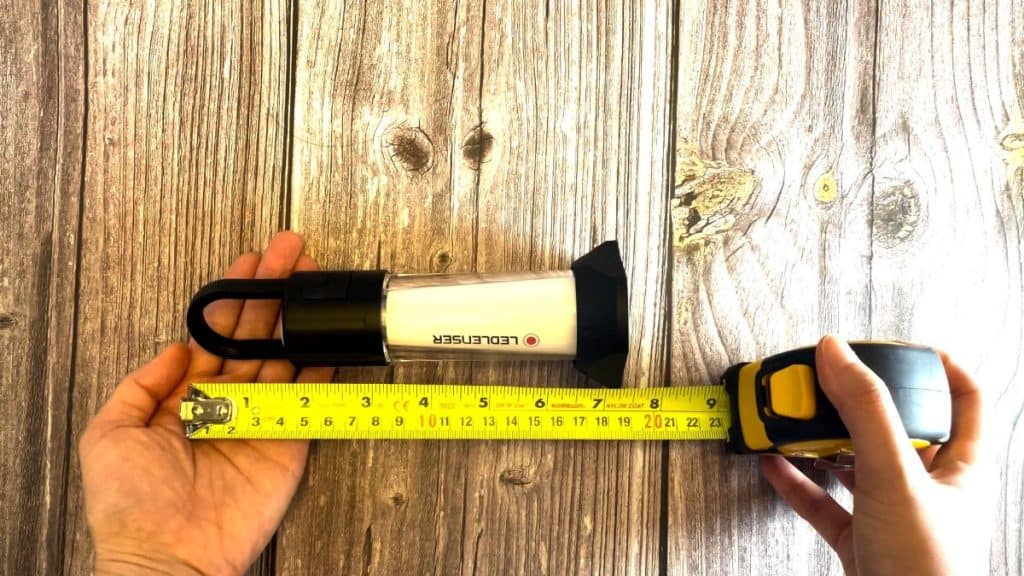
The weight of my ML6 came in at 10.6 ounces, or 301 grams.
The packed size measures about 2.25 x 2.5 x 7.25 inches (5.7 x 6.3 x 18.4 centimeters).
21. Pros, Cons, Recommendations
Pro 1: Feature-rich
Now, for pros, this ML6 is an incredibly feature-rich lantern. It has every single feature you can possibly think of, and I don’t think it’s missing a single feature at all, complete with:
2 hooks
Magnetic base
Tripod thread
Glow-in-the-dark ring
Completely adjustable brightness
And many more.
Pro 2: Many light modes
It comes complete with 16 different lighting modes, with completely adjustable brightness settings.
Also, the strobe white light is the best emergency mode I’ve ever seen in a camping light.
Pro 3: Removable battery
The next big pro is the fact that this has a removable battery. Very few rechargeable lanterns have these removable batteries, because I think they want you to buy a brand new lantern altogether when the capacity of this drops.
Pro 4: IP66 Rating
Another great pro is that this ML6 is super durable. It has a very respectable IP66 rating, one of the highest of my lanterns, and I could put it through any type of rain.
Pro 5: 7-year warranty
Also, the warranty is so generous!
Pro 6: Compact
It’s also a surprisingly powerful light in such a tiny little lantern.
Pro 7: Very detailed
And apart from all of these big pros, I love the little details too, like the glowing ring around the lantern, and I think this is my only rechargeable lantern that comes with a carry case. I don’t actually use it, but it’s nice to have.
I also really quite like the shape as well, I found that it fit nicely into my hand and it’s easy to carry around.
Con 1: Expensive
As for cons, I think the biggest one is easily that this lantern is expensive. Its MSRP, or manufacturer’s suggested retail price, is pegged at a whopping $90 dollars.
But if you ask me, I think it’s well worth the money, because this lantern can last you easily 7 years. So, cost per year isn’t too high I think.
Con 2: White is separate from Warm
You also have to buy the white light and warm light separately. So strange!
This is also separate from the Connect option with Bluetooth.
Con 3: Overheats on Boost
The aluminum housing unit tends to overheat on Boost mode, which is why that mode can’t last for longer than a minute.
Recommendation
Overall, in my opinion, I absolutely love the Ledlenser ML6, it literally has everything that I ever need in a camping light, and of course, I would 100% recommend it. It is especially suitable for outdoor activities, making it a versatile choice for any adventure.
22. Bonus – MUST Read!
Just to show you some proof, I tested 12 of the best rechargeable LED lanterns including the Ledlenser ML6, do check it out if it interests you.
Otherwise, check out the Ledlenser ML6: