6-person tents · Review
REI Co-op Wonderland 6 Tent Review (Bought & Tested!)
I bought this tent with my own money and put it through 8 hands-on tests.
- Setup 19.5 min
- Peak 81in
- Base area 82.5 sq ft
- Weight 23.6 lbs
This page contains affiliate links, and that means that I may earn a commission if you buy something, at no extra cost to you. You can find my full disclosure policy here.
Discontinued The REI Co-op Wonderland 6 has been discontinued and is no longer sold. I’m keeping this review up as a record of my testing — every measurement below is still exactly what I found. If you’re shopping now, start with The 7 Best 6-Person Tents — my top pick there is The North Face Wawona 6.
Test scorecard
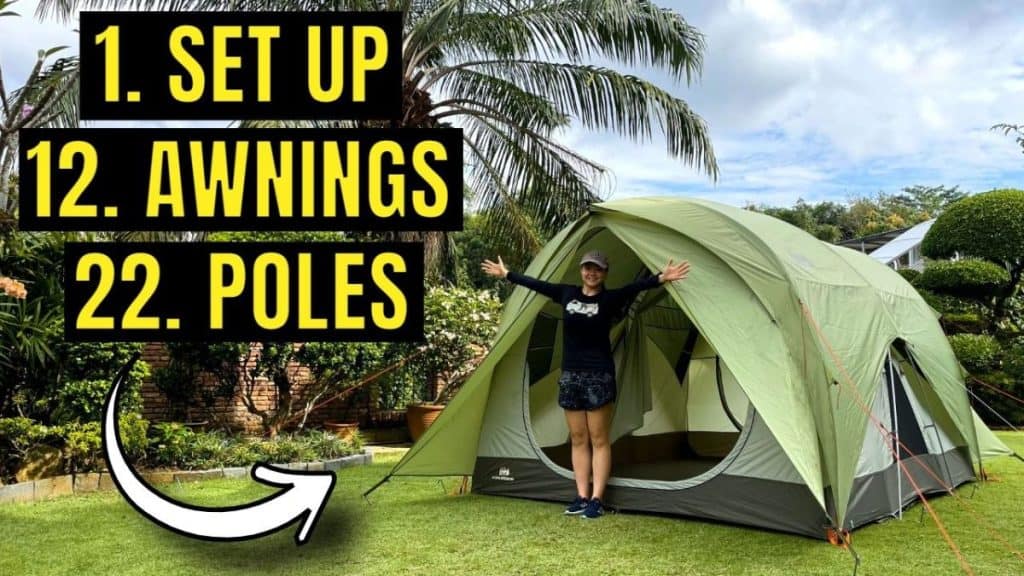
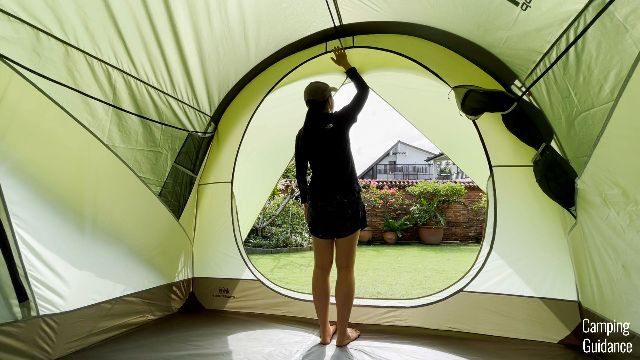
The REI Wonderland 6 is easily the most spacious cabin tent I have ever seen in all my years of gear testing. The peak height spans the entire length of the tent and the walls are completely vertical. Like every other cabin tent, though, it is not one for strong winds and heavy rain.
- High peak height
- Lots of livable space
- Vertical walls
- 2 awesome doors
- Lots of mesh for hot day ventilation
- 360 views
- Easy set up
- Not for heavy rains and wind
- Poles and carry bag can be improved
If you prefer watching to reading, check out my video here instead.
See the 8 tests
In the Box
The Wonderland only comes in a 6-person version from REI, so that’s where I bought mine. In the box: a black carry bag holding the tent body, a room divider and the green rainfly, with the poles and the stakes and guylines in their own bags.
- Poles 5, aluminumregular aluminum, not DAC
- Stakes 18about 10 short of what the tent actually needs
- Guylines 8for 14 guy-out points, so 6 short
- Extras Room divider

Set Up & Take Down
I could set the whole thing up on my own, and I’m only 5’3″ — it felt very manageable. The instructions are good and, better still, sewn onto the carry bag so you can’t lose them.


- Set-up time (1 person) 19.5 minafter a decent amount of practice
- Take down 7 min
- Pack away 9.5 min
- Total take-down + pack-up 16.5 min
Two gripes. The pole sleeves are all the same gray, which is odd when the poles, grommets, webbing and pole clips are all color-coded. And the pack-away takes longer than the take-down because the carry bag is side-loading with a small opening — for a tent this expensive it can definitely be improved. I don’t know why REI dropped the old Kingdom bag, which opened like a backpack.

Want the full step-by-step? Watch my set-up video.
Spaciousness
- Peak height 81in3in taller than marketed
- Height at the left end 77in
- Height at the right end 76in
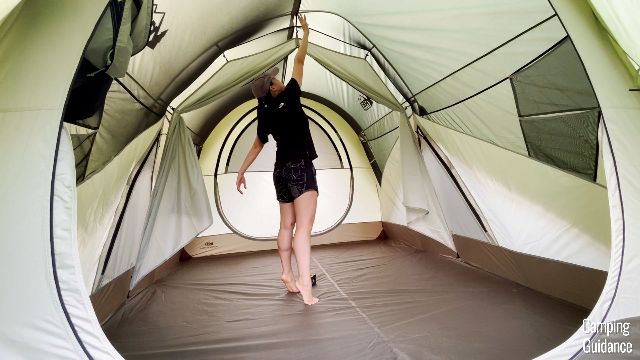

That’s the headline: you get the peak height, give or take a few inches, across the entire length of the tent. Three U-shaped poles span the side walls and the roof in one arc, and a straight pole runs the full length at the top.

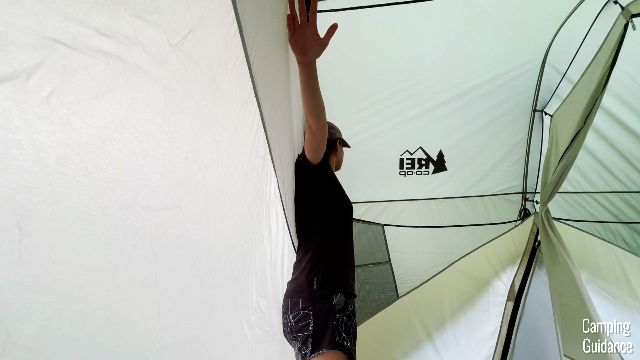
The side walls are more vertical than any cabin tent I’ve tested — on a normal cabin tent the leg poles lean in slightly. Here I can press my back flat against the wall and stand completely upright.
- Base area 82.5 sq ft
- Floor dimensions 120 x 99inright on the marketed 120 x 100in
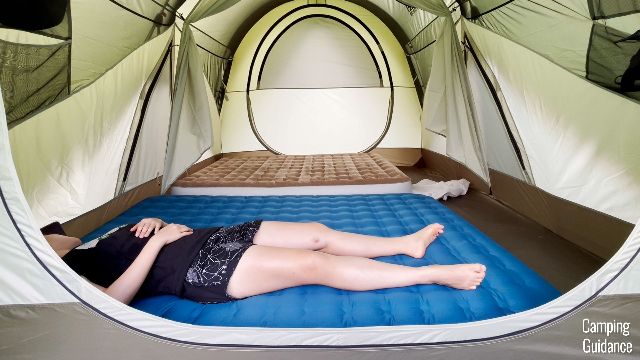
- Single sleeping pads 6or 3 doubles; regular ~20in pads only, it’s tight
- Queen-sized mattresses 2both fit nicely, with gear room at the foot

Comfort & Features
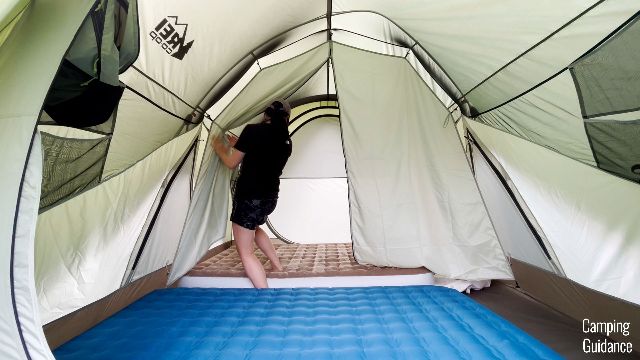
- Room divider Yes, 17 toggles onto 7 loops, splits the tent into 2 rooms
- Per room 3 padsor 2 pads with gear room, or 1 queen
- Divider gap Doesn’t reach the floorthe one thing I’d change about it

Each room gets its own door and a good amount of mesh, the fabric isn’t too see-through, and there’s a zip down the middle of the divider so I can move between rooms without taking it down.
- Awnings 2one over each door, extending 15in when staked out
- Doors 2identical, one on each side
- Door size 66 x 64in72.5in to the top — I never have to duck
- Door zippers 2 YKK eachsnag-free; a storm flap on the bottom half to nudge clear

The awnings do more than shade: they keep rain off the roof from dripping straight in when you open a door. Un-stake them and you can tie the fabric back with a toggle and still get shade from the top.

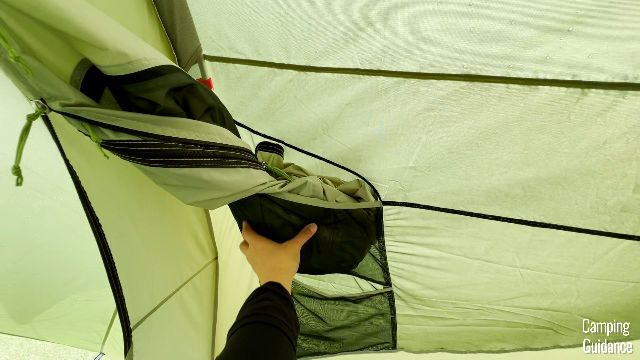
The doors unzip almost completely, and the fabric stuffs into a pocket beside the door rather than needing a toggle.
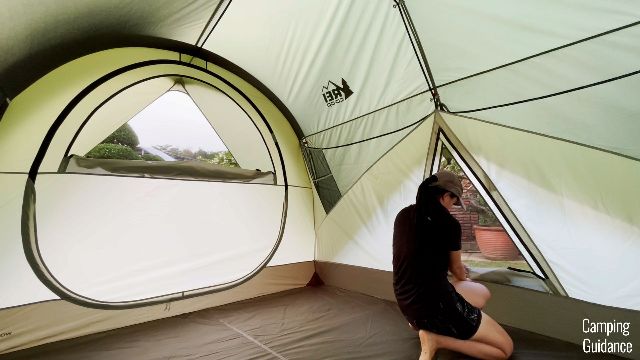
- Windows 42 on the doors, 2 triangular panels low on each length
- Door windows 54 x 26inroll the fabric up and stuff it in a small pocket
- Triangle windows 32 x 28inthese have a toggle to roll the fabric up
- Pockets 89 x 12in each; 2 get used up holding the door fabric
- Lantern loops 2plus 5 usable divider loops
Ventilation
Hot days are where this tent runs away with it. Take the rainfly off and the mesh doesn’t stop at the roof — it runs down the sides too. Easily more than half the tent is mesh, which no standard summer cabin tent comes close to.
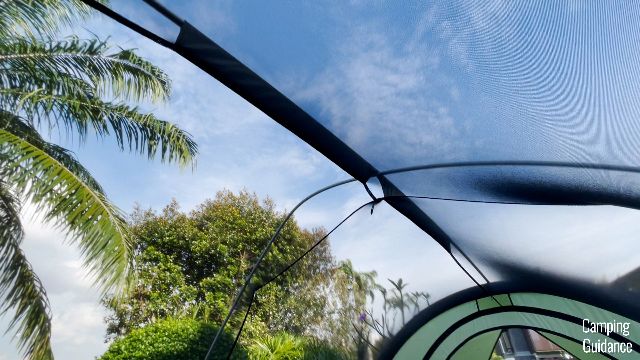
- Vents 2above the doors, and the tiniest I have ever seen
- Chimney venting Didn’t work for mehot air rose and simply stayed up there
- Rainy-day airflow The rainfly gaponly if you guy the fly out properly
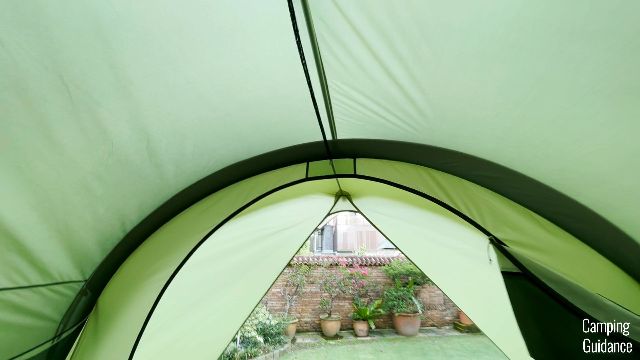
Pro Tip Guy the rainfly out using all the guy-out points. Guyed out there’s a real gap between fly and tent body for air to move through; left slack the fly sags and you lose most of it.

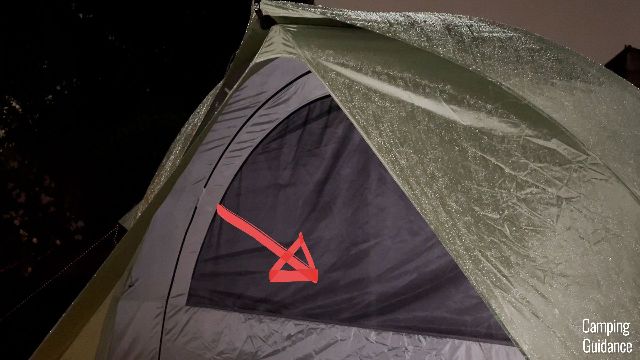
In heavy rain the awnings kept the door-window mesh completely dry, so those two windows stayed usable. The low triangle windows soaked through, though — the rainfly doesn’t reach them, and guying it out above them didn’t help.

Rain & Wind Protection
This was an overnight test in real weather: about an hour of heavy rain, then tapering to light rain by morning.

- Overnight rain 1 leak onlythe divider loops low on both lengths
- Everything else Held up wellflooring, walls, seams and rainfly all dry
- Rainfly Not full lengthit stops well short of the ground
- Guy-out points 14far more than most 6-person tents I own
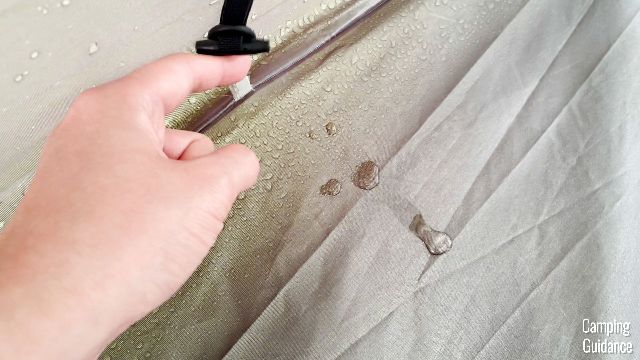
Two reasons it leaked. The loops sit right at the bottom of the tent, where the rainfly doesn’t cover at all — and inside, the loop attachment isn’t taped or sealed, so water wicked into the fabric and eventually through as the rain kept coming.

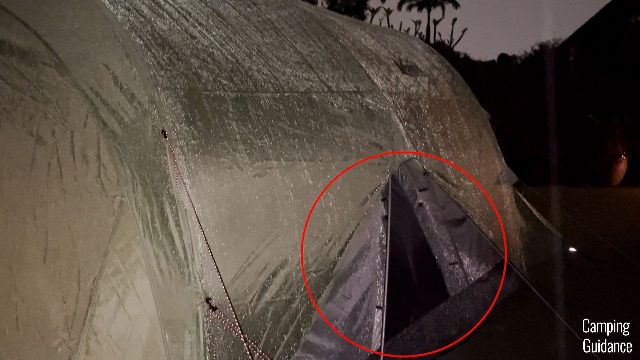
Wind won’t be its strength — big profile, very vertical side walls. The two long walls are a bit more angled at the top, which should shed a little better than a standard cabin tent, and 14 guy-out points help a lot. Light wind is fine; keep it away from anything serious.

Quality
- Floor 150D polyester

- Body & rainfly 75D polyester
- Zippers YKK on the doorswindows are no-brand but snag-free
- Mesh Micro-meshfine enough that it kept every bug out; not specified by REI
- Reflective Awning straps onlythe guylines have none
Seams are mostly double-stitched and very consistent, the outside webbing is properly reinforced inside, and I found no loose threads anywhere. The rule on taping is simple: everything the rainfly doesn’t cover is taped, everything under it isn’t.
The poles are the real problem, and they’re why this isn’t my best tent. They’re regular aluminum rather than DAC, and after a few camp-outs 2 of my 5 poles bent — the orange side pole and the Y-pole — from use in my own yard, not from any storm.


I think the shape is the cause. Three arched poles bent from one side of the tent to the other are under constant stress just holding the Wonderland’s profile.

Portability
- Packed size 30 x 15 x 10in
- Weight 23.6 lbsincluding all the provided stakes and guylines
- Carry Shoulder strap


Pros, Cons, Recommendation
So what are the pros and cons, and would I recommend the REI Wonderland 6?
Peak height throughout the entire tent length
I can walk the whole length of the tent with my arm stretched up — and with both arms stretched out sideways, completely horizontal, at the same time.

Lots of livable space
Not just along the length either — I can move around most of the tent.
A higher peak height than marketed
Mine came in 3 inches taller than REI’s figure, which is a huge thumbs-up. I can jump around and walk on my mattresses.
No need to duck through the doors
72.5 inches from the ground to the top of each door, well above my 5’3″. This is one of the very few tents I never have to duck to enter.
One of the best zipping experiences I’ve had
7 seconds to unzip a door (3) and tuck the fabric into its pocket (4), one-handed, no fumbling. The reason is an extra stake loop under each door that holds the fabric taut while you zip.

Lots of mesh
On a normal summer cabin tent only the roof is mesh, plus a few windows. Here it runs down the sides too.
360 views
Between the two door windows and the two low triangle windows, I could sit or lie down and still see out.

Lots of features
A room divider, a decent number of pockets and loops, 2 awnings, and 14 guy-out points — 10 on the rainfly and 4 on the tent body.
A manageable set-up
Not too difficult, doable on my own, and the instructions are genuinely good.
The poles bend
Easily the biggest con — 2 of my 5 poles bent from ordinary use.
Not a full-length rainfly
Unlike the old REI Kingdom 6, the fly doesn’t reach the ground, so this one wouldn’t cope with many hours of heavy rain.
The vents are tiny
Rainy-day ventilation comes down to the rainfly gap plus two ridiculously small above-door vents.
Not great in wind
Light wind is fine. Keep it away from anything stronger.
The carry bag can be improved
Side-loading with a small opening. I’d much rather have the top-loading Kingdom bag back.
Overall recommendation
If you’ve always loved cabin tents and livability, the REI Wonderland 6 is easily better than a standard cabin tent. It has the most vertical side walls I’ve ever seen, the set-up feels intuitive, the amount of mesh is unbeatable, and with cross-ventilation through both doors, hot day ventilation in the summer is incredible. The rainfly is longer than most cabin tents’ too, so it’s perfectly functional in light rain and even about an hour of heavy rain. The poles are what stop me calling it my best tent.
Bonus – MUST read!
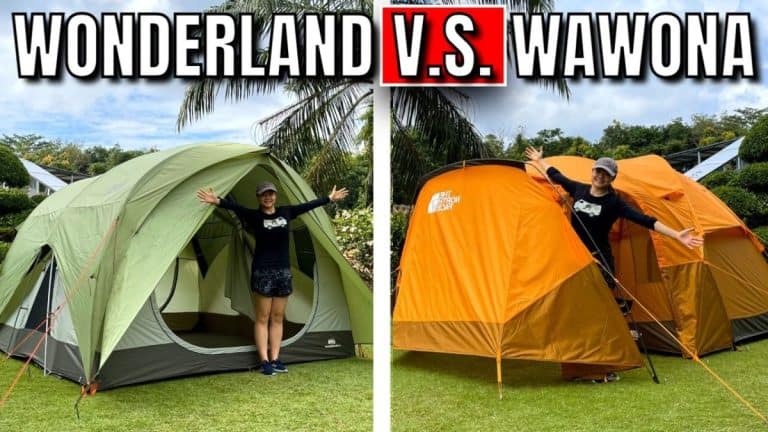
I spent over $2,000 buying and 6 months testing the best 6-person tents on the market — see where the Wonderland lands in The 7 Best 6-Person Tents. If you want a big family tent rather than a 6-person one, try Best Family Camping Tents; if cabin tents are your thing, I spent almost $2,500 on Best Cabin Tents; and for heavy rain there’s Best Waterproof Tents. It also features in Wonderland V.S. Kingdom, Wonderland V.S. Base Camp and Wonderland V.S. Wawona.
For a standard cabin tent to compare against, there’s my Eureka Copper Canyon LX 6.
Every figure above is from my own testing — measured by hand, bought with my own money.